The Hardest Spots To Get Clean In Your Kitchen (And How To Get It Done Right)

Maintaining a pristine kitchen is an ongoing battle, with various nooks and crannies posing formidable challenges when it comes to cleaning. Grease clings to oven surfaces for dear life, while the dirty blades inside your blender are hard to reach. Refrigerator seals are prone to mold growth, and cutting boards often retain stains and odors. Many of these hard-to-clean spots, however, are actually easy to clean if you know how to do the job correctly.
To conquer the kitchen cleaning battlefield, you'll need to follow a strategic plan of attack. This includes utilizing the appropriate tools and cleaning products, such as a can of compressed air and white distilled vinegar for certain jobs. Incorporating these targeted techniques will not only result in the vanquishing of stubborn stains and stuck-on foods, but it will also save you time. This makes the task of cleaning one of the most used spaces in your home much more manageable.
The toaster crumb tray is often forgotten
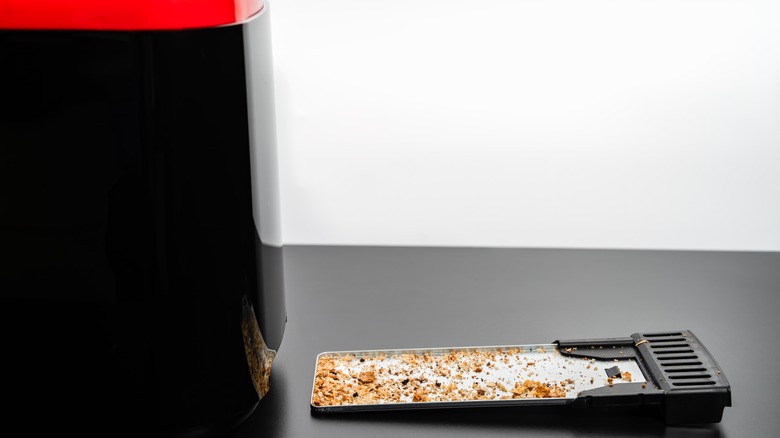
While a toaster is an extremely handy kitchen appliance, it is also one of the most frustrating to clean. This is because all of the tiny crumbs that fall off your toast stick to the tray at the bottom of the machine. The intricate design of the tray also often incorporates narrow slots and corners, which are difficult to reach in order to extract all of the accumulated debris.
To efficiently clean the crumb tray, use a can of compressed air. Hold the tray, or the entire toaster if the tray isn't removable, over a trash can. Spray the air directly over the tray so that the crumbs release and fall into the trash bag. Make sure you aim at all the nooks and crannies. If there are crumbs stuck inside the toaster itself, you can also spray the compressed air inside the appliance to clean it. Next, grab a soapy kitchen sponge and wash the surface of the tray. Immediately dry the tray with a microfiber dish towel to prevent rust.
Refrigerator seals have hard-to-clean crevices
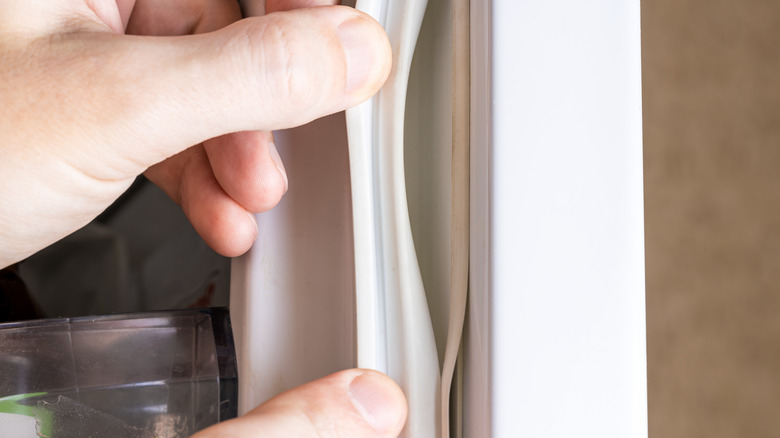
Refrigerator door seals are exposed to both moisture and food particles. Since the crevice within the seals is tight, the seals are prone to mold, as the moisture doesn't have a way to escape. The challenge when cleaning refrigerator seals is to ensure the seals are not damaged during the process, as this would affect their ability to function properly.
When it comes to regular cleaning, you'll find a cotton swab is an excellent tool to get the job done. It's soft and able to fit inside small crevices. Dip the cotton swab inside a 1:1 mixture of water and white distilled vinegar. Run it along the inside of the refrigerator seal to clean away dirt and grime. Should the seal be plagued with mold, you'll need to grab a toothbrush instead. It's a good idea to wear a mask and gloves when dealing with mold. Dip the toothbrush in white distilled vinegar (undiluted). Scrub the inside of the seal and then wait an hour before wiping the seals clean with a wet cotton swab.
Tip: To check the integrity of your fridge's door seal, place a dollar bill in it. The seal should hold the dollar bill in place and give a little bit of resistance as you try to pull it back out.
Ventilation fan grates and filters get greasy
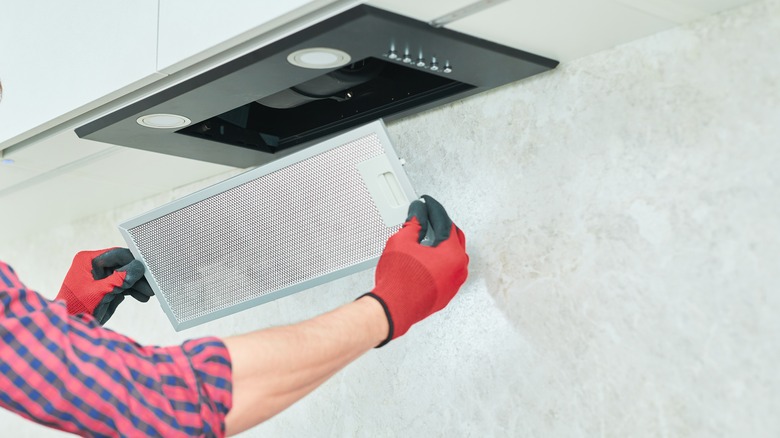
Above most kitchen ranges, you'll find a hood that is equipped with both fan grates and filters. The grates feature intricate patterns that include holes, which are prone to accumulating grease and food residue. As time passes, the grease begins to solidify, making it more labor-intensive to remove. The filters are designed to trap airborne contaminants, and if not cleaned regularly, these filters become clogged and ineffective.
Before you begin cleaning the grates and filters, it's a good idea to shut off the power to the hood. Once that's done, remove the grates and filters (some units may require the use of a screwdriver). Place the grates in a sink filled with hot water and a liquid dish soap that has grease-fighting powers. Allow the grates to soak for 15 minutes and then scrub away all the grease and grime using a soft-bristled brush. Filters can be cleaned the same way, but instead of dish soap, use two scoops of oxygen bleach. Dry the parts before placing them back in the hood and restoring power.
Blender blades require special handling
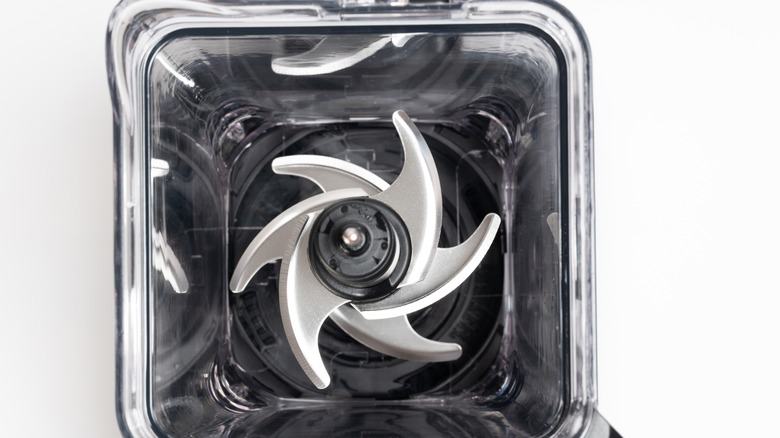
Blender blades are typically nestled within a blender jar, surrounded by the remnants of blended ingredients, including sticky substances like fruits, vegetables, and nut butters. They are sharp and hard to reach if they aren't the removeable kind, making them one of the hardest spots to clean in your kitchen. Simply sticking your hand down into the blender with a cloth won't get the blades clean, and it may even result in an accidental cut. Fortunately, there is an effective way to clean this kitchen appliance that doesn't pose any danger to your hands.
It's best to clean your blender immediately after each use. Simply fill the blender with hot water and a drip of two of a liquid dish soap. Place the lid on the blender and blend. The blades will clean up nicely and you won't even have to touch them. Pour the soapy dish water out and blend clean hot water to rinse off the blades. In the event that you weren't able to clean your blender blades right away, or you found the blades to be especially oily, add ½ cup of white distilled vinegar and 2 tablespoons of baking soda to the hot water. Blend and rinse as before.
Garbage disposals can get smelly
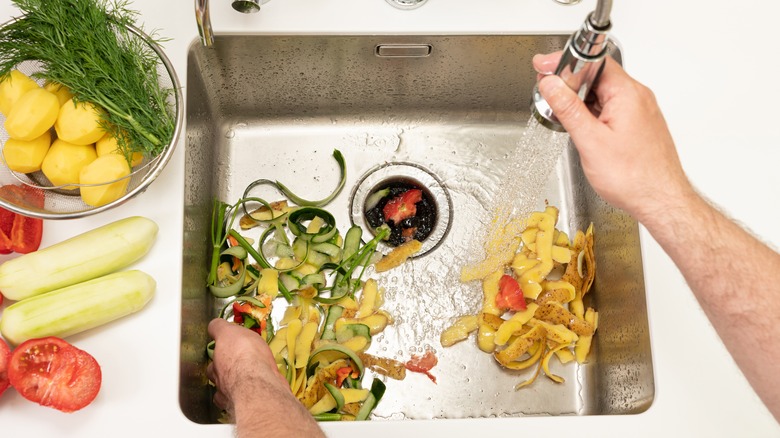
Another hard spot to clean is inside your kitchen sink garbage disposal. The disposal is designed to break up food waste, but thanks to its complex inner components, there are plenty of spots for food particles to get stuck. Not only does this foster the growth of bacteria and mold, but it also results in the emission of some really unpleasant odors. Care must be used when cleaning and deodorizing a garbage disposal, as the sharp blades pose a safety risk.
Grab a tray of ice cubes and pop them down into the disposal. Follow the ice cubes with ½ cup of rock salt, and then turn the appliance on. Run hot water while the disposal is crushing up the ice and salt. This will release any stuck-on food particles. After a minute or two, shut the disposal off. Now it's time to work on deodorizing the machine. Sprinkle ½ cup of baking soda down into the disposal and follow that with a cup of vinegar. Wait about 15 minutes before running some hot soapy dish water down the disposal.
Warning: Resist the urge to place your hand down into the garbage disposal during the cleaning process. This is dangerous and may result in injury.
Tile grout is porous
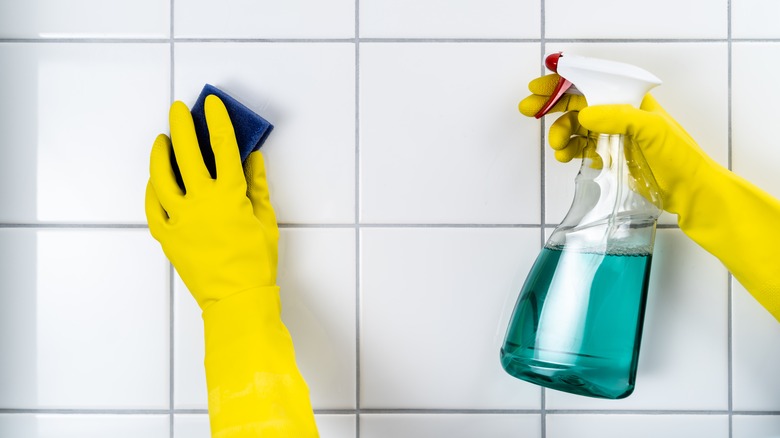
Cleaning kitchen tile grout poses a considerable challenge due to its porous and textured nature. Grout lines are small and prone to mold and mildew growth, as well as deep stains. Harsh cleaners and aggressive scrubbing should be avoided, as this damages the grout. Additionally, most homeowners gravitate toward an acidic cleaner to get the job done; however, the Tile Council of North America recommends using only alkaline cleaners, as acidic cleaners eat away at the grout.
After wiping down your tiles with a little dish soap and water, you can use a cleaner specifically made for grout. Although bleach and ammonia are often recommended, both of these products are too harsh. Use a Shop-Vac to vacuum up the liquids as you clean. Go back over the grout with water to rinse away any remaining cleaner, being sure to vacuum up the water as you go. Stubborn stains can be removed using a steamer.
Kitchen cabinets need to be cleaned top to bottom
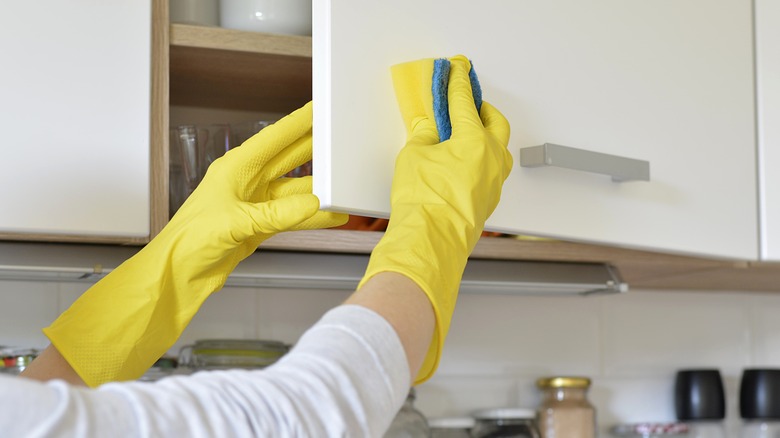
Whether you're grabbing a bowl to whip up a refreshing salad or putting plates away, your kitchen cabinets are being used on a consistent basis. It doesn't take long for cabinet surfaces to become dirty from fingerprints, food or drink spills, grease, and even dust. Additionally, kitchen cabinets with decorative elements often contain nooks and crannies that provide grease and grime a place to hide. It can be more challenging to clean these areas, but there are a few tricks you can use to get the job done right.
To clean your kitchen cabinets, fill a spray bottle with equal amounts of white distilled vinegar and hot water. Spray the cabinets sparingly with the homemade cleaning solution and wipe clean using a microfiber towel. A light mist is all you need; otherwise you risk damaging the paint or the wood. If you prefer, you can spray the cloth and then wipe down the cabinets. When you get to the cabinet pulls, handles, and hinges, grab a toothbrush to loosen and remove dirt from all of the crevices. Don't forget to wipe along the top of the cabinets, which is where you'll find all the dust. Go back over the cabinets with a damp cloth to remove any remaining cleaning solution.
Trash cans harbor odors
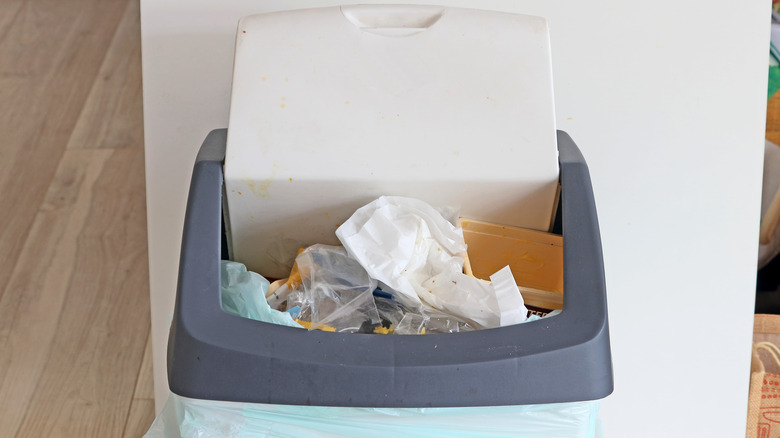
Next to the garbage disposal, the trash can is the smelliest item in your kitchen. Even with the use of a garbage bag, a trash receptacle can accumulate residue from everything including spilt liquids to food scraps to pet waste. Over time, these residues create stubborn odors that are quite repulsive, and they may also attract pests. Cleaning kitchen trash cans is often a challenge, due to their size and added features, such as foot pedals and self-closing lids.
Remove and dispose of any garbage bags before cleaning. Either take the can outside and spray with a hose, or do the job inside in the bath or shower, using the showerhead to blast hot water into the can's interior. The pressure coming from the shower can dislodge any stuck-on foods, while the hot water dissolves dried liquids. According to a test conducted by the kitchn, combining 4 ounces of water and 1 teaspoon of bleach in a spray bottle is the best cleaning solution for trash cans. Use this spray to coat the inside of the trash can and then give it a good scrub with a long-handled brush. The spray and an old rag can be used for the can's exterior. Dip a toothbrush in the cleaner to get the lid hinges and the foot pedal all clean. Rinse and dry, and you're good to go!
Cutting boards need proper cleaning
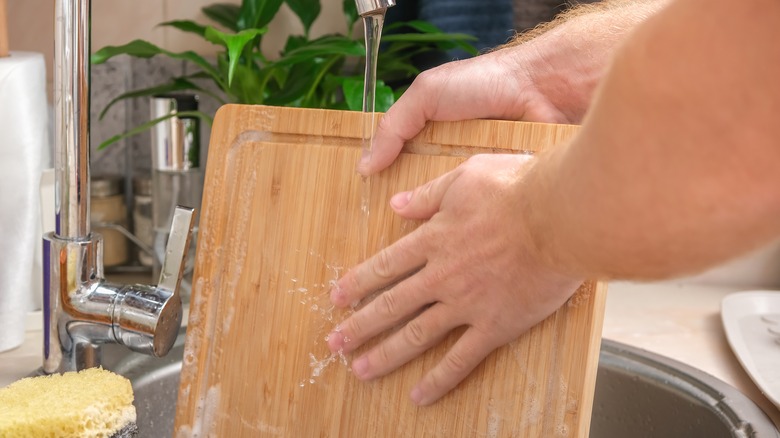
Cutting boards are another kitchen item that infamously retain stains and odors. Although cutting boards are flat, they can be challenging to clean due to the material they're made out of, as well as the deep grooves that have been carved into them during the process of chopping fruits, vegetables, and meats. Boards that are porous and plagued with cuts tend to harbor bacteria, so it's of the utmost importance that the boards are sanitized, as well as thoroughly cleaned.
A little soapy dish water is all you need to clean your cutting board if you've just sliced up an orange or prepared a few carrot sticks. For a more thorough clean, however, you'll want to sprinkle salt over the board and then rub it in using half of a lemon. The salt lifts away food particles and stains, while the lemon cleans and disinfects. If the board is especially odorous, use baking soda in place of the salt. Also, if you don't have a lemon on hand, you can use lemon essential oil. Once the board is clean, give it a good rinse and then dry it thoroughly using a microfiber towel.
Kitchen sinks require a cleaning combination approach
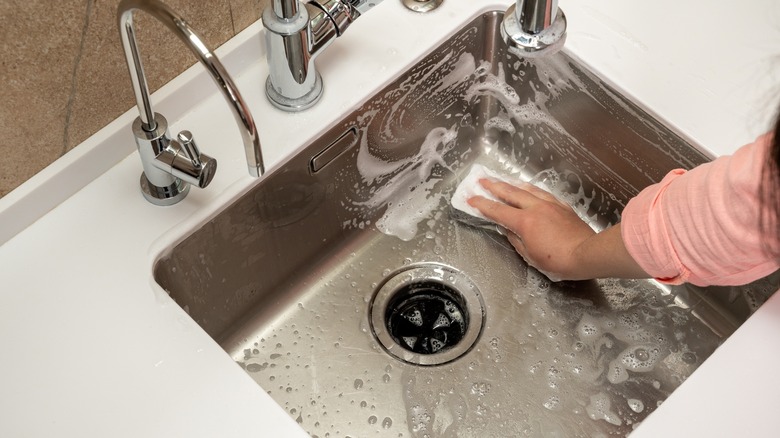
Regularly cleaning your kitchen sink is essential for preventing the buildup of odors, stains, and potentially harmful bacteria, such as that caused by raw meat. Completing this task, however, is easier said than done. Kitchen sinks are made using materials that can be scratched or dulled, and they feature basins, faucets, and drains that can't simply be wiped down. You'll find that a combination of appropriate cleaning agents, scrubbing tools, and attention to detail are required to keep the kitchen sink both aesthetically pleasing and hygienic.
If you don't want to spend forever scrubbing your kitchen sink, start with a bottle of Barkeeper's Friend. Get the sink wet first and then apply Barkeeper's Friend. Wait two minutes for the product to do its thing and then lift away dirt, grime, and stains with a microfiber cloth. Rinse the sink clean with hot water. Use a toothbrush to get around the tricky parts of the basin and faucet. You'll find the drain can also be cleaned without scrubbing when you use a combination of vinegar and baking soda. Sprinkle ½ cup of baking soda down into the drain followed by ½ cup of white distilled vinegar. Wait 10 minutes and then flush the drain clean with hot water.
Dish drainers have lots of small surfaces
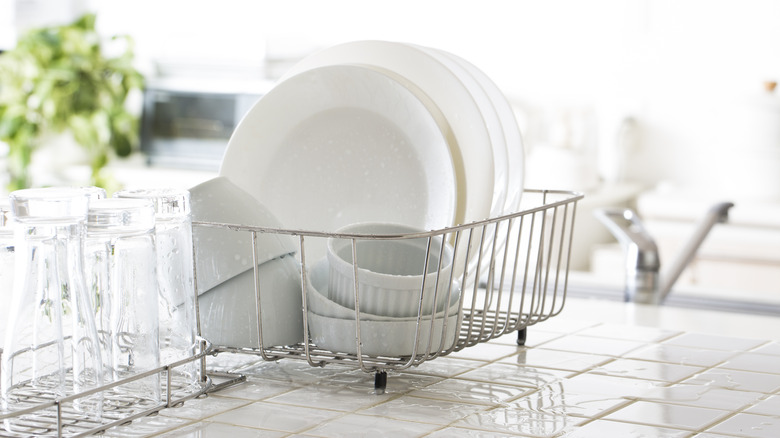
Dish drainers, also commonly referred to as drying racks, are often neglected, leading them to develop a slimy film that requires a little bit of effort to remove. Mineral deposits, mold, and bacteria are also a concern when dish drainers aren't properly maintained. Since dish drainers contain many trays, slats, and holes that make them difficult to clean, you won't be able to simply wipe them down with just a rag.
Check to see if your dish drainer comes apart, and if it is dishwasher-safe. Newer models are often able to be cleaned on the top rack of your dishwasher. If that is not an option, clean the drying rack using hot water, dish soap, and a soft-bristled brush. A small brush, such as a toothbrush, can be used to get into the hard-to-reach spaces. Rinse the rack clean and then go back over it with a little white distilled vinegar. This will sanitize the dish drainer, remove stubborn limescale buildup, and get it ready for use once again.
A clean dishwasher runs more efficiently

Although dishwashers are used to clean your dishes, they can still become dirty and smelly themselves. The machines have many hidden parts where food particles can hide and mineral deposits can form. Additionally, since the inside of a dishwasher often remains moist for a long period of time, mold and mildew can grow and pose a health risk. It's recommended to clean your dishwasher once every 3 to 6 months to keep it hygienic and running efficiently.
Once you've ensured the dishwasher is clear of any food debris, set a glass filled with 2 cups of white distilled vinegar on the top rack. Turn the heated dry setting off and just run the dishwasher using the regular wash cycle. Afterward, sprinkle 1 cup of baking soda across the floor of the dishwasher. Run the dishwasher again. It's also possible to remove the racks and cutlery baskets and clean those in your kitchen sink using dish soap and hot water.