Repurpose Jar Lids Into A Unique DIY Privacy Solution For Your Yard
Not all recycling centers accept jar lids, even in cases of mixed material recycling. The sorting machines aren't designed to handle the lids and may jam or sort them into the wrong category, causing problems down the road. So what can you do to prevent these from going into a landfill? YouTuber Marifetli İşler has a creative and beautiful solution for repurposing old or unwanted items like leftover jar lids.
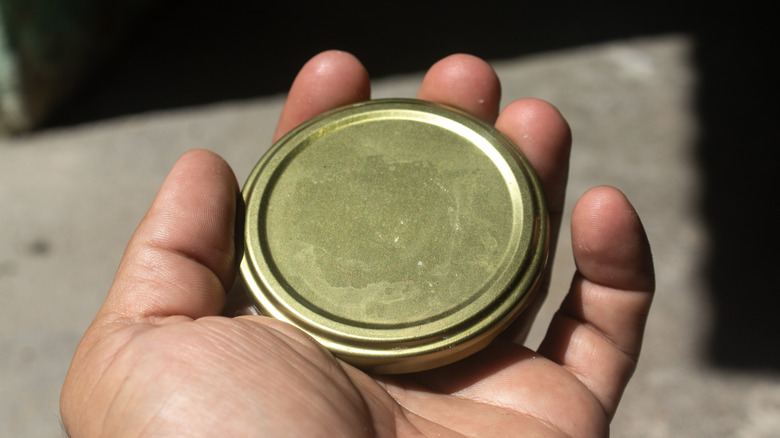
In her video, Marifetli İşler creates a privacy screen from several hundred decorative metal jar lids, hanging hardware, and some ribbon and lace, all glued together to form a panel. Not only does this project solve the problem of too many leftover jar lids, but it can also hide unsightly items in your home or yard and provide some privacy for you. This is a pretty accessible project if you have the tools (a glue gun, some scissors, measuring tape) and supplies (a plethora of jar lids, ribbon, a track, and a curtain mount). While you can use your old, unneeded jar lids that aren't suitable for recycling, İşler used new, decorative canning lids. These lids are generally used to replace canning lids on mason jars, so you can use them for gifts, projects, and storing dry goods or non-food items.
How to create and install your jar lid privacy screen
The first step is to find out how many lids you will need to create some privacy in your outdoor space with this budget-friendly solution. The number of lids depends on the size of the space you want to hide with your screen. Most wide-mouth jars are about 3 inches in diameter, and the creator placed the lids every 4 inches. Measure the width of the space you are going to cover in inches and divide by 4. Next, measure the height of that space in inches and divide by 4. Multiply the number of lids for the height and the number of lids for the width to get the number for one side. Multiply by two if you want your screen to be double-sided.
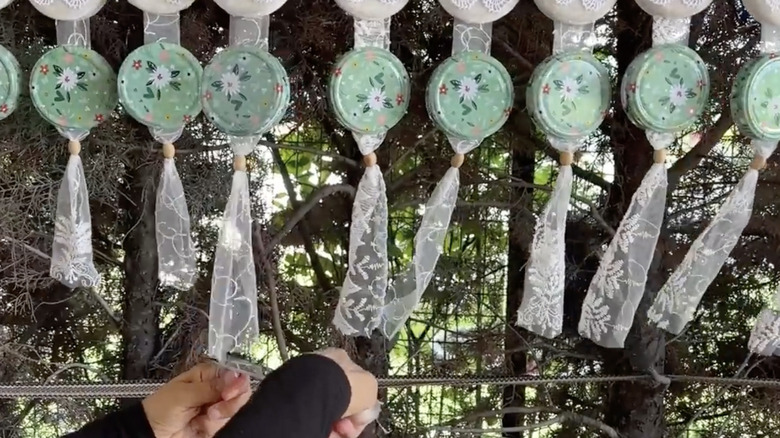
In the video, İşler marks the lace and ribbon every 4 inches. This makes your screen look evenly spaced. She installed gliders, or carrier slides, every 4 inches along the top edge of the lace where the privacy curtain will attach to the track, and then hung a ribbon from each. She glued a jar lid to the ribbon at each mark, adding in a horizontal piece of ribbon partway down to give the curtain some stability. In the last step, she installed the track using screws or zip ties and slid the carrier slides right into the track for an easy installation.
Finding jar lids and customizing your privacy screen
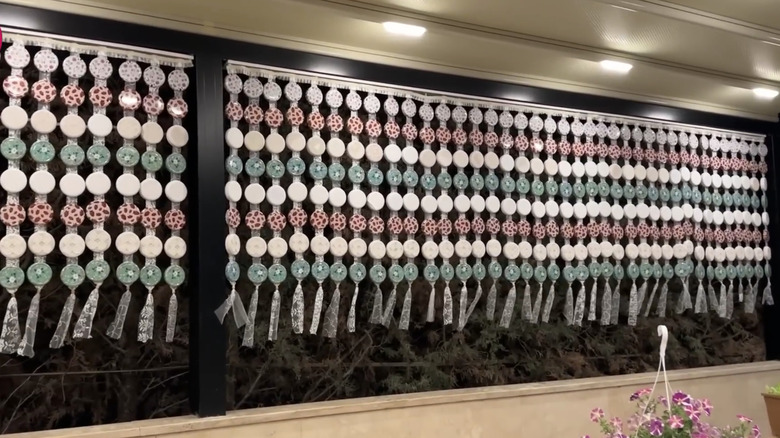
The trickiest part of this project is sourcing jar lids. İşler used over 800 jar lids to create her project with new, decorative lids, which you can buy online, or ask your friends, family, and local 'Buy, Sell, Trade, and Free' groups. If you are using used lids, you can paint them any color you like or even cover them with contact paper or fabric.
Keep in mind that canning lids can rust, but spray paint designed to prevent it can help seal the metal and protect it from harsh conditions, so you might opt to style yours with Rust-Oleum's 2026 color of the year. Also, using a glue gun to attach the lids to the ribbon might not hold up well either, especially if the screen is subjected to harsh weather. For a more permanent solution, you may consider drilling holes in the top and bottom of each lid and stringing them together with something sturdy, such as a paracord or fishing line. If you don't have access to a track and curtain mounts, try hot-gluing soda tabs to the lids of the top row, then use fishing line or even zip ties to attach the tabs to a branch, piece of wood, fence line, or wherever you are looking to hang your screen. With just a little creativity, you can adapt this project to use up items you already have on hand, making it a very upcycled, user-friendly DIY privacy screen.