Clear Countertop Clutter With A Cooling Rack Hack That Utilizes Under Cabinet Space
We may receive a commission on purchases made from links.
Your kitchen countertops are covered in so much clutter that you aren't even sure what they look like anymore. The coffee and tea station is overflowing with mugs and all of the accouterments, utensils are quite literally everywhere, and we won't even talk about the groceries that haven't found their way into the pantry yet. If your countertop clutter is driving you crazy, there's a solution you can DIY with a simple item you might already have: A cooling rack.
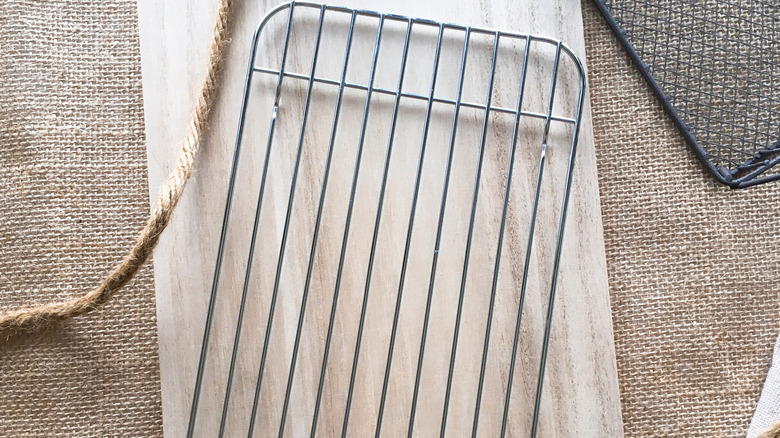
The humble cooling rack easily transforms into a storage unit that attaches to the underside of a cabinet, where you can hang things using S-hooks. This is a simple, budget-friendly DIY that will help you clear your countertops and stay more organized. It's also a great way to declutter your kitchen without going overboard. Depending on the amount of space you have under your cabinets, you'll be able to hang mugs, cooking utensils, and measuring spoons. You can even hang herbs to dry by bundling their stems together with twine and hanging them from the rack.
This DIY is a smart way to repurpose cooling racks to tidy up your home. If you don't have one on hand, you can purchase a metal cooling rack at discount stores like Dollar Tree or your local thrift store to keep costs down. You'll also need small command hooks and S-hooks, which can easily be found at a hardware store. Optional supplies include wood scraps, wood glue, and a staple gun. You can also grab spray paint if you want to give your cooling rack a more sleek design.
How to turn a cooling rack into under cabinet hanging storage
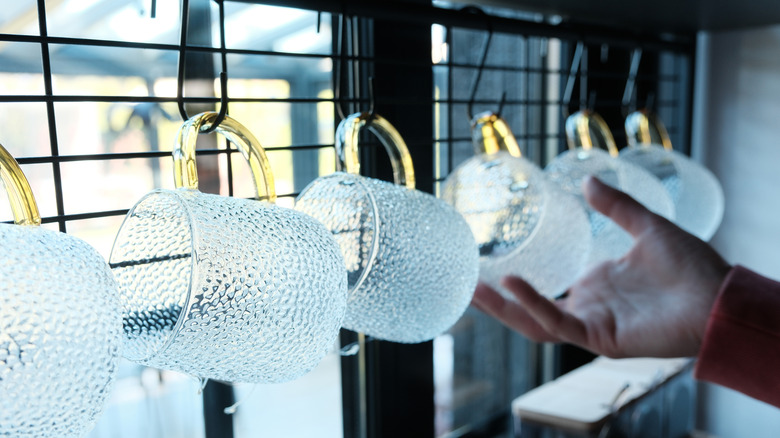
If you're ready to say goodbye to kitchen counter clutter, then grab your cooling rack and let's get started. Begin by wiping down the underside of the cabinet, if needed. Measure the space under the cabinet as well as the cooling rack to make sure it will fit before making four marks on the underside of the cabinet where the corners of the cooling rack will go. Attach a small command hook to each marking and then place the edges of the cooling rack into the hooks. If you have a longer cooling rack that needs more support, you can add a command hook or two along the middle section.
Alternatively, you can build a wooden frame to create a sturdier rack. To do that, measure and cut to size four pieces of wood in equal length as the four sides of the cooling rack. Attach the wood pieces together with wood glue, like you're creating a picture frame. Then use a staple gun to attach the cooling rack to the wooden frame by stapling along the outside edges. To attach the wood frame to the underside of the cabinet, you can use adhesive Heavyweight Picture Hanging Strips to avoid having to install permanent hardware, as well as maintain a budget-friendly DIY. Now you're ready to attach S-hooks to the cooling rack and hang whatever you'd like. Be sure to read the specific product details of the command hooks or adhesive strips used so you know how much weight they can hold.