The Same '60s Wood Paneled Wall Looks Brand New After A Clever DIY
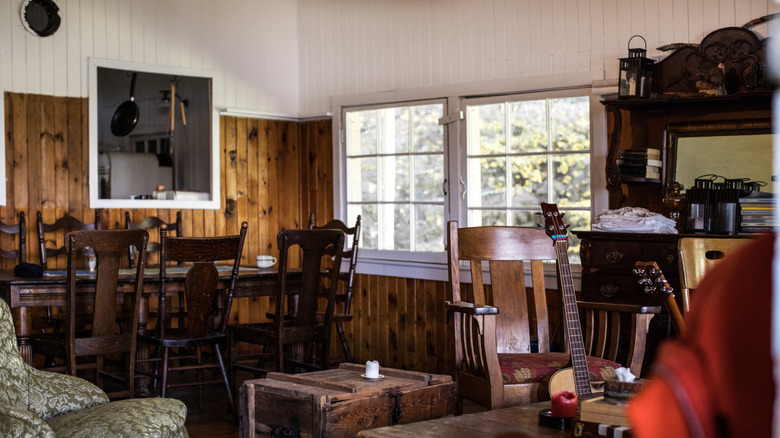
Those vertical floor-to-ceiling wood planks of the 1900s, highlighted by black grooves, are working against the sought-after modern, bright, and clean look. The outdated panelling is almost begging to be paired with a yellow mid-century sofa and accent lava lamp. While there is a '60s design trend that's making a hard comeback, the dated wood paneled walls are not it. Fortunately, you can skip the demo day and still turn the vintage staple into a modern design with wall liner.
Wall liner is a plain white heavy-duty covering, typically made from paper, that smooths the surface of the existing wall, covering imperfections like thin cracks, small digs, and panel grooves. It's a simple way to update wood paneling to make it look like a regular wall, which can then be decorated with paint or wallpaper, and you don't need to hire a professional. For this DIY, you'll need a utility knife, paint roller and brush, plastic scraper, level, pencil, straight edge, and heavy-duty papering like Patton Prepasted Paintable Solid Flat Wallpaper Liner.
How to prep wood panels for a wall liner application
The first step in transforming the wall is prep and cleaning. Remove any trim, nails, staples, outlet covers, and the like from the wood. Then, wipe the walls with a dry microfiber cloth or vacuum using the brush attachment to get rid of dust. For a light clean, simply wipe the panels with a mix of 1 quart of warm water and a few drops of dish soap. For a deeper clean that tackles grease build-up and grime, add a splash of distilled white vinegar to the solution.
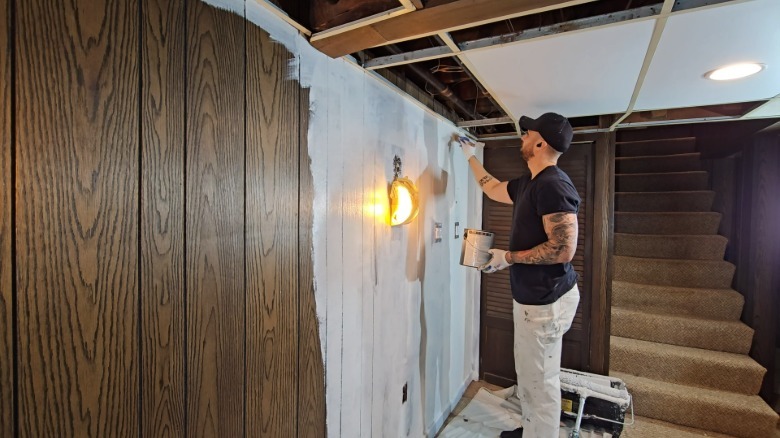
Once the wood is clean, it has to be primed. A product like Roman Pro-935 R-35 Adhesion Promoting Primer will help the liner adhere to the paneling. Use a roller to evenly apply the primer over the panels, switching to a paint brush to get inside the grooves. Follow your product's instructions for the specific drying time. Depending on the type of wall liner, you'll also need to apply paste to the backing and let it cure for a few minutes before adhering it to the wall. Again, follow the manufacturing instructions for your specific product.
For the final prep step, mark where the liner will go. If you plan to paint over the new surface, install the liner vertically. If you're going the wallpaper route, install it horizontally. Use a pencil, level, and straight edge to outline where the outer seam of the liner needs to go. For example, if the liner is 25 inches wide, create a straight line 25 inches from the corner wall (vertical install) or below the ceiling (horizontal install). Double-check that the line is straight, as this first piece will affect every liner section.
Applying wall liner over wood panels
Now it's time to go from primed wood panels to faux drywall. Cut the liner so it's larger than the wall section. It should overlap a few inches onto the ceiling and floor (vertical installation) or wrap around the corner of the next wall (horizontal installation); this way, you can cut the excess with a utility knife or fold the liner over the corners for sharp seams.
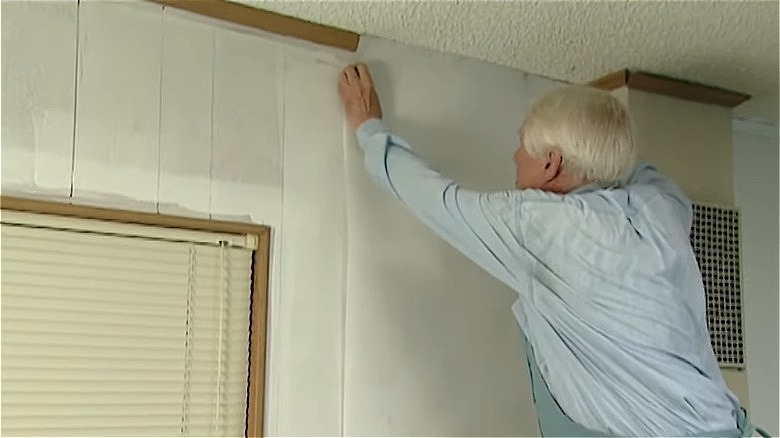
Ensure the paper aligns with the marked pencil outline and attach the first piece to the wall, firmly smoothing it over the wood panel with your hand little by little to ensure there are no air bubbles or creases. Use a dry roller or plastic squeegee to help smooth it down, and pay extra attention to the edges. Then, cut any excess from the ceiling and floor trim using a plastic scraper to guide the utility knife.
When applying the second piece, don't overlap sections of the liners. Doing so will create a seam that will be visible under the final paint or wallpaper. Finally, repeat these steps until the entire wood panel is covered and the '60s walls have been brought into modern day. After 24 hours, you're free to cover the liner with wallpaper, paint, or even plaster. This way of modernizing dated wood paneling on a budget will cover up the '60s secret hiding underneath.