Tips For A Flawless Vinyl Plank Flooring Installation
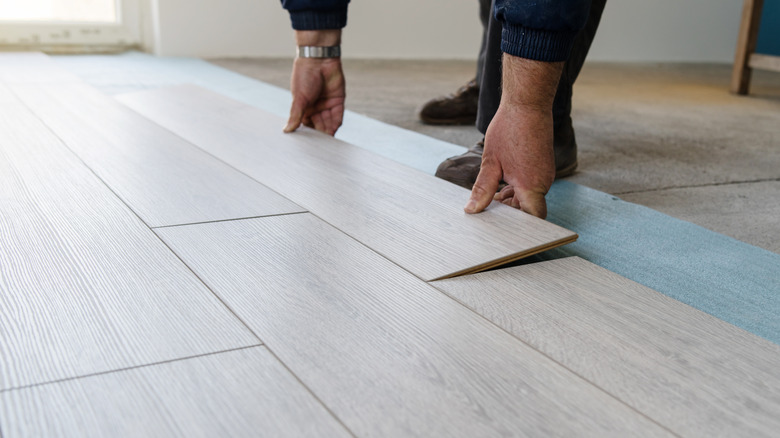
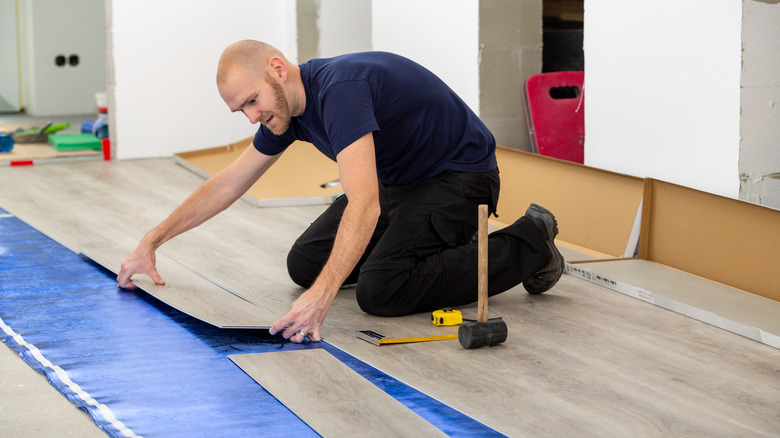
Installing new flooring can be a transformative yet disruptive DIY project. One that can turn your household upside down and take way longer than you think. If you don't have tons of professional know-how but want to put in new flooring yourself and get seamless results, vinyl planks are the way to go. They're relatively easy to install, especially if you go with an interlocking system that you can simply click into place. But just because vinyl plank flooring is designed for fast and simple installation doesn't mean there aren't pitfalls to watch out for. Without proper planning, even the most (seemingly) straightforward DIY can turn into an endless series of unforeseen problems. From knocking holes in your drywall when removing trim pieces to having unsightly gaps when you replace them — or worse, winding up with warped boards — there's a lot that can go wrong.
Fortunately, most of these issues are easy to avoid, provided you're prepared for them. Armed with these tips, you'll be able to save time, reduce waste, and achieve pro-level results, minus the labor costs. So shelve that mallet for a second and keep reading to set yourself up for a stress-free install.
Remove your baseboards like a pro

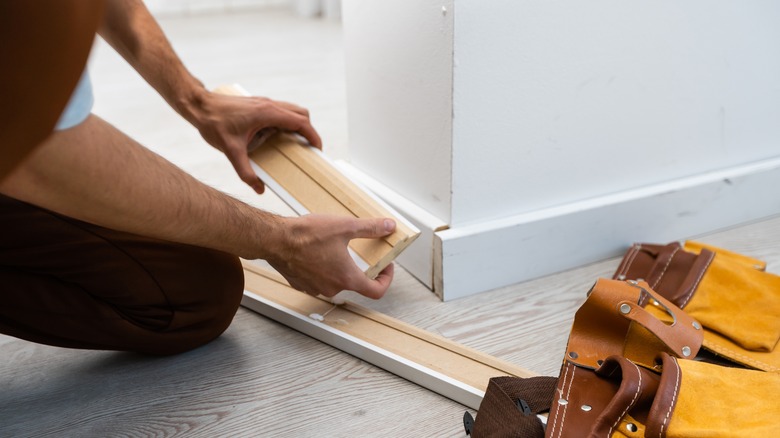
The first step to prepping an area for vinyl planks is taking off the baseboards. This isn't a complex undertaking, but you do need to take pains not to peel off paint or accidentally dent the drywall. Start by using a utility knife to cut through any paint that's sealing the gap between the trim and your walls. Do a couple of passes to make sure you've cut through this bond. You should see a small gap appear between the wall and the strip of baseboard. Severing the seal will ensure that areas of paint don't rip away when you're prying off the boards. If you're planning to repaint, you may be tempted to skip this step. But beware; peeled areas can leave indentations that show up even after you've applied fresh coats to your walls.
Once you've sliced through that buildup of caulk and paint, insert a prybar scraper or putty knife into the gap. Carefully work your way along each baseboard with your prybar, then gently pull the planks away. Once you've removed the boards, you might be left with a few stray brad nails that are still stuck. A hammer or nail puller will get these out in a jiffy, but they can also punch holes in the wall if you press down too hard while levering. To guard against this, you can distribute the pressure by placing a trowel or large putty knife next to the nail so that the hammer head can push against it rather than the bare drywall. Alternatively, use a pair of pliers to pull rather than lever out the nails.
Ripping out carpet? Roll it up in small sections
If you're removing wall-to-wall carpet, your next task will be ripping up the carpet to expose the subfloor. Although you can technically install certain types of vinyl over carpet, it's usually not recommended unless you have a hard, low-pile carpet that's perfectly level. Installing vinyl planks over carpet can also make the new flooring stand higher than other areas of your home.
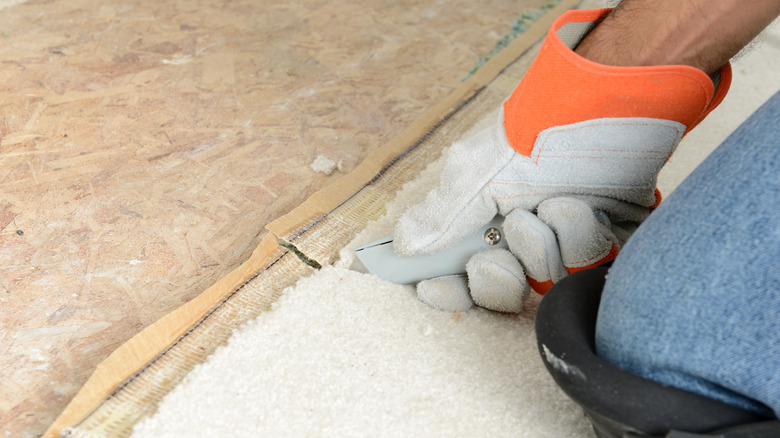
One of the easiest mistakes to make when pulling out old carpet is to grab a corner and simply start pulling. Trying to pull up the entire piece in one go will probably leave you with a huge, heavy, unwieldy pile of carpet that's practically impossible to shift. Instead, start by cutting the carpet and underfelt into strips. Begin on one side of the room and cut a line that's about 4 feet wide. If you have a long room, cut strips from side to side rather than making long runs, which will create bulkier rolls of carpet. Loosen one end and roll up the strip, repeating until you've taken up all the carpet. Neat, narrow rolls will be much easier to carry out and dispose of than massive, messy sections. You can also tape up the rolls to make them even easier to handle.
After getting the carpet out, make sure you go back over the floor and pull out any remaining staples. While you can do this with a pair of pliers, a crowbar may be faster and easier if you're dealing with thin, wide staples. Skim over the surface, targeting the stuck staples, and you may be amazed at how many it effectively knocks out. You can also use your crowbar to remove the tack strips.
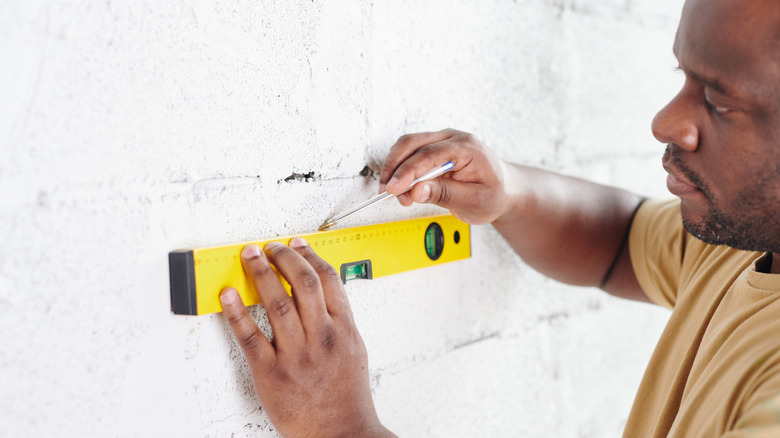
Put extra love into getting the subfloor level
The secret to a perfect vinyl plank installation lies in the subfloor. The flatter the subfloor, the less chance there is of your planks warping or developing gaps. Once you've removed any old flooring or carpet, go over the area with a level to check for dips, bumps, and humps. If you can, use a long level for the job, as a short one will be hard to work with accurately. Different vinyl products have different guidelines, but as a general rule of thumb, you don't want gaps that are bigger than 3/16 of an inch across a 10-foot area. The bigger the gap, the higher the likelihood that your planks will be suspended off of the subfloor, which can cause clicking when you walk across the floor. OSB boards tend to be less than level along seams and edges. Concrete subfloors can have dips just about anywhere. If you discover low areas, fill them in with a patching product like Henry Pre-Mixed Floor Patch. Avoid using thin set or mortar, which are harder to get perfectly level and can shrink while curing.
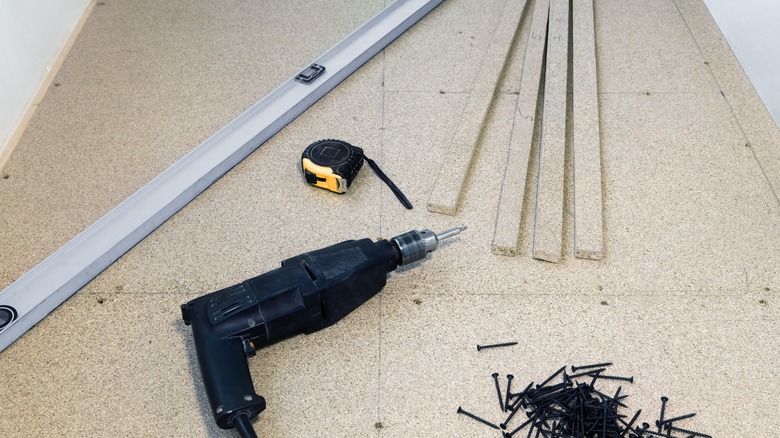
You'll also want to remove anything that sticks out. Hammer down raised nail heads and knock away drops of plaster. If you encounter any raised subfloor screws, twist them deeper. If the screw heads are too old to take a screwdriver or bit, you may need to remove them by force and replace them with new screws.
Don't forget to acclimate your planks
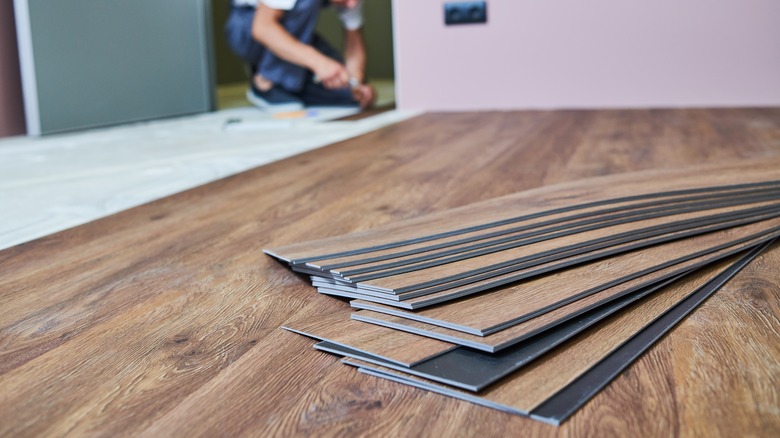
Picture this: You spend a couple of days and a few hundred dollars preparing the area and installing your new vinyl flooring. Once you're done, everything looks amazing. But pretty soon you start to notice buckling and gaps. The easiest way to avoid this? Acclimate the planks to your home before laying them. All flooring planks, even vinyl versions, need to be acclimated to the humidity levels where they're going to be installed. The good news is that vinyl flooring has very short acclimation times compared to hardwood. Most manufacturers recommend a 48-hour minimum acclimation period, which shouldn't impact your project timeline too much. However, high humidity and temperature levels can increase the amount of time it takes for your planks to acclimate.
To make sure you get this step right, start by checking the manufacturer's guidelines for your particular product. To stack your boxes of planks for acclimating, lay down a few pieces of 2x4 lumber to pack them on, leaving a space between each box. You can unpack them for faster acclimation or simply open the boxes.
The easiest way to know for sure whether your planks have fully acclimated is to check them with a moisture meter. If you want to invest in one of these, you can pick up a pinless model for just under $42 on Amazon. Using a meter isn't mandatory, but if your home is prone to damp problems, it is a good idea to measure your subfloor for excess moisture. While you're at it, you might as well check the vinyl planks. If their moisture content is within 4% of the floor, you're good to go.
Ascertain whether or not you need underlay
Before you start installing, you'll also need to check whether the vinyl planks you've purchased require underlay. This is very important because you can inadvertently void your warranty by installing the wrong underlayment. Some vinyl plank products come with underlay material already built onto the back, and installing an additional layer could compromise the warranty. Other products might only be compatible with certain types of underlayment. Very soft underlay materials usually aren't suitable for vinyl planks. As you step on the planks, your weight will transfer to the underlayment. If it's too soft, this can reduce stability and place stress on the tongue and groove joints.
There are some things you should know before buying flooring underlayment. If you're going to install a separate underlay, figure out what you need from the product. Is noise a potential issue? If so, look for an underlayment product that's recommended by the manufacturer and offers topnotch soundproofing. If you're worried about rising damp damaging your boards, look for flooring underlayment that can also act as a moisture barrier.
Don't say no to knee-pads
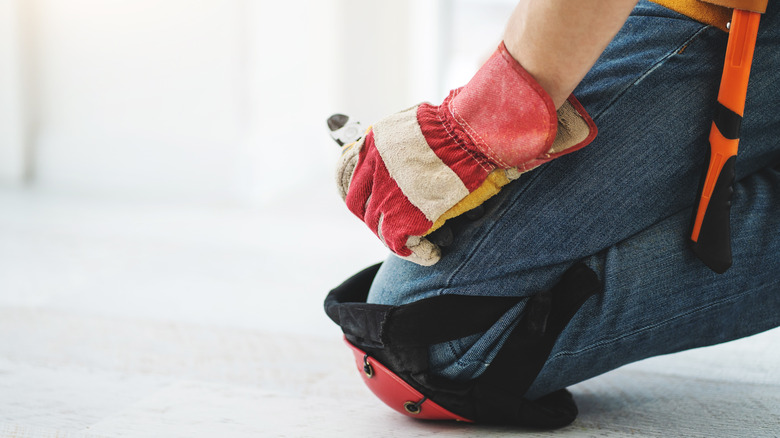
If you're laying anything less than a small entryway worth of vinyl planking, it might be wise to invest in some knee protection, such as the DEWALT flooring knee pads with gel, which are available on Amazon for just under $29. Have you heard of Hofstader's law? This inconvenient piece of wisdom states that "it always takes longer than you expect, even when you take into account Hofstadter's Law." Spending hours on the ground can place a lot of strain on your joints, and knee pads can give you some much-needed cushioning. Besides making kneeling for long periods more comfortable, pads can also protect your knees from stray nails, staples, splinters, and other debris.
Kneeling pads like this extra-thick mat on Amazon are a little less convenient to use, but they are very affordable and easy to repurpose for other jobs like gardening. Are you on the verge of laying your planks and don't have time to pick up some pads? A flat cushion or piece of foam can also work in a pinch.
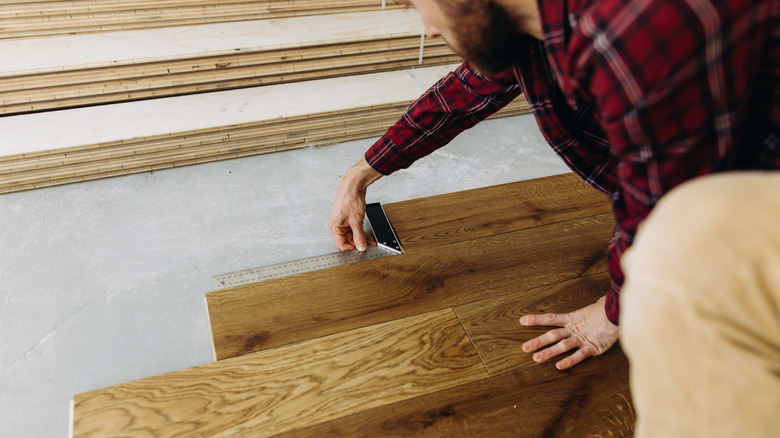
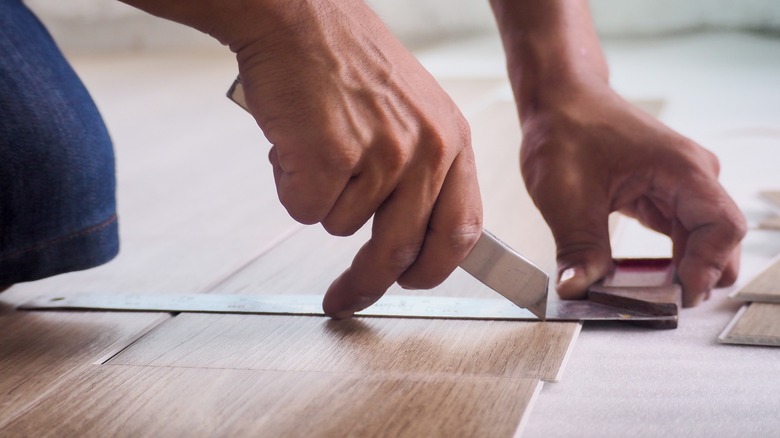
Speed up the laying process with a laminate cutter
One of the advantages of vinyl flooring is that it's super convenient to cut. You can slice through it with a hand saw, or even score it with a utility knife and snap the plank on the line. But if you aren't operating on a super tight budget and you want to save time, buying a laminate cutter can seriously speed things up. It will allow you to cut through vinyl planks with one easy swipe and gives a really nice, crisp end that's hard to achieve with any other method. Because they create clean slices, these cutters also don't generate dust, which is great if you plan on cutting vinyl planks indoors. Laminate and siding cutters aren't the cheapest tools to buy, and something with great reviews on Amazon, like the Norske Tools 13-inch model, will run you almost $200. However, the investment can definitely pay itself off if you're tackling a very large area or plan to do more than one room.
Not keen on spending a couple hundred bucks to cut your boards? No problem. If you want a cleaner edge than what a box cutter will create and wish to skip manual sawing, a miter saw, jigsaw, or circular saw can also do the job. However, you may want to install a blade like the IVY Classic 35050 Swift Cut that's designed for plastic. This will help avoid any ragged edges. If your room isn't a clean rectangle or you have to lay planks through a doorway or into a closet area, you may need to create cut-outs. A handsaw can do the job, but a jigsaw will be a lot faster. Having an oscillating tool on hand can also be super useful, not for cutting planks to size so much as edging out door jambs so that you can snugly slide your boards underneath.
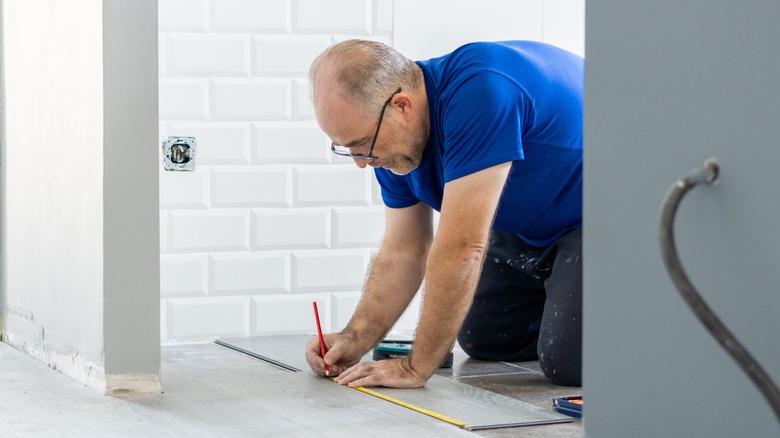
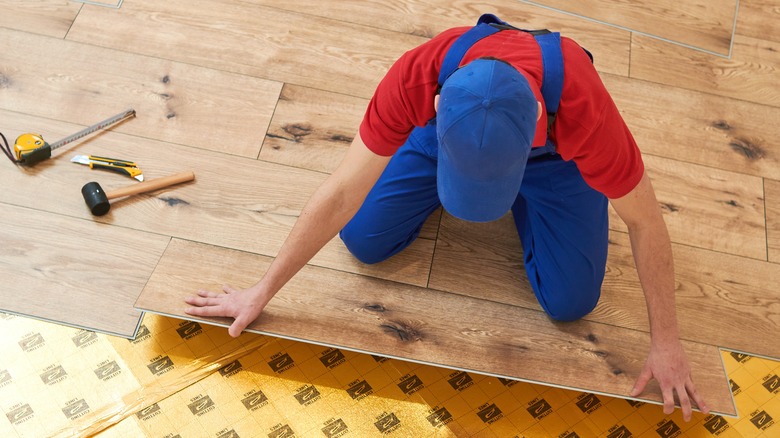
Plan out your plank placement
Before you strap on those knee pads, it's also wise to spend some time planning out the placement of your planks. Consider which direction you want them to go. Once installed, the planks will create visual lines that naturally draw the eye along them. If you have a beautiful big window or an impressive fireplace, laying the boards so that they point toward these focal points can create an attractive effect. Alternatively, maybe you want to follow the direction of hardwood or vinyl planks in an adjoining room.
Once you've worked out where to start, measure the width of the room and divide it by the width of your planks. If you can't make it across perfectly and will have to cut the last row of boards narrower, work out this width. If it's just a sliver, consider trimming your first set of planks as well, so you wind up with a narrower row on each side rather than ending with an unsightly, super skinny strip. The same tip applies to the length of boards. Invariably, you will need to trim down the final plank in a row to fit. Ideally, these end pieces shouldn't be under 6 inches long. If you realize that the last piece is going to be less than this, you can shorten the first plank by a few inches.
Start at the straightest wall
If you don't have a particular preference for which direction your planks should run, the easiest place to start is against the straightest wall. Exterior walls are often straighter than interior ones. To check how plumb your walls are, you can either grab a long level for a rough idea, or you can use a chalk line. Measure out an arbitrary distance from each end of the wall — say, 5 feet. Create a chalk line, and then measure the distance between the wall and the line in a few different places. If the measurements are different, the wall isn't straight. Fortunately, if you're just dealing with a slight bulge, your expansion gap might be enough to cover the discrepancy.
One of the easiest ways to make sure wonky walls don't throw off your plank lines is to lay the first couple of rows away from the wall with some temporary boards at the back to give you something to push against. Once you've locked the planks together, remove the temporary ones, push the rows toward the wall, and insert your spacers. This way, you'll have a solid piece of flooring that you can align with the length of the whole wall.
Besides bulging walls, you might also find that your room isn't truly square. To check this, measure the width of the room from both corners of the wall you want to start on. If the measurements are different, you may need to shave down the side of the first board on the narrower end.
Watch out for repeating patterns
Want to know one of the easiest ways to spot a newbie vinyl plank flooring job? Pattern repeats. Unlike hardwood, vinyl plank products have a set number of faux grain patterns printed on the top. If you don't pay attention, you could end up placing a few identical planks close together. This is a dead giveaway of a DIY job, and once you notice it, the repetitive pattern will probably disturb your eye no end.
To avoid this, sort your planks into piles, placing those with the same pattern together. Having them separated into piles will make it easy to evenly space the patterns out for a seamless look. Once you're laying, simply rotate which pile you grab your next plank from. To keep things from looking too uniform, choose a pile at random every now and again. You can also do a dry run. This will help avoid pattern repetition and set you up for success when navigating tricky areas like doorways. One of the benefits of floating vinyl plank flooring is that you can go back, disassemble the boards, and change the layout if you want to. There's no need to panic if you do make a mistake or don't like how the installed planks look together. However, dry runs and plank sorting can help you cut down on any unnecessary work.
Don't ditch your offcuts
Once you get to the end of the first row, you'll almost certainly need to cut the last board to fit. If you've never laid a plank floor before, you might be tempted to toss this offcut. But these pieces will usually be the perfect length to fit into your next row. If you start with the offcut, you'll also get an automatic stagger. Staggering planks makes the floor more sturdy, reduces the chance of joints breaking, and looks better than if all the ends are aligned.
Besides reducing material waste, using your offcut pieces to begin the next row will also help keep your staggering pattern random. Why is this good? If you stagger the planks perfectly, this will create an "H" pattern, which looks unnatural and is weaker than a slightly random, unsymmetrical stagger. Prominent H patterns or uniform steps are also a dead giveaway of a DIY job.
Use a multitool to undercut door jambs
Once you get to a doorway, there's a good chance you may have to undercut the jambs. You want your planks to slide neatly underneath for a clean, finished look. Trimming them to fit around the door jambs won't be nearly as neat, no matter how careful you are with your cuts. You can use a handsaw to etch out a space for your boards to fit under the jambs, but a multitool can get the job done in a fraction of the time. It also ensures better accuracy. All you have to do is fit a plunge-cutting blade, place a scrap piece of vinyl plank against the jamb as a guide, and you'll be able to make a precise cut. If there are any pieces of shoe molding or quarter round on the door jambs, remove these first.
Once you've undercut the door jamb, your plank should fit perfectly below, but there's one last obstacle. Because the door jambs probably protrude into the room, there might not be enough space to insert the last piece and click it into place. To work around this issue, insert your board away from the door, and then use your rubber mallet to tamp it down the row until it sits under the jambs.
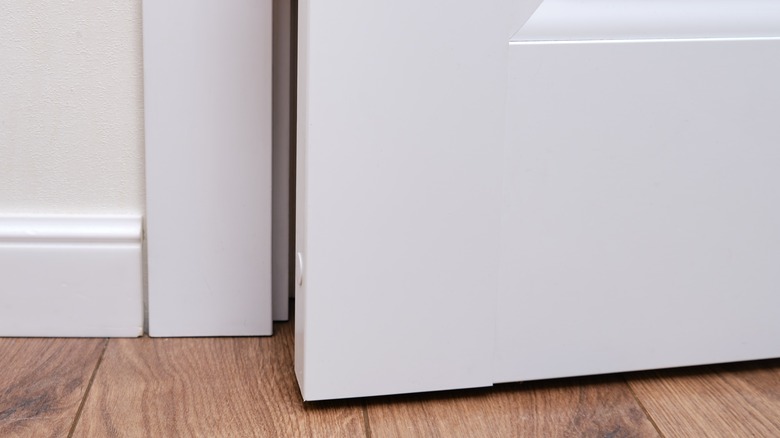
Consider replacing your baseboards with wider trim
Once you've laid the last board, your final task is replacing the trim. If you reuse your old trim, this can save on costs and reduce waste. But there are times when replacing the trim can save you time and give you a better finish. For instance, if you're ripping out wall-to-wall carpet, you might find that the original trim will sit lower than it used to. In this case, you'll probably be left with an obvious line where paint has built up. You can make the line less obvious by sanding it down, but this also means you'll need to repaint the room. In this situation, it's a whole lot easier to simply install some new, wider trim that will cover this line. Wider trim appears less builder-grade and can give your whole project a luxe look. Keep in mind that you don't have to send your old baseboards to the dump; you can reuse them for other projects, such as narrow shelving.
On the other hand, if you're installing vinyl planks over an existing floor, such as tiles, you might find that the old baseboards will automatically cover any unsightly paint lines. In this situation, it might be worth reusing them. To make things easy for yourself, mark or number each baseboard when you remove it so that you know which wall it goes on. Simply give the boards a light sanding, reattach them with brad nails, caulk the top of your baseboards, fill any holes, repaint, and they should look as good as new.