How To DIY Caulk Your Baseboards
We may receive a commission on purchases made from links.
When you look around your home, do you see gaps between the baseboards and the walls or floors? If you find these spaces in the kitchen, bathroom, or any other room where spills can occur or humidity can pose an issue, then it could be due to moisture. If left unchecked it can warp the wood and maybe even get into the sheetrock. Similarly, you may find gaps around the edges of the baseboards on account of foundation settling, which is a common occurrence as a house ages.
Regardless of the reasons, caulking your baseboards provides additional protection for your walls as noted in Home Reference. Whether you are installing new baseboards or refinishing the existing ones, you might consider caulking the top and bottom edges and the seams to block out moisture, unwanted bugs, and dirt. Plus, this easy do-it-yourself task adds a seamless, finished look to your baseboards. All you need is a razor blade or a caulk scraper to remove any old caulk, some painter's tape (which is optional), a caulking gun, and caulk in a tone of your choice. You can also have damp paper towels on hand for smoothing the caulk, but your fingertip also works if you don't apply too much pressure.
Get your baseboards ready
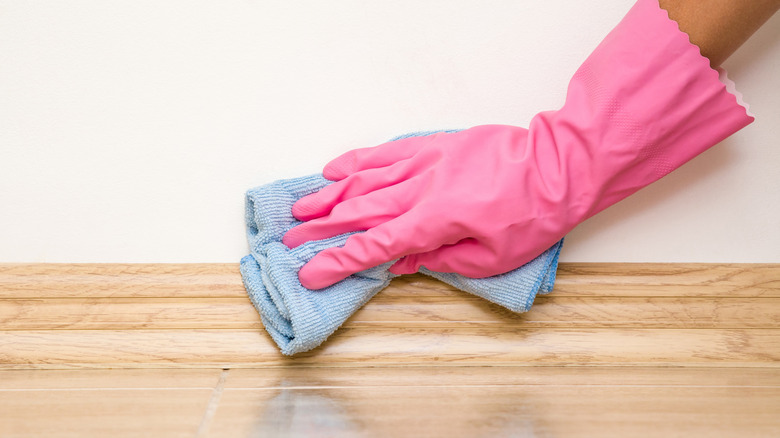
The first step is carefully removing any old caulk using the razor blade or scraper. Next, you will need to clean the baseboards by wiping them down with a damp rag. This first step is vital because if you leave behind too much dirt, it mixes with your caulk, which leaves an odd grayish or brownish tinge that brings you back to square one.
Also, you should carefully examine the tops and bottoms of the baseboards for very wide gaps that the caulk might not cover. If you find an excessive amount of space, you will need to install a filler piece such as rope or wooden shims, explains Mr. Fix-It. Depending on your comfort level with caulking, you can place painter's tape on the wall and floor if you are doing both edges. The tape guarantees that you will end up with a straight line, but if you have steady hands, then it is not necessary.
Load your caulking gun
Once your work area is ready to go, you can prepare your caulking gun. If you aren't already familiar with working with a caulking gun, the main thing to keep in mind is to use the plunger (the rod protruding above and behind the trigger) correctly. When you have the rod pulled all the way back, no pressure is applied to the caulking tube. However, you will need to push and adjust the rod to maintain the tube's snug fit in the gun. When you're ready to replace the tube, you press the lever and pull the plunger backward, explains Home Depot.
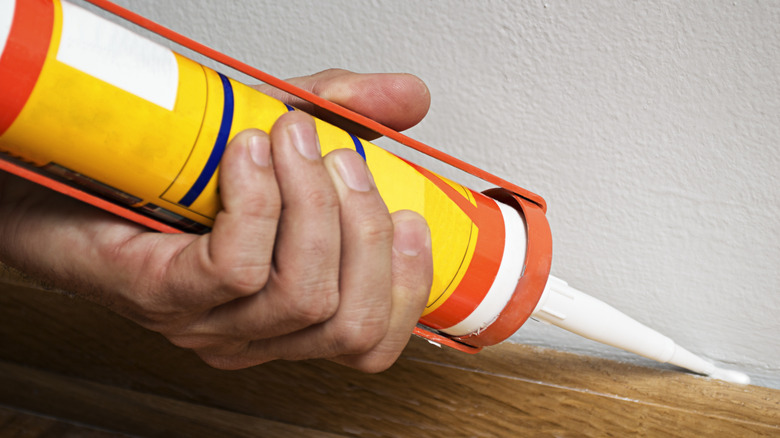
Before you can start caulking, you will need to cut the tip from the nozzle end, you can use the hole in the handle of the caulking gun (if it has one) or a sharp utility knife. Since the nozzle is tapered, cut closer to the tip for a small bead and further away from the tip for a larger one — and be sure to cut the tip at a 45-degree angle.
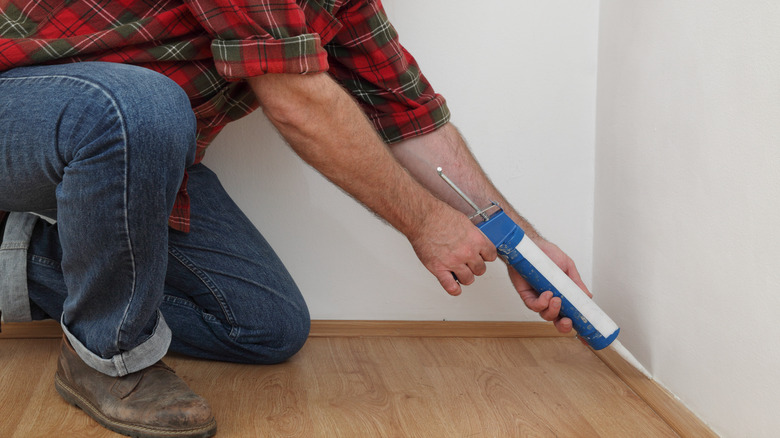
Apply the caulk
Now you're ready to start caulking the baseboards. Hold your caulking gun at an angle, explains Home Depot, and gently pull the trigger. Once the caulk starts coming out, keep moving in at a steady pace until you get to the end of the section. You won't need to apply pressure from the nozzle to the baseboard. Instead, you'll need to maintain the same distance and speed while not moving the caulking gun too quickly.
Once you get to the end, simply let go of the trigger and pull the plunger out to keep the caulk from spilling out of the tip. After that, you can start smoothing away the excess caulk either by using your fingertip, a damp paper towel, or the tip of a spoon. Again, don't press down too hard, and try to maintain a constant, steady movement. By smoothing out the caulk, you make it less noticeable, allowing it to blend in more with the wall and the baseboard.