The Best Way To Start Seeds Indoors
We may receive a commission on purchases made from links.
There are countless indoor seed starting options on the market. You can find everything from mini-greenhouses that use peat pellets and sunlight for less than $20 to shelving units with state-of-the-art LED lights for hundreds of dollars. With so many options available, how do you know what you need? Well, the answer is somewhere in the middle. If you want to start a significant number of seeds, you will need to make an investment, but it's probably not as much as you expect. After all, part of the reason people want to grow their own food is to save money.
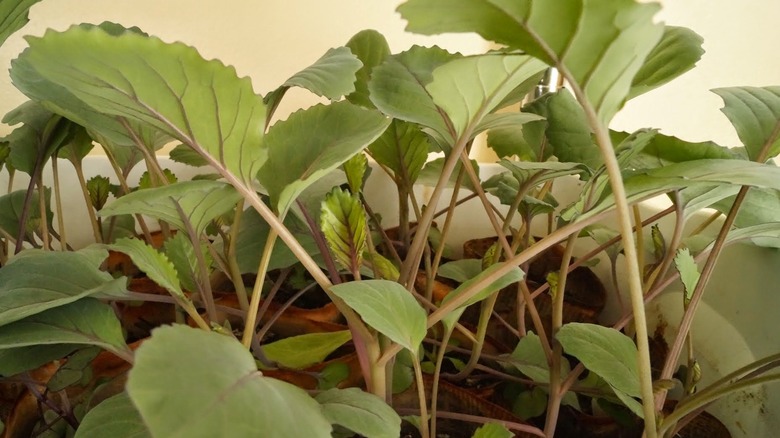
Although the mini-greenhouses in every garden center in the spring seem like a quick, simple, and cheap way to start your vegetable seeds, they have some severe flaws. First, as Get Busy Gardening states, the mesh that holds the peat disks together is notorious for not decomposing in the garden. This can cause your young seedlings to become root-bound, stunted, and eventually die – a frustrating experience for a new gardener. Second, even the sunlight provided by a south-facing window is insufficient to grow healthy plants. Young seedlings need at least 8 hours of direct light a day, and the indirect light from a window will cause plants to grow leggy and weak. So now that you know what doesn't work, let's find out what does.
Shelving

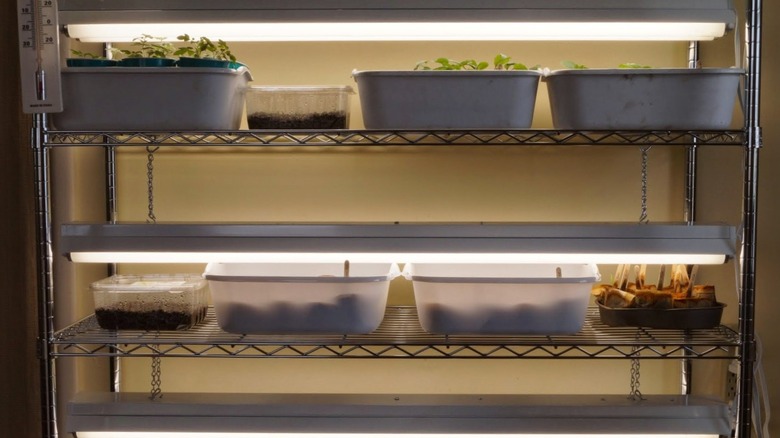
The shelving you select is the foundation of your seed starting process. If you are handy with power tools, you can build your own shelving out of wood. If your goal is to save money, this is probably the most economical option, especially if you already have the materials you need. If woodworking is not in your skill set, a store-bought shelving unit will work fine. This common style of wire shelving is attractive, inexpensive, easy to assemble, and available at many retailers. It's also easy to clean, which is a nice feature when working around soil and water.
Regardless of how you acquire your shelving, it needs to be capable of a few things. First and foremost, the shelving should be sturdy. In fact, consider anchoring it to the wall if you have small children or unruly pets. Additionally, depending on the lighting you use, you may also need a shelving option that allows you to install a hook or use S-hooks to adjust your light fixture. This will ensure it's always the ideal distance from the top of your plants.
Lighting
There are many exciting lighting options for indoor plants available these days, but you don't need anything fancy. LED grow lights like these are expensive and are designed for large-scale hydroponic farmers that grow plants indoors to maturity. However, if you want to start seeds for a few weeks before planting them, all you need are some cheap shop lights like these from Walmart — Yes, it's true. The same shop lights that your dad used while working in the garage are great for starting flats of seeds indoors!
When shopping for lights, make sure they come with chains so you can adjust the height as your plants grow. Fluorescent bulbs are cool to the touch, so even if your seedlings have a growth spurt overnight, they won't get burned. Adjust your shop lights so they are consistently 1 to 2 inches above the top of your plants. Keeping the light too high will cause the young seedlings to reach for it, making them leggy and weak.
If you decide to use this kind of light, you will need to select or build a shelf that's about 4 feet long because that is the length of a shop light fixture that uses T12 bulbs. However, if you do not have room, or don't need that much seed starting space, small LED tube lights, like these, can also work.
Seed starting materials
To start your seeds, you will need a seed starting medium and something to hold it. There are many ways to start seeds, and every experienced gardener has their favorite. Some people even love peat pellets, so this is an area where you can experiment and see what works best for you. Plastic trays with individual cells from previous plant purchases make excellent seed starting containers. Don't worry, if you don't have any, a gardener you know probably does.
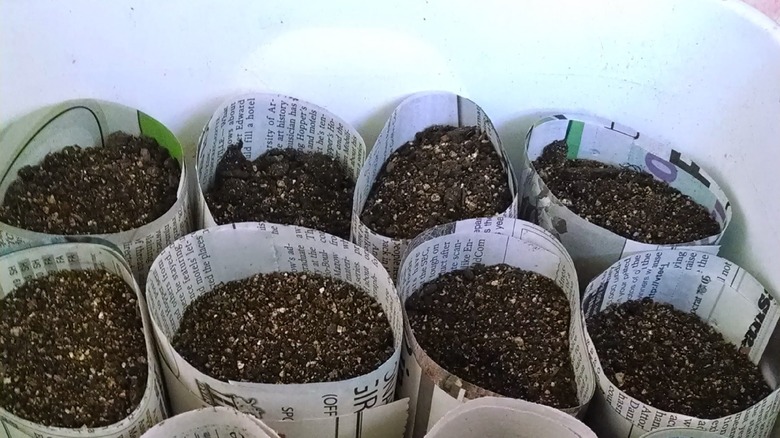
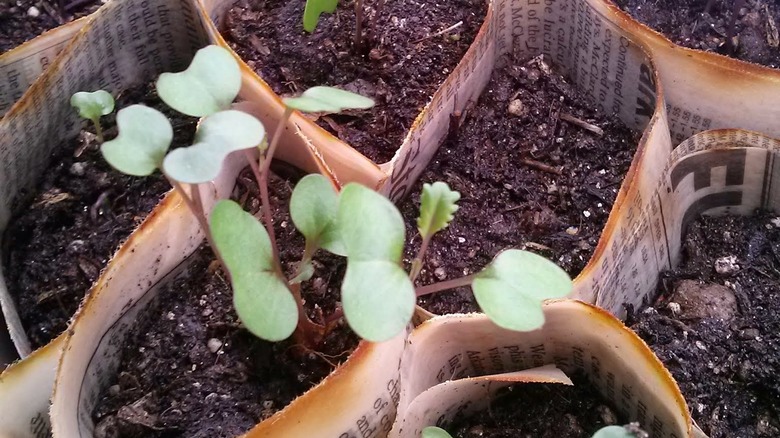
Paper products can also be an excellent way to upcycle. You can make newspaper pots for free using an old bottle or can to create the shape of the container, or you can buy a newspaper pot maker, like this one on Amazon, to simplify the process. One of the best things about using newspaper to start your seeds is that you can place everything in the hole, newspaper and all. This way, you do not disturb the tender seedling's roots. Earthworms love newspaper, so you're not only keeping your seedling happy but also providing food to one of your most essential garden friends. To contain your seed starting pots, you can use what you have on hand, like plastic trays or casserole dishes — you just need something with sides at least 2 inches tall to hold water. Plastic dishpans from a discount store are also an excellent choice.
Seed starting mix
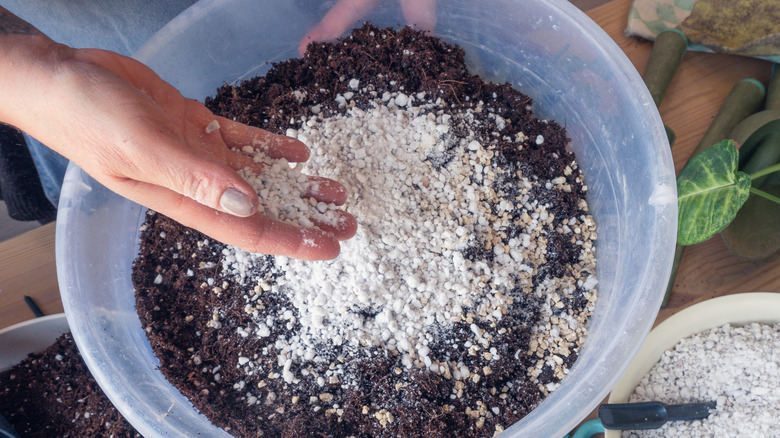
Now that you have all your containers, it's time to fill them up with a seed starting mix. There are several good ready-made options on the market. It might be tempting to buy a general potting mix, but a seed starting mix is ideal because it is lighter and looser than what you would use for larger plants. These pre-made mixes do not include soil, making them very light. Soil is quite dense compared to the ingredients in seed starting mixes, which can include vermiculite, peat moss, and coconut coir. The light, fluffy nature of these special blends helps the roots of young seedlings grow more quickly, encouraging the whole plant to get big faster.
The downside of a seed starting mix is that it's kind of pricey, and if you are starting a lot of seeds, it can take a chunk out of the financial benefits of growing your own food. Luckily, you can save a lot of money by making your own. Garden Betty recommends mixing equal parts vermiculite, peat moss, and perlite to create your own lightweight seed starting mix for a fraction of the cost of store-bought products and without any unnecessary ingredients.
Setting everything up
With all the necessary supplies collected, it's time for the exciting process of starting your seeds! First, set your shelf up in an area protected from icy drafts, where you will remember to check it daily. Then, install your lights and make sure everything is sturdy. Make or gather your containers and fill them with your seed starting mix. Place them in their waterproof container and ensure everything fits appropriately on the shelf and all the lights work.
Once your setup is complete, plant your seeds according to the depth listed on the packet. Instead of watering them from the top, pour water into the container holding your individual seed pots. This will prevent the flow of water from displacing tiny seeds. Continue to water this way until the seedlings are a few inches tall to keep water from breaking delicate stems. Make sure your seedlings get at least 8 hours of direct light a day and enjoy the process of watching them grow. No matter how long you garden, this process always contains an element of magic.