10 Ways To Bring Old Hardwood Floors Back To Life
We may receive a commission on purchases made from links.
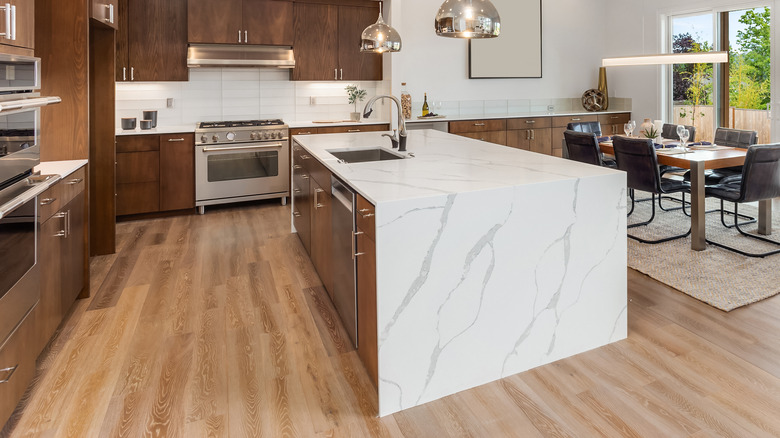
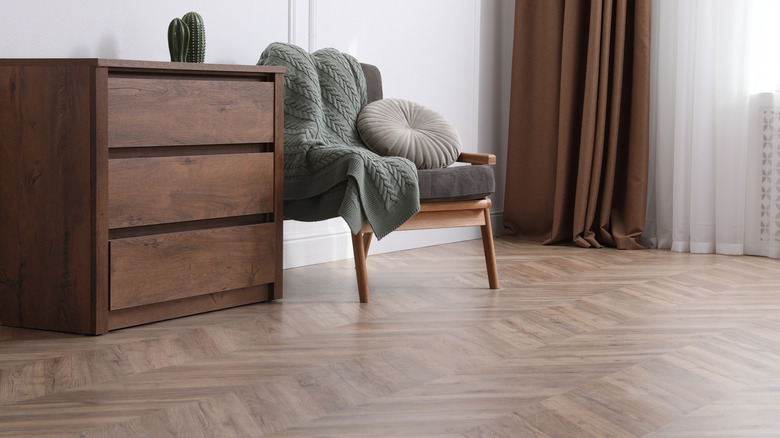
Hardwood floors are one of the most coveted types of floors in homes today. Looking at resale value, hardwood floors are at the top of the list. But over time, they can lose their luster and shine, becoming worn with heavy foot and pet traffic. Scratches and scuffs begin to show up more easily, and the floors look dull and worn, even after cleaning them. Instead of covering them up with rugs, refinishing them, or considering replacing them, why not try some other methods to save and rejuvenate them? After all, besides being beautiful, they can last for many years and can almost always be saved.
That's right, with solid hardwood floors, looks can be deceiving. According to Angi, sometimes all they need is some refreshing, which can include giving it a deeper clean, instilling the help of a restoring liquid, or adding a new layer of wax. There are a few things you can try first, which is mostly what we're going to discuss here. If nothing suggested works, you may need to hire a professional. But we'll get to that. For now, let's go over some tips on how to bring old hardwood floors back to life.
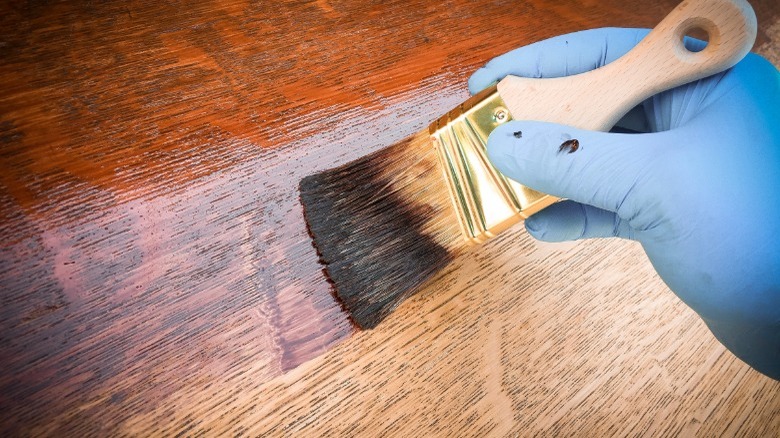
Use a wood floor restorer
According to Rejuvenate Products, you can use its wood rejuvenating products to restore old floors. In fact, you can find the floor finish on Amazon for $22.98, and it seems to be one of the best ones to try. It comes in a satin or high-gloss finish that lasts for years and can be used on solid wood of nearly all kinds, including exotic and engineered wood floors. However, do not use it on laminate or vinyl flooring since it will damage them.
It fills in cracks and scratches with its water-based polyurethane formula while also protecting the floors from future damage. You only need to use one coat to see results, and it mops on easily. Another cool thing about it is that it's stain-resistant, allowing future spills to wipe up easily.
However, you need to prep your floors before using this finish. First, remove any oil or wax residue with something like Windex Ammonia-Free Glass Cleaner. This will help remove any buildup from products like Murphy's Oil Soap or Pine-Sol. Then, mop the floor to remove any dirt or dust. Allow it to dry, and finish it off with Rejuvenate.
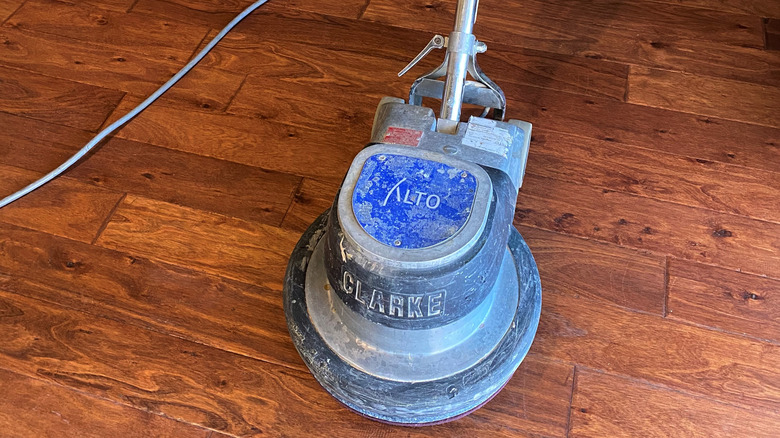
Rent a commercial-grade buffer
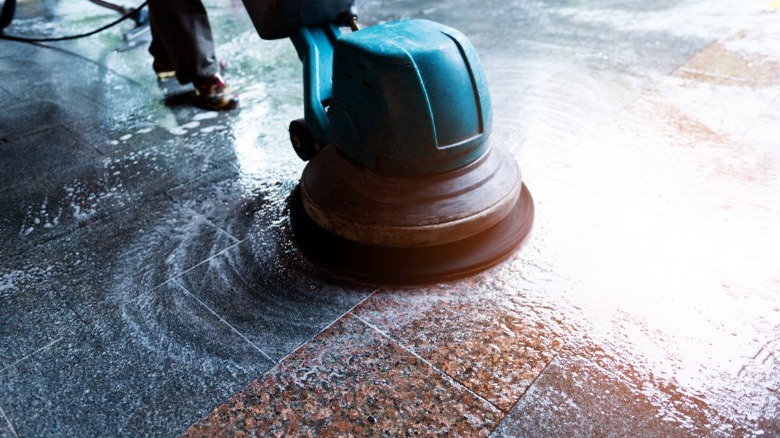
If you have wood floors with a polyurethane finish, which is the most common, renting a commercial-grade buffer can help remove scratches that have penetrated the surface, per Angi. The buffer won't help if you have scratches in the actual wood, but it will remove superficial knicks on the finish. You can rent a machine from Home Depot for about $50 to $65 a day, depending on your location and whether it has one available. One with a water tank is typically used for this kind of project, but you'll likely need to buy the pads and finishing product for the machine, which the home improvement store can help you with.
Before you start the buffing process, you'll need to prepare the area by removing all the furniture and contents from the room. Curtains should be lifted, and any metal grates or vents removed. Use a wood floor cleaner to clean and dry the surface area first. You'll also want to use a safety mask and make sure the room is well-ventilated due to the fumes from the finishing solution. Apply the solution to the floor with a mop or spray applicator. Buff the corners first and work inwards. Don't allow the machine to remain in one spot too long, or you can damage the floor. Be careful, as these machines have a lot of power! You can do a second buff and finish for a better shine.
Use a hardwood floor polishing sealant
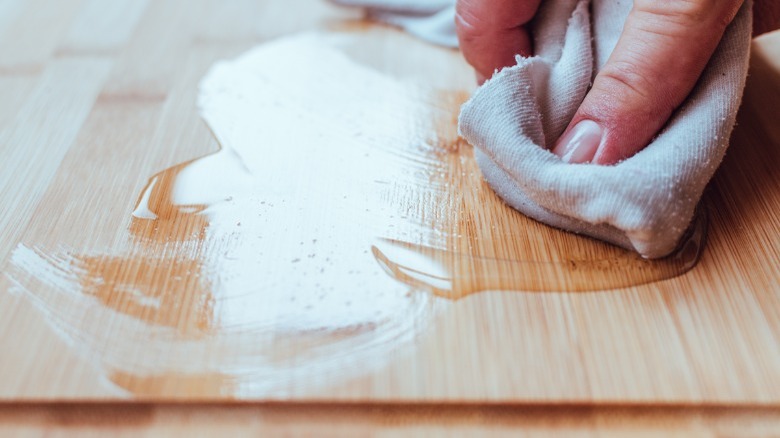
Another thing to try is a hardwood floor polishing sealant. You can try using a polish like Weiman Hardwood Polish and Restorer, which has great reviews and a low price. It can be found at Home Depot for $9.97. To apply it, you'll first need to vacuum the floor with a soft brush attachment to remove any dust and debris. The next step is to use a wood floor cleaner such as Bona, which you can also find at Home Depot for $8.97.
This cleaner is easy to use because you spray it on the floor directly and use a mop with a microfiber cleaning pad to scrub the area thoroughly. This is honestly the most challenging step because you want to get your floors as clean as possible before using the polish. If you're not working up a good sweat, you're not doing it well enough! Once your floors are nice and clean, allow them to dry before starting the next step.
Now comes the polishing. Use a polishing pad on your mop, which is made from material similar to lamb's wool that won't scratch or damage the wood. Pour the polish onto the floor and use the mop to disperse it evenly. You don't have to scrub; just work your way out of the room as usual. It will seal the surface, fill in light scratches like the restorer does, and should not leave any residue.
Use a hardwood floor chemical abrasion kit for waxed floors
This option will be a lot of work, but you'll need to consider it if your floor has wax on it, per All Property Management. Any product you try to use on a waxed floor won't stick or bond to it, so you'll need to strip it off. If you're unsure if your floor is waxed, find an inconspicuous spot, such as a closet, and drip a few drops of mineral spirits onto the surface. Wait a few minutes and use a clean white rag to wipe the area off. If any colored residue appears, this is evidence you probably need to consider this choice.
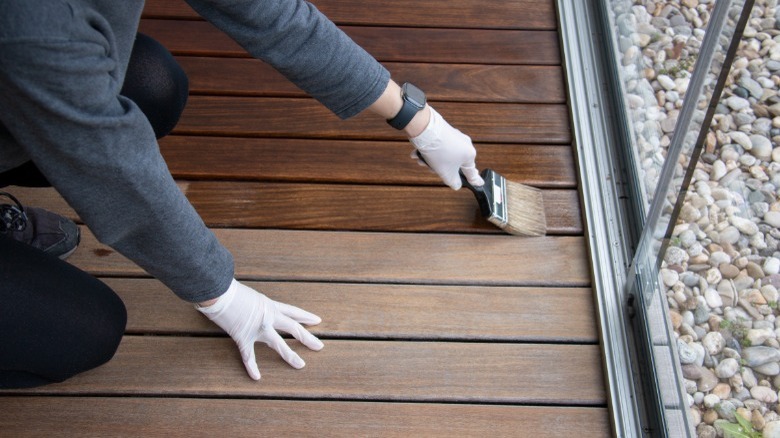
Luckily, Rust-Oleum makes a great option called Wood Floor Transformation Renewal Kit, which you can find at Home Depot for $65.07. The kit includes all the major components you'll need. It involves using a chemical treatment and elbow grease to break down and "etch" the surface, which prepares it to accept the new finish. Keep in mind that you will need two people to complete the project, and you will have to work fast because the finish will dry quickly. Follow the instructions carefully. Reserve a day to complete everything, plus at least 24 hours to dry. The results are impressive in most cases if done correctly.
Recoat floors with polyurethane
According to Pete's Hardwood Floors, this method may not be well known, but it can sometimes save you from calling in the pros. Your hardwood floors are likely coated with polyurethane, which over time needs to be recoated. It will involve renting a buffing machine, but this time you'll be putting a light screen on the bottom of the buffing wheel. The screen is like sandpaper and performs the task similar to what you'd be doing by hand with a chemical abrasion kit. It prepares the old surface for a new polyurethane finish.
Prepare the area by removing any nails, staples, metal grates, and screws. You want a completely smooth surface. Any splattered paint or drywall compound should be scraped off the wood flooring and vacuumed. Next, deep clean the floor with a product like Pallmann Strong Clean, which you can find at Wood Flooring Supply for $25.74. Dilute it in water at a ratio of 10:1, and use a white polishing pad on the buffing machine. Spray the solution directly on the floors, then follow with the machine.
Next comes screening, for which you'll use a pad and a 150-grit screen on the buffer. When you've completed screening the surface area, vacuum again and tack the floor using a damp rag with the correct solvent. If you're unsure whether your finish is water or oil-based, take a cotton ball and dampen it with rubbing alcohol. Wipe an inconspicuous spot and let it dry; if it turns lighter in color, it's water-based. Use a polyurethane finish of your choice to apply one to two coats. Let it dry for at least 24 hours before walking on it or replacing any furniture.
Minimize deep wood scratches with markers
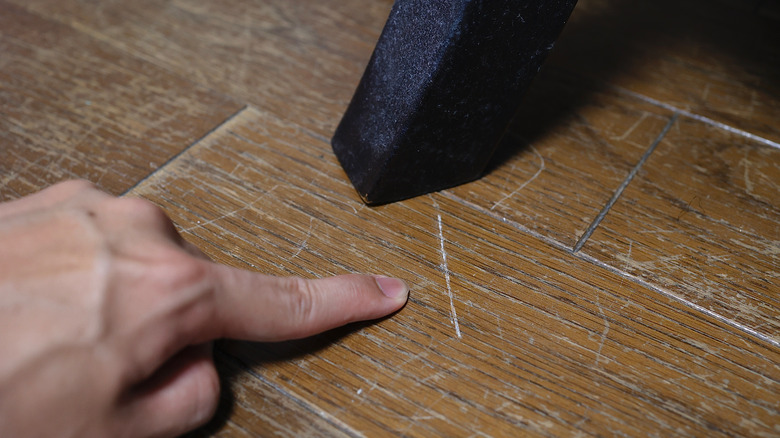
If you need to try to remove or hide some deeper scratches on the wood surface without refinishing, there's another great invention out there, per Longologo Productions. You can buy a set of specially made markers by Rejuvenate at Lowe's for $8.98. This set of six markers helps you find an exact match for your particular color of hardwood floors.
This is a pretty amazing method for covering up unsightly scratches that penetrate the wood and not just the finish. The markers contain actual wood stains and come in colors matching most types of wood used in hardwood floors. It's a very simple but effective way to hide scratches or marks when your budget doesn't permit completely refinishing the floors. There are also other brands of these markers, and you can also purchase them individually.
After finding the right color, shake the marker well. After shaking, remove the cap and press the tip into the cracks a little at a time, pressing into the scratch so it penetrates the wood thoroughly. If you can still see any white edges, try pressing along the edge downward and then push upward from the other side of the scratch. Cover the edges from all angles. When the scratch is completely covered, wipe on and around the area with a clean paper towel and stand back to inspect your handiwork. It's just that simple!
Remove lighter scratches with nuts
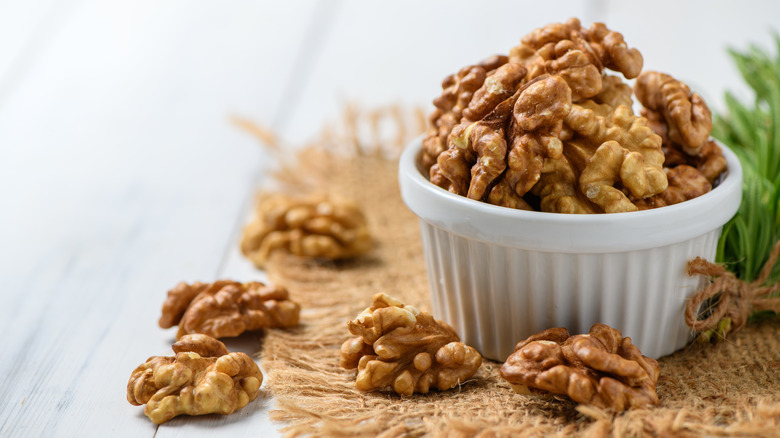
According to Food52, another method for hiding minor scratches (such as from a cat) is using various nuts. Walnuts are probably the most common, but you can use any oily nut, such as macadamia nuts, pecans, almonds, Brazil nuts — you get the picture. For this example, we'll use walnuts. It's really quite simple! You just crack a few walnuts and use the "meat" part to buff away marks.
Before you start, use your finger to rub over the scratch vigorously to create some friction and warmth. Then quickly grab one of the walnuts and start rubbing it back and forth into the scratch. Rub it in well, and go over it a few times from all angles. Wait a couple of minutes for the natural oils to seep into the wood, and you should now be able to see a difference. Wipe down with a clean cloth afterward, and voilà! That's all there is to it.
Remove white water stains from wood floors
According to Discount Flooring Depot, there are a few different ways to remove white stains caused by water on wood floors. We'll review two methods you can try that involve household items you likely have on hand. You can first try making a paste out of baking soda and water. Get a microfiber cloth and rub it into the stain. Leave it to do its thing for 24 hours, and then use some furniture polish after wiping off the paste. Allow it to dry overnight, and then you can determine if it's been effective or not.
Another neat trick involves using low heat, either with a hairdryer or a steam iron. If using a hairdryer, ensure you have it on low and continuously move it around the stain, never lingering on one spot for too long. With a steam iron, place a towel on the stain you want to remove. Heat the iron up hot enough for the steam function to work and begin "ironing it out!" Don't leave it in one spot; keep it moving. Thoroughly go over the area, lifting the towel to inspect your progress. Repeat until satisfied.
Remove dark or black stains with wood bleach
According to Zothex, you can also remove black stains from wood flooring. Hardwood floors can get dark stains on them in a number of ways. If your floors are mahogany, oak, or walnut, chances are higher that they will become darkly stained with tannic acid discoloration. The tannin levels in these trees are higher. Black water stains are also common. These dark stains are often in the wood itself, so you might need to sand the wood and refinish it. For example, Ace Hardware has a product called Savogran Wood Bleach, but it only works on unfinished or stripped wood, meaning you would have to sand the stain beforehand. If you use it, be sure to follow all the instructions carefully.
However, there are also some DIY recipes you can try before sanding. You can use equal parts of white vinegar and warm water, using a microfiber cloth to scrub the stain and remove odors. Hydrogen peroxide can also get rid of dark stains on wood floors. Soak a clean, soft cloth in peroxide and wring the excess before placing it onto the stain. Leave the cloth in place overnight or for at least eight hours before checking. If necessary, leave it on the stain longer until it's gone.
If all else fails, hire a professional and refinish
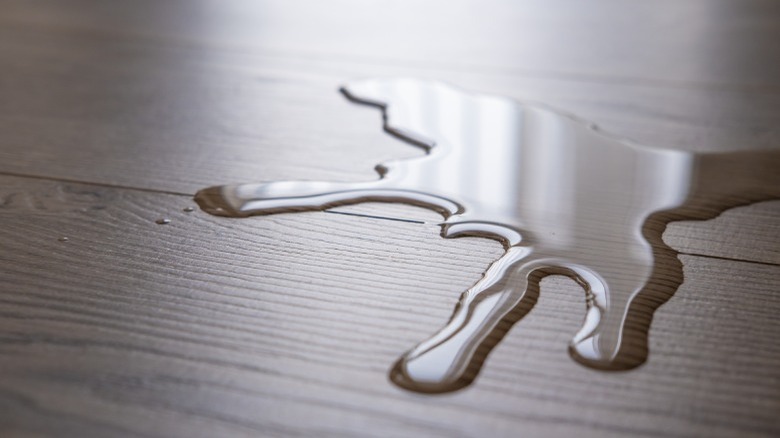
Although hardwood floors can take quite a beating and still be saved, sometimes none of the restoring options give the desired results. If all else fails, you need to call a professional to refinish. According to Forbes, this is not a DIY project a homeowner should attempt to do alone. Before calling anyone, you can do a preliminary test on the wood to determine whether it needs refinishing. Simply squeeze a little water from a sponge on the floor, and if it still beads on the surface so you can wipe it up easily, try one of these other solutions. If not, the finish is gone.
In the case of the latter, you will need to refinish. But if this is the situation, finding the right place to do the job is important. Getting at least three bids from reputable wood floor refinishing specialists is recommended. Make sure they've been in business for a while and have a good reputation. Check the Better Business Bureau and your state's Contractor's Licensing Board to be sure everything is in order and there are no pending lawsuits or actions against the company or contractor. It's an important job that represents a significant investment, but you'll save yourself a lot of potential problems and headaches.