We Tried Making Acrylic Pour Art For The First Time With Artistically Messy Results
You've probably seen the videos of super-fluid paint flowing across a canvas when scrolling through social media. At the end of the video, you're left with a colorful marble effect that makes for interesting wall art. This technique is called pour painting, and while it's gone viral on social media in the last couple of years, it's actually been around for decades. David Alfaro Siqueiros, an artist from the 1930s, is often credited as the original creator of pour painting. Siqueiros layered different colors of paint on a canvas, allowing them to naturally spread out to create a unique piece of work.
We wanted to try our hand at this historic yet viral painting technique to add to our home décor. The process itself is actually rather easy, and the materials are pretty accessible. Rest assured that you don't need an art studio or pricey, hard-to-find paint to try making your own beautiful works of art. So rather than stare at a blank wall in your home and wonder what to put there, this painting technique is easily done in a few minutes, and the finished product is a one-of-a-kind piece that can look like it came out of a modern art museum.
Take a trip to your craft store
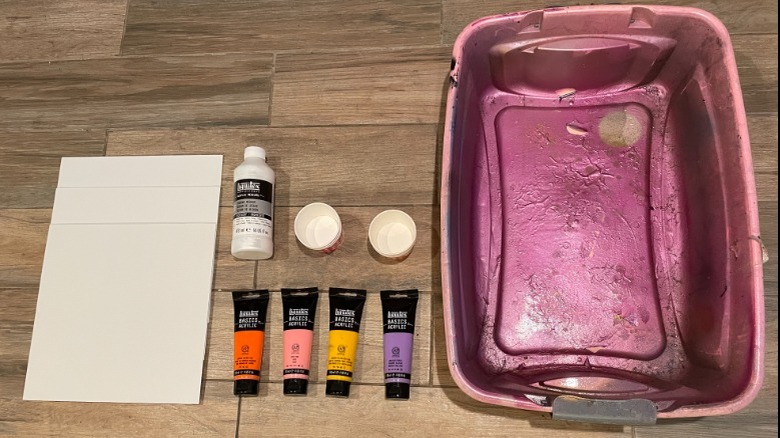
While pour painting is touted as a professional art technique, it's incredibly accessible for home DIY artists, too. The basic items you need can be found at most craft stores like Micheal's or Joann's. We went to Joann's and found all the items necessary in one aisle. You'll need acrylic paint and an acrylic pouring medium — it's important that the paint is acrylic based, or else it won't work with the pouring medium. The paint can be any color, but we went with orange, yellow, pink, and purple to create a sunset theme, along with three thin canvases to pour the paint on.
It is a good idea to use paper cups to mix the paint in. These can be any size, but if you're wanting to mix the colors into one cup, it's better to opt for a bigger size. Now, this is a rather messy form of art, so having something that captures the excess paint is a must. While you can set down some newspaper or a tarp for this project, it's probably best to have something with raised sides to stop the flow of excess paint — we used a plastic bin that we had previously used for spray paint. Lastly, you'll want something to place the canvases on while they dry. Since most of the excess will have already flowed off, newspaper or a plastic tarp will work fine.
Let it flow
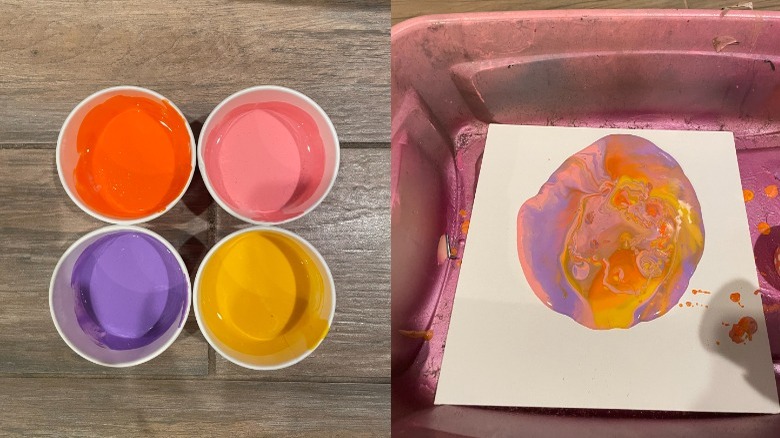
We mixed each color separately in its own cup until fully combined. After mixing, there will be some bubbles, and you'll want to wait a few minutes for them to pop before pouring to ensure a smooth piece. Once the bubbles disappeared, we poured a little bit of each color into another cup to create a layered color effect. Then, we placed the canvas on top of the cup, flipped it over, and lifted up the cup to let the paint pour out.
On the first canvas, we did a 2-to-1 ratio, as suggested on the bottle. While the mix of colors did come out pretty layered, the mixture was still quite thick and didn't easily slide across the entire canvas. We had to tilt the canvas to get the paint to slide, but it still moved pretty slowly.
On the second canvas, we repeated the same initial steps. However, we added water to help thin out the mixture. A word of advice, though, is to mix the pouring medium and paint first and then add small amounts of water at a time. This mixture definitely moved more than the first but still required tilting to cover the canvas.
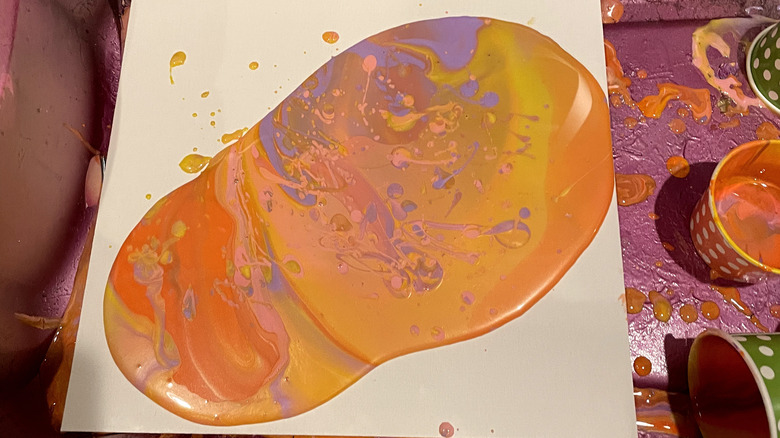
For our third attempt, we added more pouring medium — about a 90% ratio to 10% of the paint. This resulted in a mixture that easily slid across the canvas and covered the entire piece with minimal tilting needed.
Should this be your next DIY?
We found pour painting to be lots of fun, albeit pretty messy. The materials are easy to use and it only takes a few minutes to complete, though it's best to allow the canvas to dry overnight. But before you run out to the craft store, here are some things we learned:
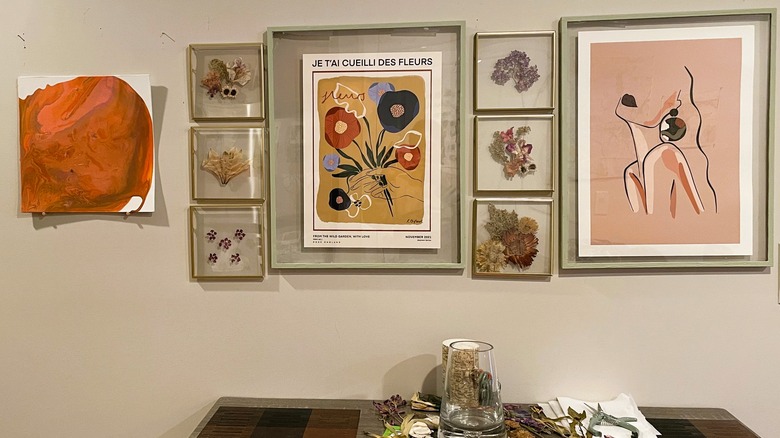
First, we'd buy a different kind of canvas. These canvases were thin, which made them lightweight and easy to hang, but they warped with the moisture of the paint. After drying overnight, the edges were completely curled up. They were easily flattened by turning them upside down and putting a heavy object on top for a few hours — which can add a dimension to the piece — but if you're looking for a classic flat painting, go with a canvas that's wrapped around a wood frame or a decorative piece of wood.
Second, be cautious with the colors. Because of the pigment, some colors are denser than others. We noticed that purple always sunk to the bottom of the mixture, while some colors also tend to overtake the others. For example, orange became the dominant color no matter how much we put in — probably because yellow is similar, and yellow mixed with pink can make a shade of orange. So, should this be your next DIY project? If you're looking for an easy, creative, and cool piece of art, then we'd definitely recommend giving pour painting a try.