We Tried Straw Bale Gardening And It Had An Unexpected Benefit
Straw bale gardening has gained popularity in recent years, and there's a lot to recommend it. It is like raised bed gardening, but much cheaper and less laborious. Frankly, it seemed a little too good to be true, so naturally, we had to try it ourselves.
With this type of garden, you place your plants in straw bales with a limited amount of soil mix and fertilizer. If you search online there are many different methods, some of which require weeks of preparation to get the straw bales ready, and some that you can just do all in one day. Since the weather was already getting hot and we were running out of time to plant our summer veggies and herbs, we just went with the simplest version. To be honest, that is probably what we would have done anyway since there is really no reason to overcomplicate things... but did we make the right choice?
Why we chose a straw bale garden
We are between garden types this year. We used to have a large in-ground garden, but the time and energy required to maintain it just became too much. Plus, our family shrank from four people to two, so food was literally rotting on the plants — how much okra can two people eat! We dismantled the garden with a plan to install a few raised beds to grow only our favorite veggies, but life happened and we did not get them built in time. Thus, the idea of the straw bale garden was born.
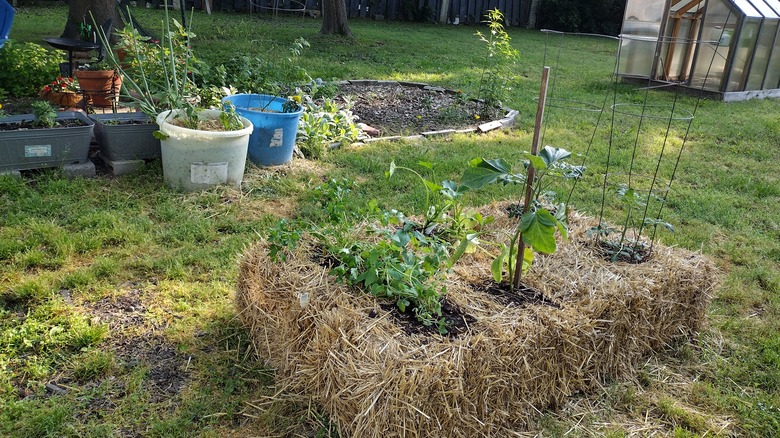
This experiment actually serves two purposes. First, we wanted to see if this kind of garden would thrive in our hot, dry Arkansas summers. Second, the location we put our bales is also where we want to install raised beds. Even if the straw bales do not succeed, all the weeds and grass in that area will be suffocated, and as the straw breaks down, it will condition the soil beneath, making it the perfect spot to build a raised garden bed.
Gathering supplies
If you are considering a straw bale garden, be aware that straw and hay bales are very different. Hay bales are used for feeding livestock. They still contain the nutritious seeds and leaves from the harvest, and if you tried to grow a garden in a hay bale, those seeds would sprout and you would probably have a mess. A straw bale consists of the stems left after the leaves and seeds have been harvested from the plants that make hay.
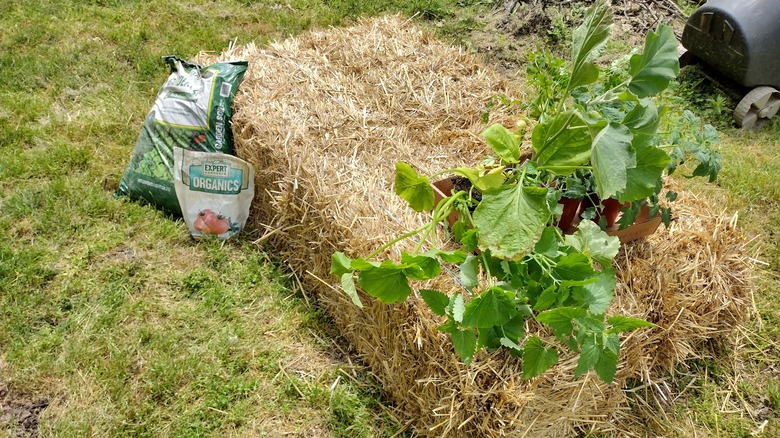
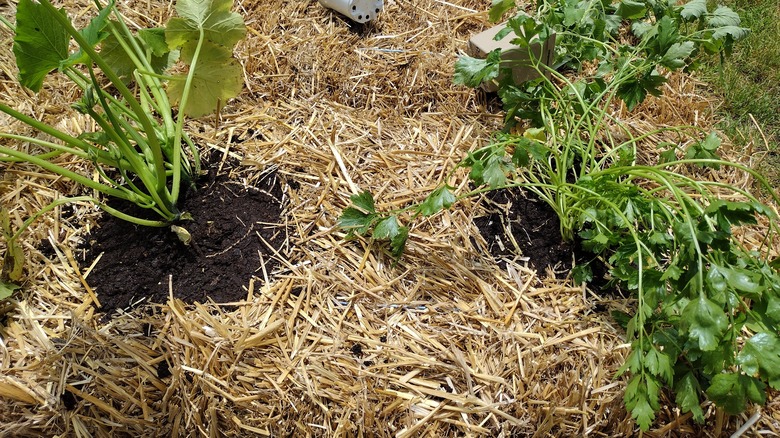
There are two standard sizes of straw bales. The ones available in our area were 18 inches wide, 36 inches long, and 14 inches tall. At this size, they were light enough to lift and move and we even managed to get four of them in our mid-sized SUV. The other items on our supply list were soil, fertilizer, and plants. Since we already had soil and fertilizer, we only needed to purchase four bales and six plants for this project. We opted for a variety of plants for this experiment: two determinate tomatoes, eggplant, yellow squash, parsley, and catnip. We spent about $30 on four strawbales and the same amount on plants. If you started early in the year, you could potentially grow the plants from seed, which would save even more money.
Creating our garden
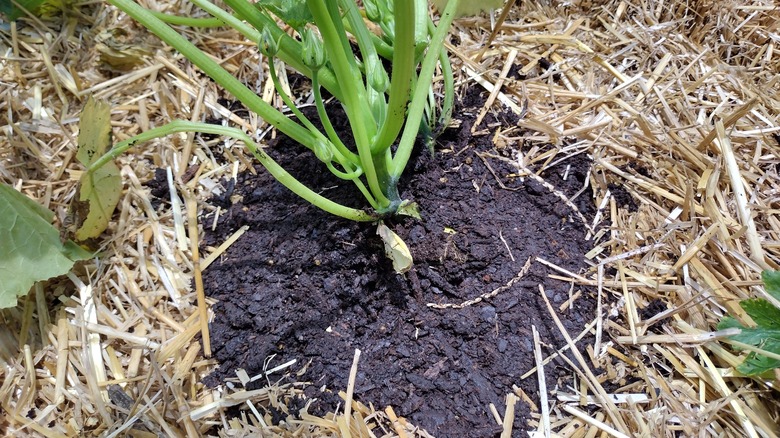
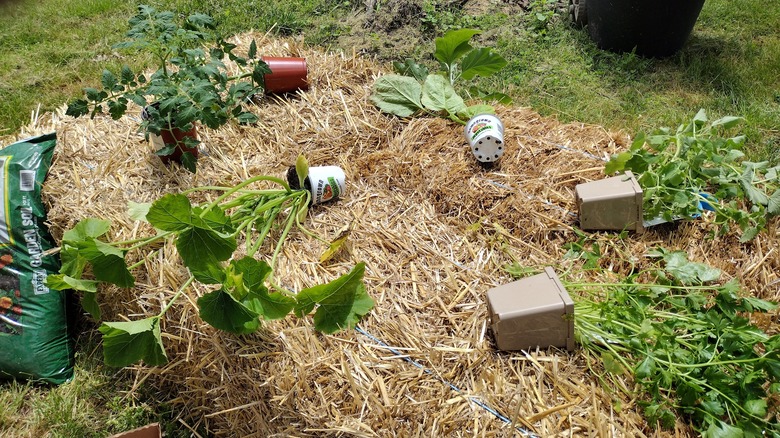
We placed our bales in a rectangle and pushed them together to make one large bed. When you purchase straw, the stems are bound together with string. It is important not to remove the string or it will all fall apart. Because they are bound so tightly, it took some muscle to make the holes in the straw big enough for our plant's roots. We used a trowel and scissors to dig out and cut holes about twice as deep and wide as the root ball of each plant. We then filled those holes with our garden soil, shoving it as deep as we could within the bale.
With the hard part done, we sprinkled a little all-purpose vegetable garden fertilizer into the soil and added our plants, filling the rest of the space with more soil. We even heaped a little extra soil on top to make sure the root balls were completely covered. With all our new plants in place, we watered everything deeply to help reduce transplant shock.
The results
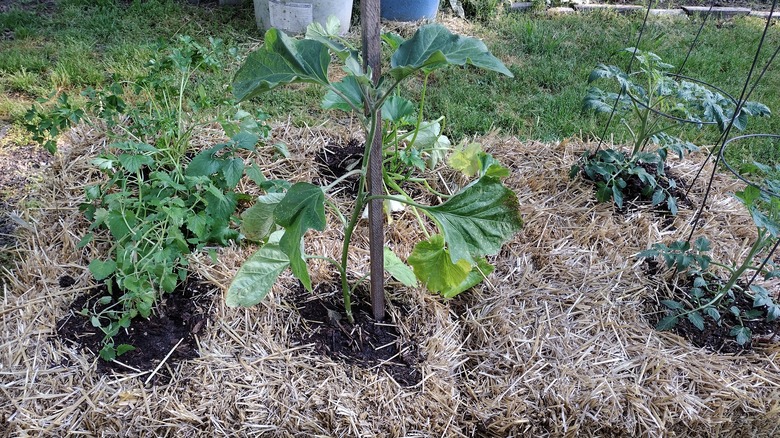
Overall, we are pleased with how things are growing in our straw bale garden. It has been a few weeks, and we are seeing new growth on each of the plants, although it will be a while before we can harvest anything beyond the herbs. The cats are ok with this, though, because they have already gotten to enjoy some homegrown catnip. Although making the holes in the straw was a bit difficult, we appreciated being able to sit in a chair while we worked instead of on our hands and knees on the ground. What used to be a back-breaking task — the digging — didn't result in an afternoon date with the heating pad. We are even happy with the way it looks, since it's fairly tidy and adds an interesting element to our large backyard.
The biggest challenge we are facing is that we planted large seedlings in our straw bale garden just as the weather was starting to get hot and dry. This means we have to water at least once a day to keep the plants from wilting. We are hoping as the straw begins to break down, it will retain more water. If it does not, we will be watering two or three times a day, which is not ideal.
What we would do differently
The main thing we would do differently if we attempt another straw bale garden is to start earlier in the year with smaller seedlings or seeds. Transplanting is hard on seedlings even when they are not dealing with dry conditions, and the larger the plant, the more stressful the move. We would also be prepared with a liquid fertilizer, like fish emulsion, to help ease transplant shock and give the plants an immediate boost of nutrients to help their roots recover.
We would also make bigger holes for planting. Even though it seemed like the ones we made were big enough. After adding soil and fertilizer, it just didn't seem like there was quite enough room for the root balls of our plants, especially the tomatoes. Since making sure our plants get enough water is such a big concern, we believe adding a drip line, or even a homemade DIY watering system, will boost our plant's chances of surviving the hottest and driest days to come.