Budget-Friendly DIY Home Garden Watering Systems
We may receive a commission on purchases made from links.
Many irrigation options are on the market, from low-cost sprinklers to expensive and complicated drip lines. Although irrigation is vital for a healthy garden, it doesn't have to break the bank. In fact, you may have everything you need at home in your recycling bin. Or, perhaps a quick trip to the dollar store can provide all you need for a few bucks.
If you are growing your own food to save money, you don't want to blow a year's worth of savings on a watering system, but if you have more than a couple of garden containers, hauling a watering can around will get tiresome. While a hose-end sprayer is always an option, it may not be sufficient if you live in a region with hot, dry summers. You are going to need a system that allows water to soak deep into the soil without evaporating. Here are a few ideas to keep you on budget.
Water hose drip line
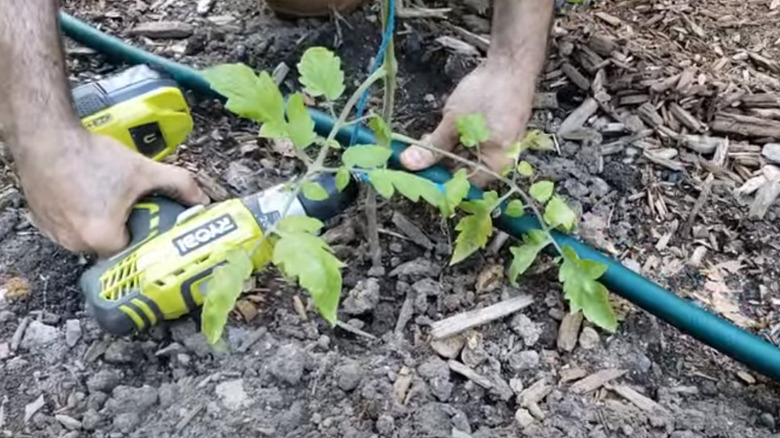
Inexpensive water hoses tend to kink and sometimes crack after a few seasons in the hot sun. It might seem like it's time to toss those old, worn-out hoses in the garbage, but they may still have a little life in them as a drip line. All you need to do is add more holes – they're already leaky, so you might as well use those leaks to your advantage.
Turning an old water hose into a drip line is simple. You will need a power drill with a small bit, about 3/16 of an inch. Drill your first hole 2 to 3 feet away from the hose end that attaches to the faucet. Then, drill additional holes in a straight line 8 inches apart throughout the entire length of the hose, stopping about 2 feet from the end. To keep the water pressurized, add a hose end cap, which you can purchase from Amazon. Place your hose around the base of your plants and turn the water on so that it steadily drips until the ground is thoroughly soaked.
Soaker soda bottle
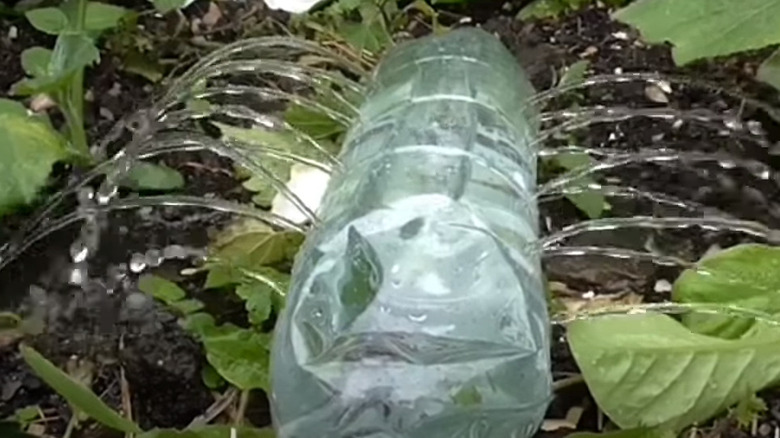
If you do not have a large area to water, you can use a soda bottle to create a mini soaker. This is a good option for smaller raised beds, like a 4 by 4-foot square raised garden. For this quick project, you will need to run a hose from your faucet and connect the open end to the soda bottle.
The trick to this project is using a large nail to make the holes since a drill will likely be too powerful and may tear up the thin plastic. While wearing safety gloves, use the nail to carefully poke holes around the bottle a few inches apart. If you have a bradawl (a tool used for woodworking) or something similar that you can heat up, that will make cleaner holes by melting the plastic. Those of you with a couple of bottles can test out different methods to see what works best. Sometimes experimenting is half the fun! Once you have made all the holes in your bottle, use that magical fix-all product, duct tape, to connect it to the end of your hose. Place your new soaker in the middle of your garden bed and turn the water on just enough to soak the ground.
Pool noodle sprinkler
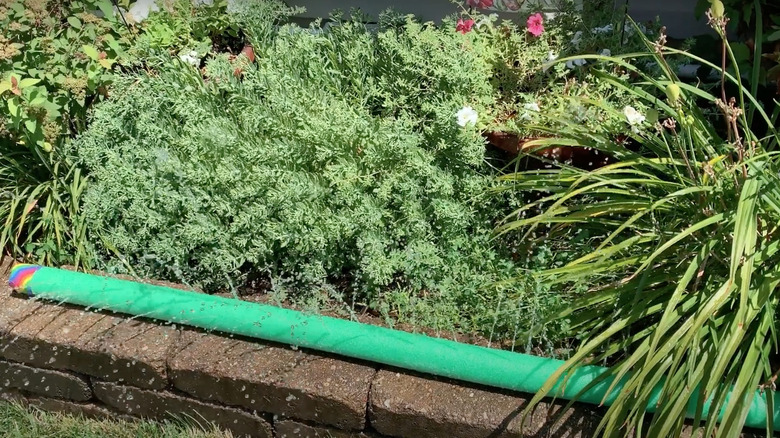
This project is not just for the garden. Sprinklers are practical and fun, and this DIY pool noodle sprinkler is no exception. You can use it to water your plants, but when it's time to play, just move it to the yard for some good, old-fashioned sprinkler jumping! Unlike a store-bought sprinkler, if someone trips or falls around this one, there are no hard metal or plastic parts on which to get hurt – just the soft foam of a pool noodle.
For this project, you will need a hose, some duct tape, and something long and skinny to make holes. Since it isn't particularly difficult to poke holes through this material, you can use a metal BBQ skewer or a screwdriver. Make holes about 3 inches apart on all sides of the pool noodle so it sprays in every direction. Seal off one end with duct tape, then insert your hose into the other. Secure the hose to the pool noodle with more tape, and voila! A sprinkler for everyone to enjoy.
Terra cotta pot olla
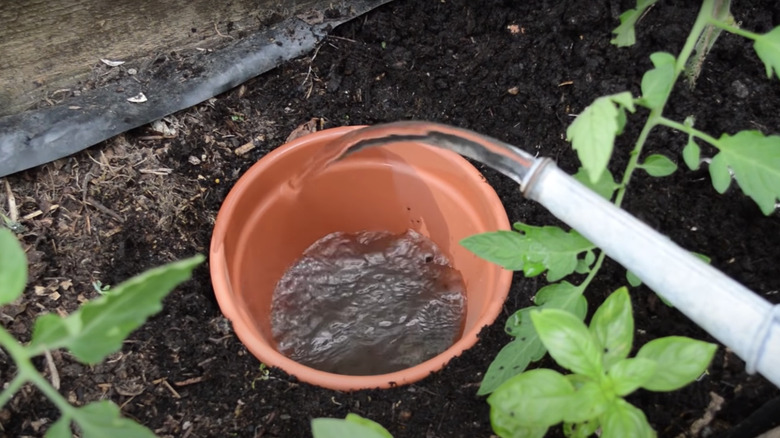
Ok, this one sounds kind of fancy, but ollas are actually an ancient way of irrigating crops. A true olla is made of unglazed clay, a porous material that, when filled with water, slowly releases it into the ground as it dries out. These items are buried halfway in the soil, leaving an open top into which water is poured. Ollas are still used around the world as an effective irrigation tool, but since they are handcrafted, they are quite expensive in the U.S. We can make a modern version of an olla using terra cotta pots.
If you do not have extra terra cotta pots sitting in your shed or garage, you can purchase basic, unglazed options at most garden centers for a few dollars each. The 6-inch size is ideal for this project. Like original ollas, these pots are porous and slowly release moisture as the surrounding soil dries out. Since terra-cotta planters have a large drainage hole, you'll need to patch that with anything you have that's waterproof, like clay, cement, or even a wine cork if it fits! Bury your pot, leaving just the top inch above the soil, fill it with water, and cover it with the matching terra cotta saucer to keep bugs out.