The Big Mistake Everyone Makes When Using A Stud Finder
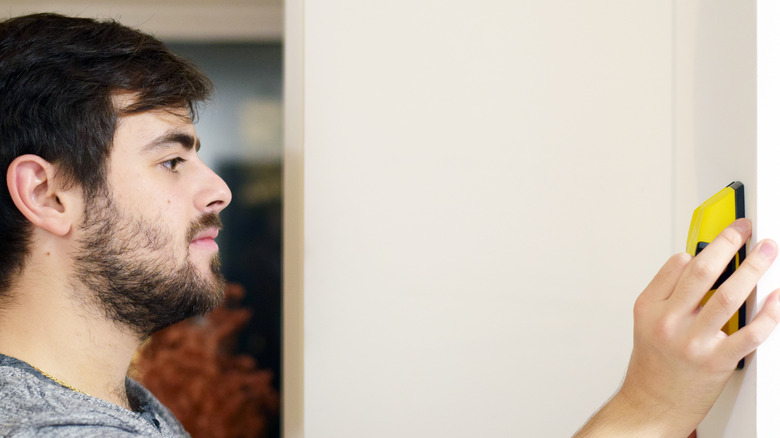
If you're a regular DIYer with loads of home improvement experience under your belt, then you know that the one tool every homeowner should have is their stud finder. These handy devices are vital when looking for wooden wall frames to drive nails through, and they even prove helpful when locating wires and pipes. You need to know what's behind that wall before drilling into it. Ironically, while some people swear by the functionality of stud finders, others would toss it out like yesterday's paper. If you belong to the latter group, you are probably making one big mistake everyone makes when using a stud finder, which is rushing the calibration process.
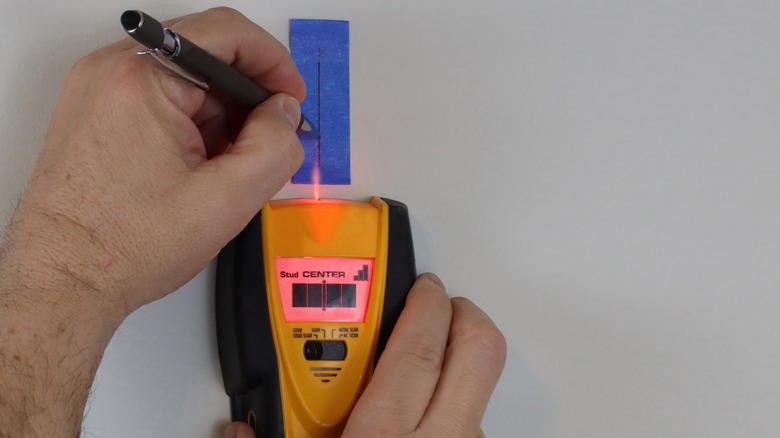
Calibration is arguably the most crucial feature stud finders have because it could make or break your project. When the devices calibrate, they take note of their surroundings through electromagnetic impulses and give you as accurate a reading as possible. The calibration process involves placing the stud finder against the wall to read the wall's density as the base density or zero point and, therefore, searches for higher densities beyond it. Some people rush this process, which results in inaccurate readings. It's usually a trial-and-error process that requires patience and experience to get it right every time. Once you know the intricacies of using a stud finder, you can better recognize when calibration happens.
How to use a stud finder with zero mistakes
When using your stud finder, you have to give it enough time to do its thing. Glide it gently along the wall until it beeps and lights up. The wall support beams usually occur every 16 or 24 inches, so mark the spot on the wall with a pencil and keep going. Eventually, you'll reach another stud and place another mark there. You can measure the distance using a measuring tape. The mid-point between these two studs is where the center is. You have to note this spot for whatever project you try.
You also have to beware of calibrating over a stud, or it will take the stud's reading as the zero point and give you false measurements. Usually, the stud finder has a built-in sensor that will recognize this and alert you. Once this happens, move the device around a few inches until you find only a wall, and then try recalibrating it. Ensure there are no foreign objects around the tool while calibrating. That goes for your pencil and measuring tape.
Sometimes, your stud finder might not work for you, no matter how hard you try. This is usually due to thick walls that make it difficult for the device to make a reading. If this applies to you, you will have to find another way to locate the wall frame because the stud finder won't work.