The Best Way To Fix Super-High Water Pressure
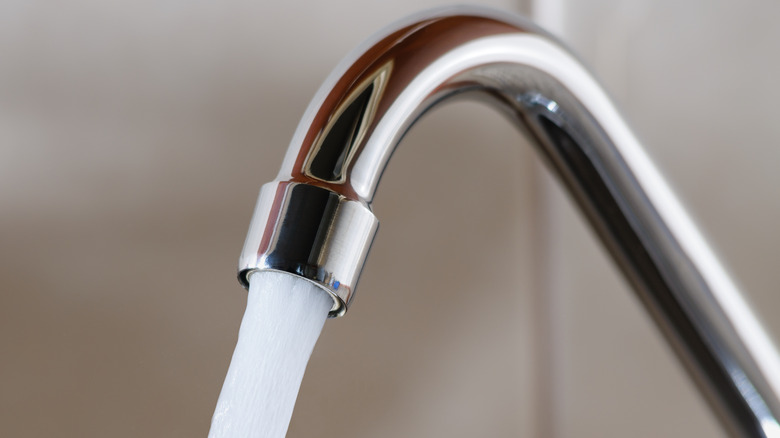
The U.S. Office of Energy Efficiency and Renewable Energy recommends that homeowners keep their home's water pressure at a maximum of 60 psi. In most houses, averages range from 40 to 60 psi, so if your water exceeds this mark, your entire plumbing system may be in danger. High pressure strains your pipes if they're not designed to transport water at such demanding levels (via Out of This World Plumbing).
This strain can cause leaking pipes and damaged appliances, not to mention an expensive utility bill. Alarmingly, such wastage can also lead to drought in many areas. Consider that a single tap can waste up to five gallons of water daily, adding up to two thousand gallons a year (per Universal Plumbing and Sewer). Thus, if your home's water pressure is too high, you're wasting more than you'd imagine.
Fixing this problem saves you money and helps protect America's waterways. However, if your pressure regulator proves faulty after testing it, you'll have to purchase a new one. You can follow this guide to find out what's causing your problem and how to fix it.
Check your water pressure
Common signs of high water pressure include clanging pipes, noisy appliances, and having your hot water run out too quickly (via Smith's Plumbing Services). Still, these symptoms — and even a leaky tap — can be caused by other factors. Testing the pressure will let you know if it's too high.
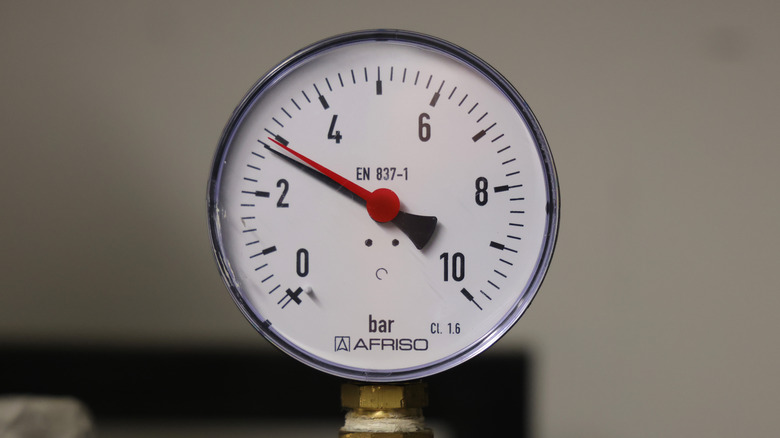
To get started, turn off every tap, faucet, and plumbing appliance to ensure no liquid is running. Next, grab a pressure gauge and fit it on any faucet in your home. Wonkee Donkee Tools advises choosing a tap or faucet closest to your main pipe for optimal results. Be sure to fit the gauge over the faucet as tightly as possible. Then, turn on the water to its maximum setting for an accurate reading.
If your pressure isn't high, you might need a professional plumber to figure out what's causing issues. On the other hand, if it is, the regulator might need to be adjusted. Per Benjamin Franklin Plumbing, a reading of over 75 psi might indicate your regulator isn't working. If this happens, you need to find the regulator to examine it.
Find your water pressure regulator
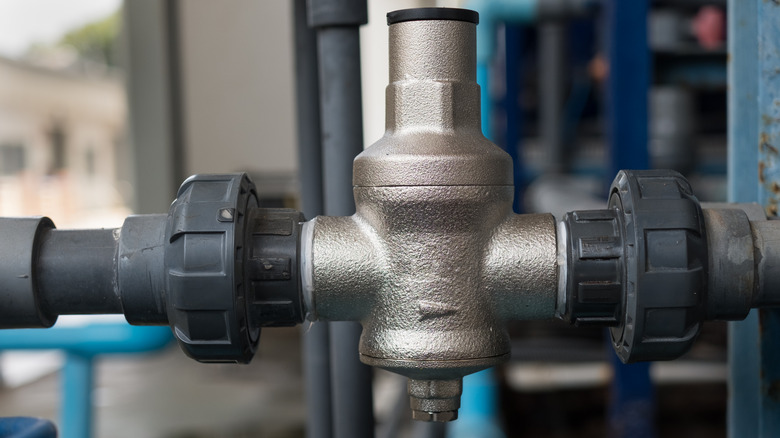
To find your water pressure regulator, you'll need to search for the main pipe that supplies your home with water. This pipeline also has a main valve that can shut off all the water flowing into your home. Appliance Analysts suggests searching the front of your home or digging out your home inspection report. Search for a device that looks similar to a small bell attached to the pipe. However, if you've been searching for a while and still can't find it, you should call a plumber since some houses don't have a regulator.
Once you spot it, check if the pipes near it leak or appear damaged. An old and rusty look indicates that your regulator needs to be changed (per Guardian Plumbers). You should also check for worn-out screws or bolts that look ineffective. On the other hand, if it looks like it's in good condition, you might only need to adjust it. To know for sure, you'll have to try an adjustment to see if the pressure is affected.
Adjust your water pressure regulator
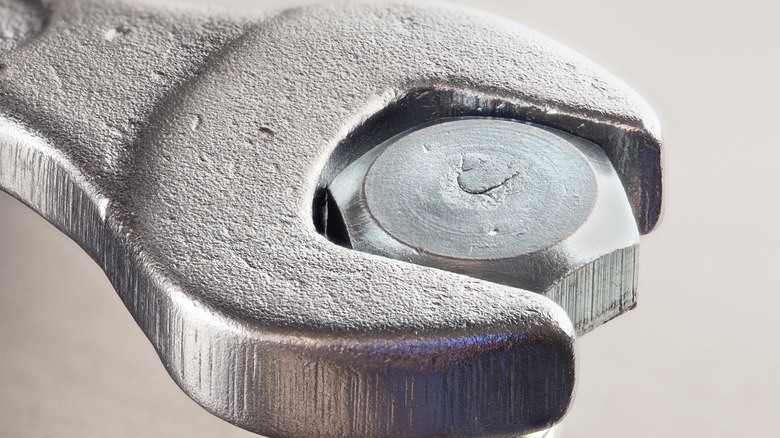
To adjust your regulator, focus on the bolt, nut, or little wheel. Some models have their bolts on the top of the bell-like part, while others position it at the base. Turning the bolt will adjust the pressure. You can use a spanner, wrench, or a pair of pliers, but if your choice is a wrench or spanner, ensure that its jaws make "complete contact" with the bolt before you begin to turn (via Teng Tools USA).
Turning the bolt in a clockwise direction will increase the water pressure. If you're trying to reduce it, you should turn the bolt left or counterclockwise. If you're unsure how much to turn your wrench or plier, start with a slight movement, then test the pressure with your gauge.
El Dorado Irrigation District advises checking through the taps and faucets in your home to be sure that there is a significant improvement. You'll probably need to make one or two adjustments, but with the help of the gauge, you'll be able to get your water flowing at an ideal pressure. If your adjustments don't work, the problem could be from a damaged regulator.
Remove the old water pressure regulator
Before removing your old water pressure regulator, be sure to find a suitable replacement. When buying a new one, 1-Tom-Plumber advises sticking to the same model and specifications. Additionally, always turn off the main valve that supplies water to your home before changing it. You'll also need to drain your pipes by turning on all your taps and faucets, as working with liquid in them can be dangerous.
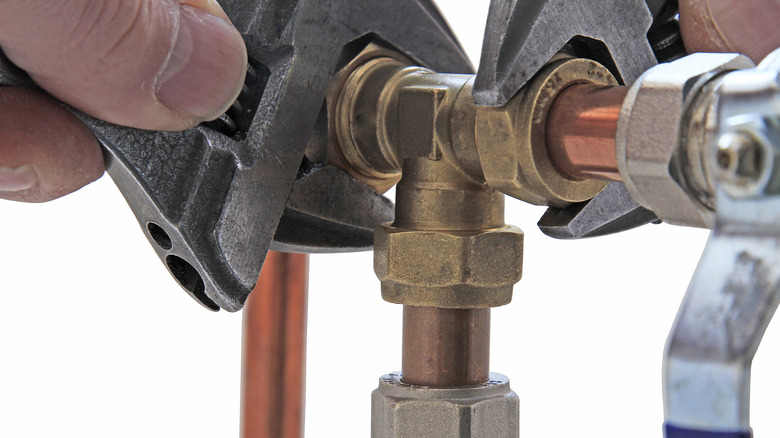
Meticulous Plumbing suggests flushing toilets and checking the taps in your basement to properly drain your home's pipes. Some liquid will probably remain, so place a bucket underneath where you're working. Finally, remove the regulator. The best way to do this is to use two wrenches (per ClearWater Plumbers).
First, use one wrench to firmly grip the valve while you use another to loosen the nuts on each side. If you find it hard to do this, someone else can secure the first wrench while you undo the nut. Once you loosen the nuts on both sides, you can remove the regulator, letting out all the water remaining in the pipes. You might get wet, but the bucket you placed beneath should minimize the damage.
Install a new water pressure regulator
Get the new regulator ready for use by taking off the screws that came with it. You'll only need these if the ones on your pipes are in poor condition. Irrespective of the brand, it should be packaged alongside thick, black rubber rings. These rubber rings are gaskets and help form a reliable seal to prevent leaks (Via REthority).
To get started, place the gasket in the regulator. You should ensure it sits in the right groove and doesn't slip behind (via McWane Ductile). Next, position the new valve in the same way the old one was, with the bell-like part on top and the pipes connecting through the bottom part. When properly arranged, you can use the nuts to seal the assembly.
To do this, hand-tighten both nuts before using a wrench. Next, use one wrench to hold the regulator in place while you use the other to tighten each nut until secure. Congratulations! You've finished the installation. You should be able to feel a notable difference when you test the water pressure with your hands, but you should use a gauge just to be sure. Finally, test and adjust the regulator bolt until your water flows at a safe and convenient pressure.