How You Should Be Cleaning Your Vacuum
We may receive a commission on purchases made from links.
Cleaning your vacuum is mostly straightforward, but there are a few gotchas that can take the results from "better than expected" to "somehow made it worse" if you're not careful. Fortunately, it's nothing overly complicated, and as long as you pay attention to the type of vacuum you're taking care of (bagged vacuum or bagless, canister or upright, or maybe one of the cordless/stick vac models) it shouldn't be hard to keep a handle on.
There are some supplies you'll need, and while there's room for substitution in some cases, you should be a little deliberate about getting the best options for your vacuum and its particular situation. For example, if you're dealing with a lot of smelly pet hair, you'll need slightly different supplies and a different cleaning schedule. After all, everyone knows that vacuum-that-smells-of-dog scent, and no one likes it.
There are a few consumables you'll want to keep on hand: A replacement bag, if your vacuum uses one, and replacement filters for any disposable ones you will replace. You'll also want to have some dishwashing liquid on hand, and a small container to put it in, along with some warm water. Microfiber cloths are usually pretty good at vac cleaning, though you might choose a different option if you anticipate more wet than dry wiping. If your model has a rotating floor brush, you will need some pointy scissors. A grout brush or something else with similar reach and the ability to work at any angle can also be handy. And if you have access to a compressor and a blower nozzle, you'll find a good use for it. You might need a screwdriver for light disassembly. Finally, consider wearing a dust mask; getting rid of this stuff doesn't have to mean sucking it into your lungs.
Step 1: For vacuums with bags
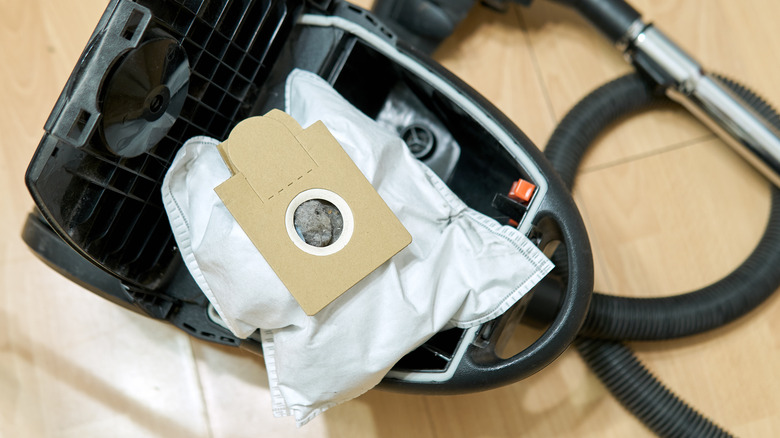
Vacuum bags are a hassle, as evidenced by their very gradual march toward extinction. But it's also true that some of the best vacuum cleaners use bags. And, besides, if you have a bagged vacuum, you have to dance with the vac that brung you. It shouldn't be too challenging if you do it right.
The bags aren't just convenient trash containers. They are, perhaps most importantly, big air filters. Let's take a step back. Vacuums usually work by sucking up whatever you want to be rid of, then expelling the air and as little dust as possible. This requires filters, so vacuum bags are made of porous material that allows the air to pass without creating a counterproductive dust cloud. Bagless vacuums also have these filters, but they're simply filters.
Dust isn't all you're filtering. Some bags are designed to filter out bacteria and other contaminants, down to HEPA filter level (about .3 microns). Obviously, the finer the pore size of your vacuum, the more power the vacuum needs to pull air through the filter. And since it's a filter, as it is used it becomes increasingly clogged with dust, becoming increasingly less efficient. Follow your manufacturer's guidance on when to replace a vacuum bag, sometimes when the bag is only half full. There are some obvious signs that it's about time: If the vacuum is suddenly not sucking as well as usual, if it's smelly, or if you've just vacuumed a particularly dusty room or surface. Some vacuums have an indicator light designed to tell you when the bag needs to be replaced, so tune into that if you have one.
Step 1: For bagless vacuums
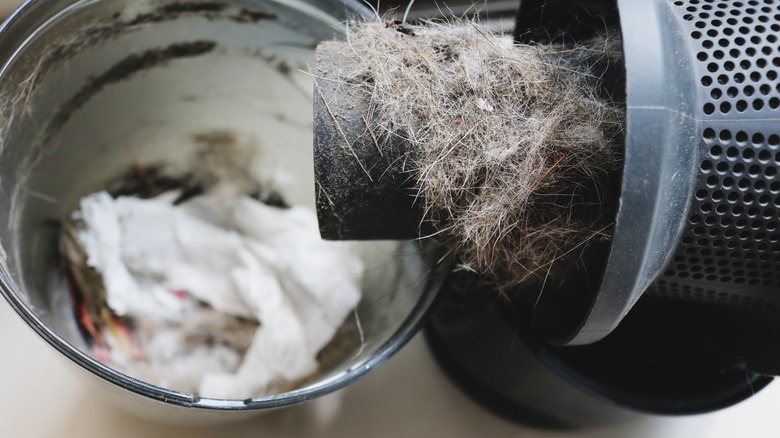
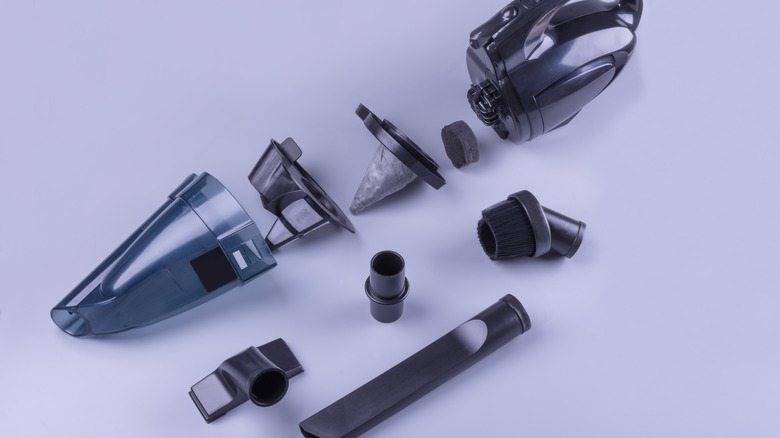
Bagless vacuums usually have a built-in compartment (sometimes more than one), rather than a bag, for storing debris until you're ready to dump it. We're going to call that compartment a "canister," but keep in mind that there's a style of vacuum popularly known as a "canister vacuum" that could be either bagged or bagless. The parts tend to be similar among models with such compartments, but figuring out what's what (and how to avoid accidentally throwing away something important) can be a little tricky. The key thing to do when removing your vacuum's canister for cleaning is to follow the manufacturer's instructions. Beyond that, just keep an eye on a few things.
Your average bagless vacuum has at least two filters: one before the vacuum's motor (pre-motor filter) and one after it (exhaust filter). Some filters are washable, while some (particularly paper filters) must usually be replaced fairly often. You might also have dust collection elements that direct airflow, but aren't really filters. There can also be plates that allow you to open and close at least one end of the canister, and sometimes these are removable. The key here is this: Don't throw any of the reusable parts away accidentally. It's surprisingly easy to do.
Cleaning the hard parts of a canister mechanism is usually a matter of wiping them down well with a microfiber cloth, or using warm, soapy water if necessary. Use a grout brush or similar long-handled device to reach crevices that you can't get to with a cloth. And if you have one, a compressor with a blower attachment can be handy to get the remaining dust out of corners. You're going to want to use compressed air outdoors, lest you undo all your vacuuming work in a single blast.
One key to success is always being sure that parts are completely dry before reassembling your vacuum. Putting together a damp vacuum is inviting mold and other odors in, and once they're in they can be difficult to get rid of.
Step 1: For cordless and stick vacuums

There's a huge variety in the realm of cordless and stick vacuum cleaners, but they usually have a canister like a bagless vacuum. However, there are some important differences in how the canister works, and how it is handled. On average, they have fewer filters and tend to not have replaceable filters. Because of the smaller size, there also tends to be more opportunities for the airflow to have bottlenecks... places where dust, hair, and the like might get trapped, waiting for cleaning.
Clean your stick vac canister by opening the compartment and dumping the contents, then inspecting the entire device for clumps of debris that are prone to getting stuck in corners, at openings and transitions, and wherever something like a hinge or joint can grab onto fibers or dirt. A wipe-down with a microfiber cloth is usually sufficient for the canister itself since these vacuums are usually used for lighter-duty tasks, so long as you can get the device as clean as possible. Use compressed air (a can of air will do, even if it's a little kooky to buy cans of air) and a brush as necessary. Use soap and warm water only when directed to by the manufacturer. Using anti-bacterial wipes is always a pretty good idea when cleaning a vacuum, and that might be especially true of cordless and stick vacs that are used on surfaces that get more hand contact than floors.
Speaking of re-assembly, if your vacuum is complicated but you can't put your hands on the user manual, consider taking a photo of it so that you will be able to tell how things go back together. It's also helpful to lay components out in the order you removed them, which gives you a clue as to the order in which to put them back together.
Step 2: Clean the filter(s)
Bagless vacuums typically have as many as three filters: one before the motor, one after the motor, and a HEPA filter on some models. Some models have more devices that look like and/or function like filters, especially if it has multiple dust-collection compartments. (You'll usually be able to recognize these by their characteristic cylindrical shape.) All of these types of filters are handled differently.
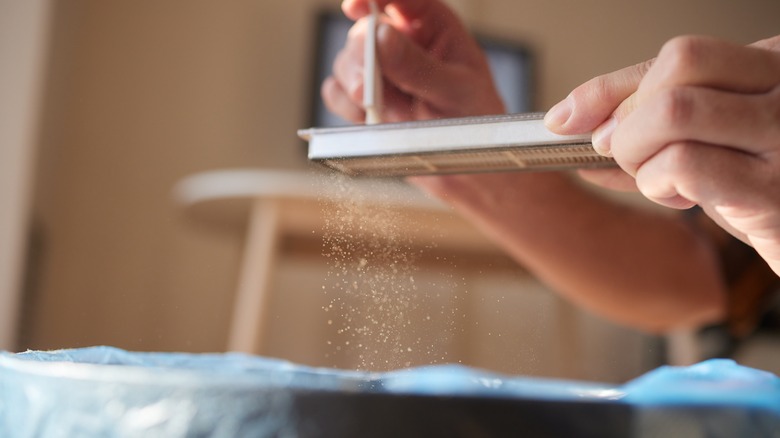
Pleated paper filters should usually be replaced during periodic cleanings. It's possible that you can prolong one's life slightly by tapping the filter on a hard surface to knock off most of the grime, then blowing compressed air backward through the filter carefully (remember to only do this outdoors!). You won't get it all, which hurts the performance of the vacuum, so remember that this is just a stopgap measure for when you're low on replacement filters.
Foam filters and filter cartridges should usually be rinsed under cool running water and squeezed out a few times, then left to dry before reinstalling. You don't want water droplets flying through your vacuum motor, of course, but don't be tempted to use a clothes dryer to speed up the process. You'll almost certainly deform your filters. Mesh, silicone, and hard filters can usually be rinsed and left to dry. As always, follow your manufacturer's instructions.
Step 3: Clean the base plate
Most bagged and bagless vacuums, and some cordless/stick models, will have a base plate that needs to be cleaned regularly. This is, after all, where the vacuum meets the road.
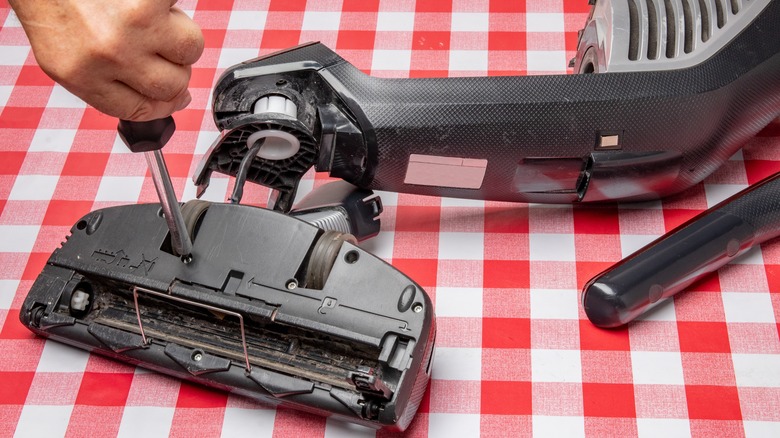
For most upright vacuums and some stick vacs, you'll want to remove the base plate that holds your floor brush in place. It isn't necessary to perform this step every time you clean the vacuum unless you use it heavily. Let your grime be your guide. This is the step in which you're most likely to need a screwdriver. Remove the base plate and roller brush per the manufacturer's instructions. Clean the base plate with a microfiber cloth. While you're at it, clean the vacuum's wheels. These might require a little soapy water, as they tend to have more gunk stuck to them than any other part of a vacuum.
Do yourself a favor and put all the screws you take out (if any) when cleaning the roller brush and base plate in one of those magnetic trays or a container you can close. There's a good chance you'll drop one, or five, and it might be a bigger deal than you think. Some modern vacuums are engineered in such a way that certain functionality depends on the integrity and tightness of the vacuum's housing. For example, a missing base plate screw could cause some models to be loose around the joint where the vacuum's base swivels around its main body, which can cause the limit switch that automatically turns the roller on (which is activated by changes in the relative positions of other objects) to malfunction.
This step might not apply to cordless and stick vacs, depending on how they're designed.
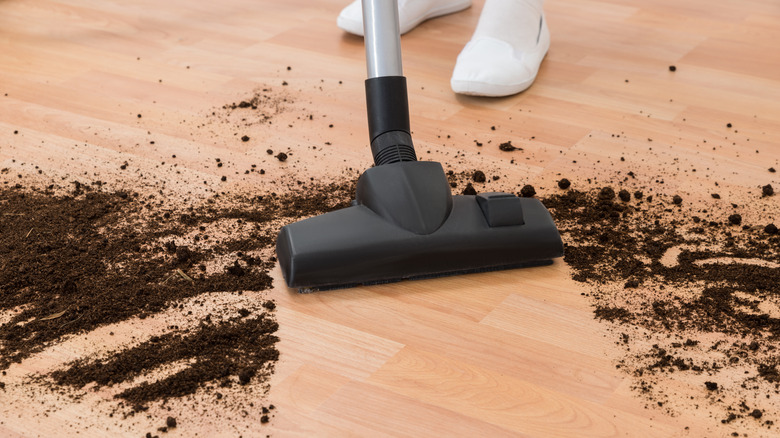
Step 4: Clear the floor/roller brush
After the canister, the roller brush is among the tricker vacuum parts to disassemble and clean. They are usually entangled with a belt and a surprising number of fibers like hair and thread can gum up the works. You'll also need to clean the roller brush's housing and the vacuum port above the roller.
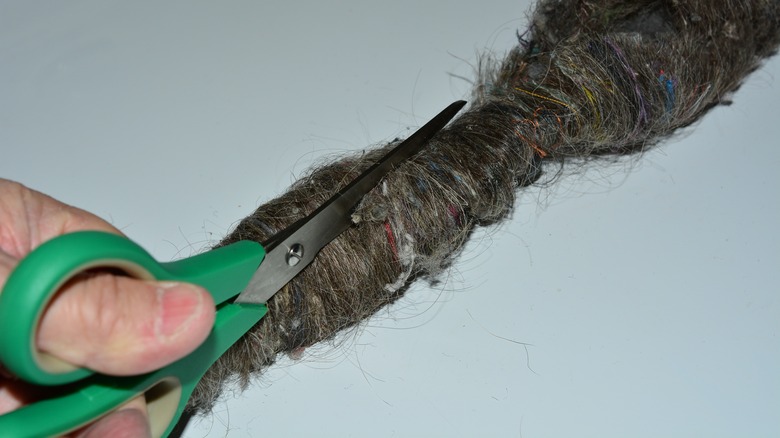
Once you've freed the brush from its housing, wipe it down. Brush and/or suction off debris from the brush bristles as needed. You'll probably have some fibers... hair or threads, mostly... wound around the brush spindle. Cut these with your pointed scissors to simplify pulling them off. Take your time and get all of the fibers; leaving them there will eventually cause you to have more serious problems, like a stuck roller and a damaged belt. In fact, while you're at the brush-cleaning business, it's probably a good idea to inspect your belt for damage or excessive wear, and replace it if necessary.
Clean the recess that the brush is housed in, paying special attention to the air port through which the vacuum sucks stuff freed up by the brush. This is a common choke point in which debris can get trapped, making your vacuum work less well than it could. Clear any obstructions before reassembling the vacuum.
Step 5: Clean the vacuum's exterior
You can probably get away with just wiping down the exterior of the vacuum with a microfiber cloth, but a little more aggressive cleaning (and maybe even disinfection) might be called for. Vacuums are largely able to function regardless of their external cleanliness, but there are some exceptions. Obviously, you want to make sure any port that allows for the ingress or egress of air is clean and free of obstructions, and it's a good idea to keep any moving parts, like wheels and joints, clean to ensure that they work as well as possible. Another reason to be a little particular about the condition of the outside of your vacuum cleaner is that young children are strangely attracted to these devices, and if you have any toddlers ambling around when you have the vacuum out, you don't want them handling remnants of the dirt you're trying to get rid of.
The cleaning itself is fairly trivial. A dry wipe-down with microfiber is often enough. For tougher messes, a damp cloth will probably do the trick, or use a disinfecting wipe.
Step 6: Reassemble the vacuum
You're going to put everything back together the way it was originally. There are a few potential trouble spots to watch for, and we've touched on a few of them already. First, and perhaps most importantly, make sure everything is dry before putting it back together. Mold, sour smells (or worse), and damage to electrical components like your vacuum's motor can result from sticking everything together wet and hoping for the best. And debris will tend to get trapped wherever there is dampness, inevitably causing your vacuum to look and perform worse.
We mentioned taking photos and laying things out in the order they are disassembled, to make putting them back together easier. In the event that your disassembly involves more than one size (including length) of screw, you'll want to take care to put the right ones back in their corresponding holes. One approach is to color-code the screws by marking their heads and their out-of-sight locations (such as the base plate) with various colors of Sharpie.
If you're averse to defacing your appliances in such a way, you might mark them with sticky notes or colored flags. You can write some code on them that corresponds to their size/length. Try using one of those pill organizers with a compartment for each day of the week to temporarily store the screws. It might sound like overkill, but using a long screw where a shorter one is called for leaves the housing damaged in one place and loose where the long screw should have gone.
Step 7: Clean the vacuum hose and attachments
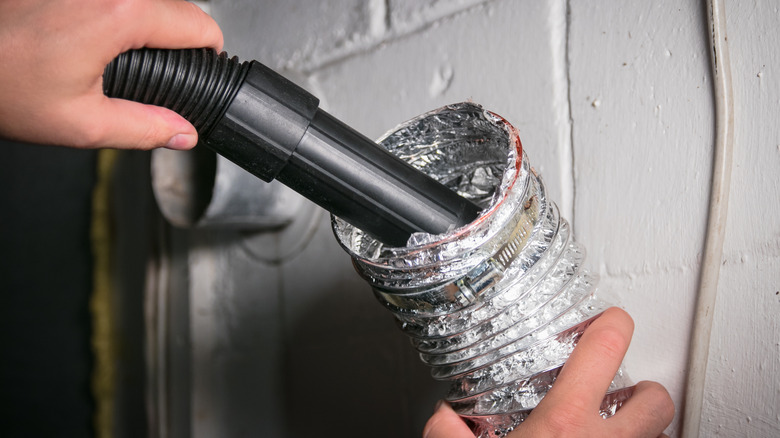
Cleaning a vacuum's hose can be challenging, as they're usually corrugated affairs that want to collect grime and hold it fast in places that can be hard to reach. The trouble is that you want to vacuum out the hose, but that obviously won't work, because if it did, you'd be done before you got started.
What's needed here is a long, skinny brush, and the place to find one is the "dryer vent brush" search results on Amazon. These can be had in lengths up to 30 feet, which is overkill for a vacuum hose. (But, really, this whole business is overkill to some degree. Dirty dryer vents can be a fire hazard, but "dirty" is the natural state of the inside of a vacuum cleaner hose.) You can remove the hose for cleaning, but it probably makes more sense to use the brush on it, then suction out all the loosened dirt. When you're done, wipe down the outside of the hose and, if necessary, reassemble.
Tips for cleaning an odorous vacuum

It's not unusual for a vacuum to acquire odors, since you're not always vacuuming up the freshest-smelling things in your home or car. Here are some general tips on managing to keep your vacuum as neutral-smelling as possible, or at least smelling good enough to mask stubborn odors.
Empty the canister immediately after vacuuming anything smelly. Some plastics tend to absorb smells, and there's no reason to give them extra time to do so. Put a dryer sheet in the vacuum bag or use strips of paper towel with essential oil or vanilla extract. Take care with essential oils. Some oils can cause endocrine system disruptions or allergic reactions in some people, and since the presence of the oils isn't actually cleaning anything, there's no good reason to take risks.
Add anti-microbial wipes to your normal cleaning regimen. To the extent that the offending smells are caused by bacteria, this should help. Use the most aggressive cleaning method allowed in your vacuum's owner manual, such as cleaning with warm, soapy water.
If you find that your vacuum acquires pet-related odors from specific areas, such as a dog bed or around a litter box, consider using a dedicated vacuum for those areas. That vacuum won't smell any better, but your main vacuum cleaner should.