The Best Way For Renters To Fix Up Their Apartments
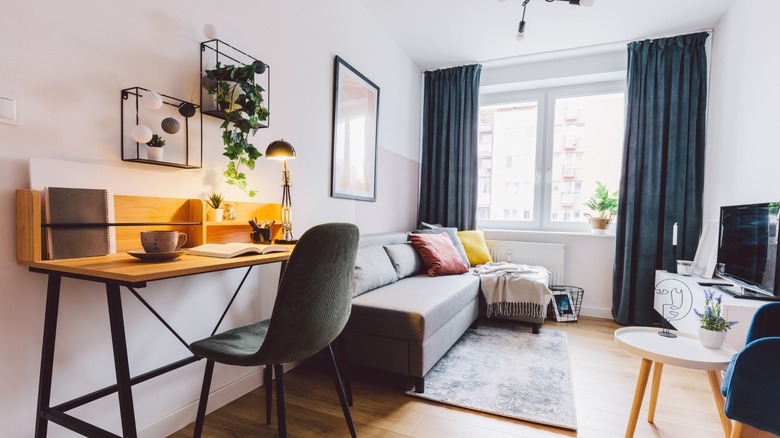
Finding a decent apartment isn't easy, especially with the unprecedented rent price increases throughout the U.S. over the past few years. Renters must often make concessions, settling for spaces that need fixing up to make them comfortable and aesthetically pleasing. And sometimes, landlords don't make previous tenants complete minor repairs like nail holes and scratched-up drawer interiors. Things like that aren't hard to fix and won't cost much, and new tenants can add personality with fun aesthetic upgrades to make the atmosphere homier.
But before grabbing spackle or shopping, new tenants should read the lease and check with the landlord or property management company. In many cases, they will give the go-ahead, but getting the approval in writing is important.
The best ways for renters to fix up apartments aren't expensive and aren't structural. And if the lease specifies that the apartment must be in the original condition after the contract ends, look for upgrades that can be changed back. Original materials like switchplates and showerheads should also be saved for reinstallation. And leave major work like repairing an oven or installing a new sink to the owners — don't mess around with major projects like those. Here are some easy ways to upgrade your apartment if you're renting.
Fix holes in the walls
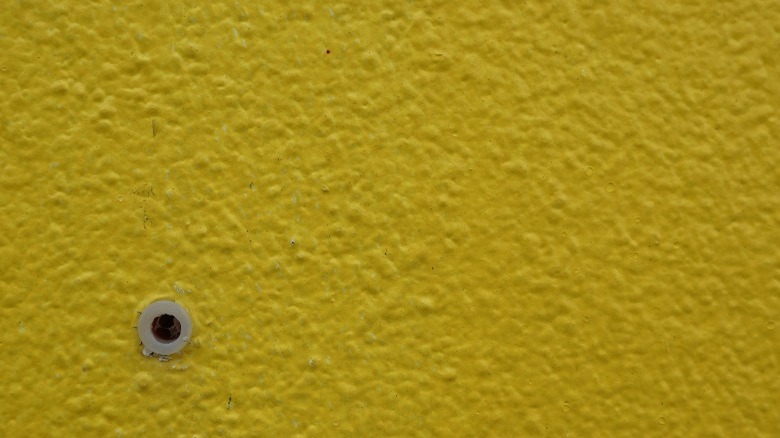
Property owners might take the time to fill in unsightly holes in apartment walls, but then again, they might not. New nails can be hammered in to support new artwork and shelves to solve the problem. If that isn't desirable or doable, only a few tools are needed to fix those voids.
If there's a drywall anchor in there, that can be easily pulled out by hand. Home stores sell wall repair kits, and the method used depends on hole size — smaller ones can be filled with a bit of joint compound or spackling. Once that is smoothed and dried, it can be lightly sanded. Holes ranging from ½ to 1½ inches should be filled with adhesive-backed fiberglass mesh first, and ones up to 6 inches need a rigid metal patch inside for support. Leave larger holes to the landlord because the drywall will need to be cut out and replaced.
Line the kitchen drawers
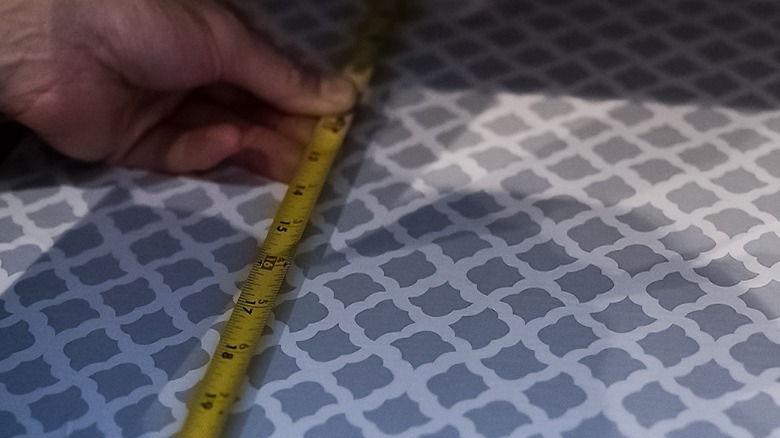
No one likes to open up a drawer and see dirt, dust, grease, and scratches inside, but this is a common scenario for apartment owners. It's worse with kitchen drawers because food and drink residue can also harbor bacteria. Lining them will improve their look and make maintenance easier, but they must be cleaned out first. Vacuum them with a hose attachment, and use an all-purpose cleaner and microfiber cloth to get out the gunk. Lingering smells can be quashed with baking soda and a damp sponge. Leave the drawers open until they are completely dry.
Contact paper is the best option for lining drawers because it is easy to install and remove. There are more choices than ever, and the waterproof kind is perfect for kitchens. Use a tape measure for the drawer insides and add an extra ½ to 1 inch all the way around. Remove the backing and place the paper at the back end of the drawer. Slowly push it against the drawer bottom, using a blunt-edged knife or tool to smooth out the air bubbles. Then, carefully use a craft knife or razor blade to cut off the excess.
Fix the hole in the carpet
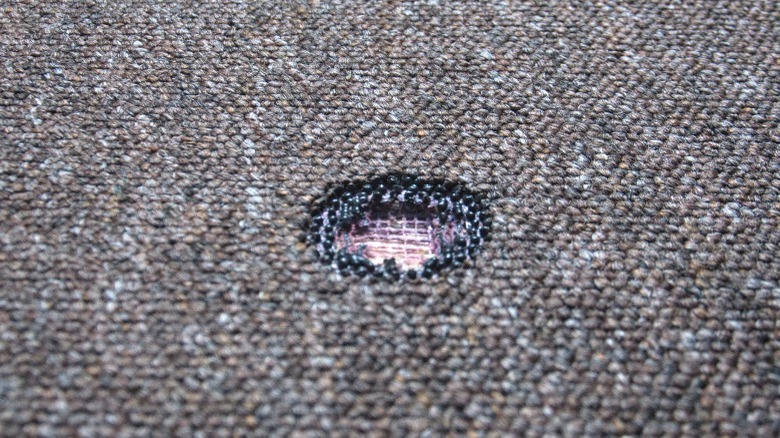
Carpets take a lot of wear and tear, and while it might be easy to get out a stain, holes are trickier. A landlord might replace carpets that have large, obvious holes but leave smaller ones alone. Holes can be covered up with area rugs and furniture, but when a small piece of matching carpet is available, it can be used for patches. Extra ones might be stored in a closet, or the landlord might have some. Place it on the carpet to make sure it matches first, since the existing carpet might be faded.
Cut a circle or square out around the hole with a utility knife or carpet knife. Then, place the cutout on top of the matching piece and cut out a new patch. Lower it into the hole, and if it doesn't fit like a puzzle piece, either trim it down or cut out a new one. Cover the back with double-sided carpet tape and push it into the hole. Mist the area with a bit of water and go over it with a wide-toothed comb.
Attend to that noisy toilet
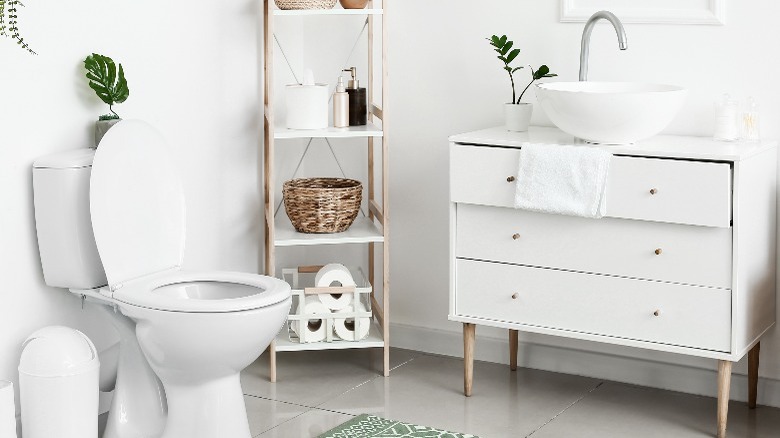
Few things are as aggravating as a toilet that won't stop running after each time it's flushed. Jiggling the handle is a temporary measure because the noise will start up repeatedly. When a toilet constantly runs, it could have a leak, so that should be checked first. Remove the tank lid and draw a mark at the top of the water level, turn off the valve under the toilet, and wait 60 minutes. If the level drops, let the landlord know about the leak. When toilets aren't leaking but constantly running, the likely culprit is the flapper. It connects by a chain and rests beneath the tank water. Flappers normally open when toilets are flushed. Sometimes the chain needs to be adjusted, but if the flapper needs replacement, it can be disconnected.
If that doesn't help, the fill valve and float ball might need adjusting. This valve has an adjustment screw on the top that can be turned to change the tank's water level. The toilet's fill valve should not have water leaking out of it and if it does, it can be replaced. A final reason for constantly running toilets is a leaky flush valve. The flapper should be tightly sealed against this, and if there's excess water, that valve can be smoothed down with fine sandpaper or be replaced.
Remove marks from walls and floors
Many floor and wall stains can be easily removed, but others cannot. Before attempting removal methods, test them in a hidden area like a closet floor or a wall behind a curtain. If the mark is gone and there's no discoloration or other damage, give it a try. The least invasive method is a microfiber cloth damped with a drop of gentle dishwashing liquid and water, but a baking soda paste might be even better. Work slowly and carefully, in a circular motion.
When those attempts fail, try rubbing a small amount of white toothpaste on the mark. These products are made with gentle abrasives and don't have coloring like gel toothpaste. Another option is a Magic Eraser or another brand of melamine sponge. These are a bit more abrasive than the other methods, so don't use too much force, or it could damage the surface.
Touch up the paint
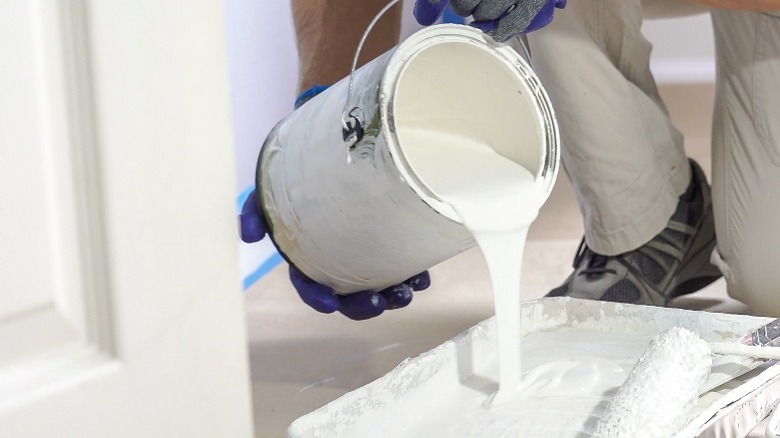
Painting an entire apartment is a big undertaking, and even if the lease allows it, touching it up might make better sense since it requires less time and money. But this fix will look messy and unfinished without the same color paint. See if there is leftover paint on the property for tenants to use, but if not, call a local paint store and ask if it has a spectrometer for color-matching technology. If it does, cut a small square from the drywall in an inconspicuous place and take it in. Paint-matching smartphone apps are more convenient, but usually aren't as accurate.
Since it's hard to know what kind of applicator was used with the original paint, small paint rollers are best since they're easier to control. A small foam brush can be used on smaller sections. Clean the wall with a clean, damp sponge and dry it with a microfiber cloth. Look at the surface carefully, because there could be imperfections like small holes and scratches. Small ones can be repaired in the same way as nail holes.
When the surface is good and smooth, prime the area with latex primer paint made for interior walls. This can be done with a sponge applicator, but only use it on the area being touched up. After that dries, mix the paint and start applying it from the center of the area being touched up. A second coat can be painted on after the first one dries.
Regrout the shower
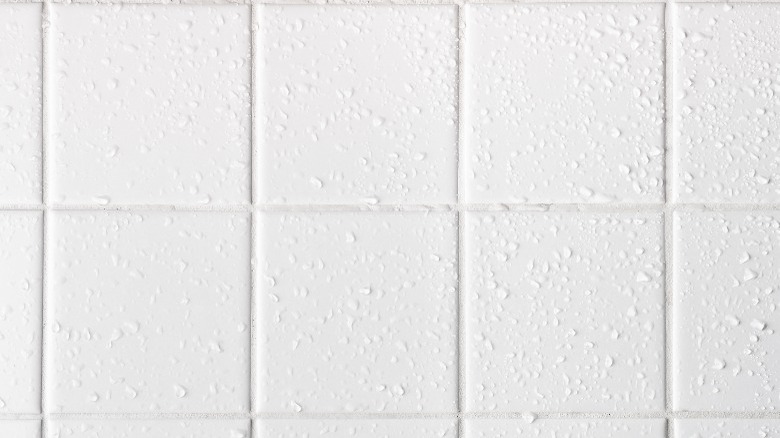
Newly tiled showers look clean and pristine, but shower time can be unpleasant once the grout discolors from use and mildew. A mold remover product, diluted bleach, or vinegar could help; otherwise, regrouting might be the best solution. The old grout has to be removed first, and this is done with a grout rake. There should be enough grout left to come up halfway to the tiles' thickness — don't leave holes.
The new grout can be in powder or pre-mixed form and should always be waterproof. This gets pressed into the horizontal and vertical tile joints with a trowel, using upward, diagonal strokes. Excess grout must be removed as quickly as possible to prevent dried residue on the tiles. Use a damp sponge to remove it, keeping clear of the damp grout in the joints. It's a good idea to work in sections rather than waiting until all the grout is troweled-in. A grout shaper can neaten up the work after it is partially hardened.
Replace electric stove drip pans
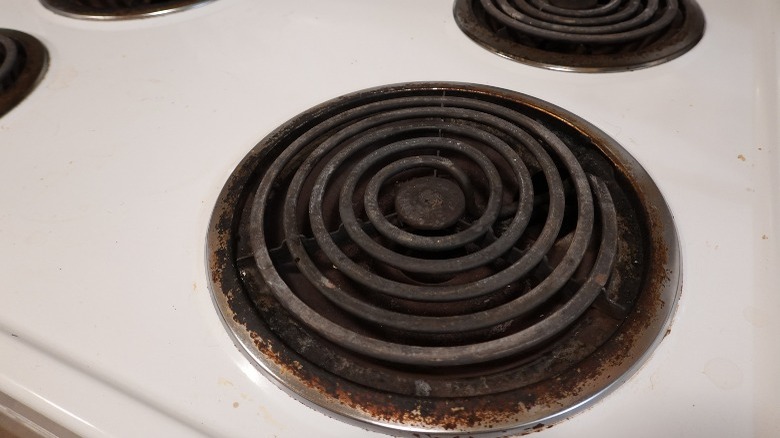
Having to look at someone else's food residue can be gross, and one of the best places to find it is in a stovetop's drip pans. Years of blackened, burnt-on gunk looks pretty unappetizing, but those pans could start smoking when the burners heat up. This could also affect the taste of the things that get cooked on them and stink up the place.
Drip pans can be soaked and scrubbed, and this can require a good amount of time and elbow grease. And there's no reason to deal with all that since the pans aren't that expensive. They can easily be slid off the stove and traded for new ones. To find the right replacements, get the brand and model name of the stove and look it up online. Manufacturer websites often sell the parts, and they can also be found on sites like RepairClinic.com. Finding drip pans for older models is harder, but some generic ones might be close enough to fit.
Give the garbage disposal some TLC
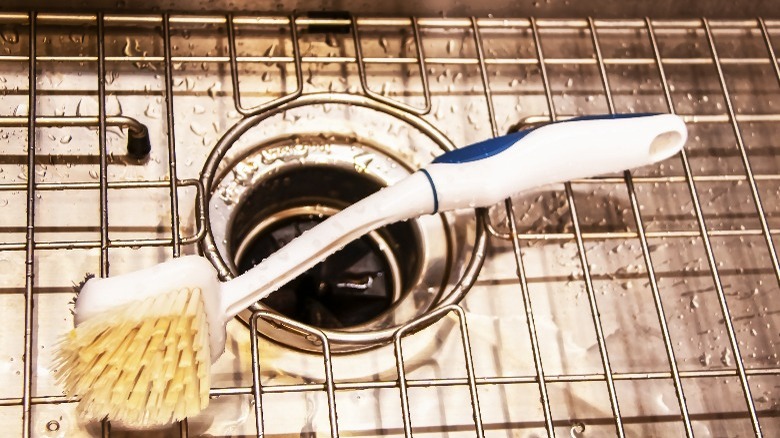
It is impossible to know everything that a previous tenant put down a kitchen sink garbage disposal, and in many cases, these units must be replaced. But when a disposal is sluggish or smelly, new tenants can give it new life with a few clever tricks. It should first be checked for obstructions, but the power must be disconnected first. Use a flashlight and tongs to poke around and remove anything stuck in there. Then, reconnect it, fill the sink halfway with water, and run the disposal. If the water goes down easily, disconnect it again and pour in a few drops of dish detergent and some baking soda. Clean the inside with a long-handled scrubbing brush and warm water, and run it again with more water.
Now comes the cool part: ice cubes. These will sharpen the blades and remove lingering smells, but be aware that this will be pretty loud. Just drop in a handful and run the disposal for a few seconds. And to prevent clogs and breakage, avoid putting four kinds of items down there: fibrous, stringy things like celery; hard things like corn cobs; starchy foods such as potatoes or rice; and leftover cooking oil.
Replace the showerhead
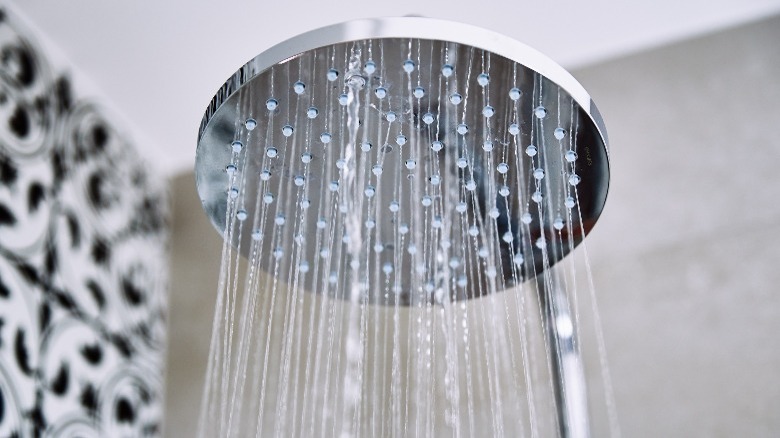
Old shower heads can be clogged and inefficient, so the water streams can be sporadic and wasteful. But before removing the old one, it's important to have the replacement ready. It can be upgraded from basic to a rain shower head, a hand-held one, high pressure, low flow, or a dual shower head — there are plenty of options out there.
If the old shower head cannot easily be removed by hand, use slip-joint pliers, but protect the shower arm with a towel or cover the pliers with electrical tape to prevent damage. Holding the arm, turn the old head counterclockwise with an adjustable wrench. The shower arm threads should then be cleaned of any mineral deposits, rust, and old tape.
Apply new plumber's tape to the shower arm, making three tight loops in a clockwise direction. The new shower head must be installed in the same direction, following the manufacturer's instructions. Test the water; if there is leaking, more plumber's tape or good tightening should work.
Fix the door that won't close
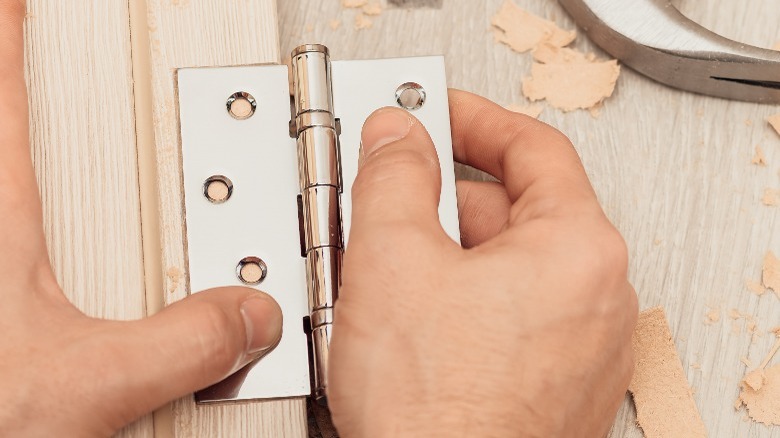
When doors aren't installed properly or abused, they might not close securely, which can be a real problem. The root cause could be the latch, but it might be something else. When a door doesn't latch shut, try smoothing down the strike plate hole with a metal file or make it larger with an electric planer. If the strike plate is bent, it can be unscrewed and hammered out on a flat surface.
Loose hinges also prevent doors from closing, and can easily be tightened up with a screwdriver. If that isn't effective, they might need to be replaced. Another option is to remove the screws and glue a toothpick into the hole. Put the screws back in after the glue has dried — they will fit better. And when a door doesn't close because it's out of alignment with the jamb, use sandpaper to smooth the edges and try closing it.
Install new switch plates
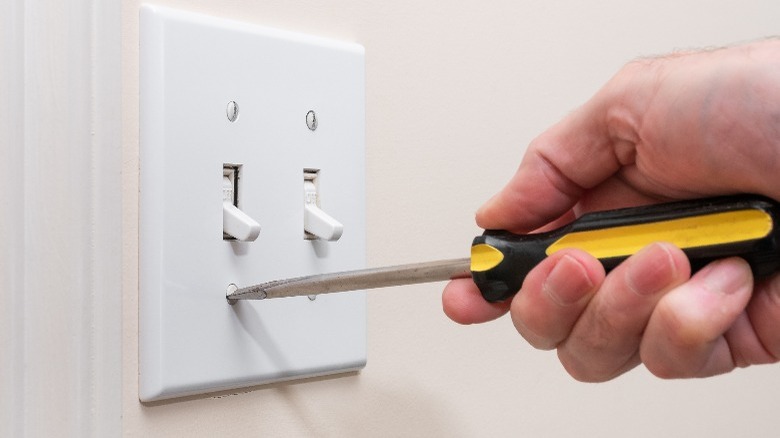
Old switchplates can have impossible-to-remove stains and scratches, and if they're wallpapered over, the material can get torn. Sure, they can be unscrewed and cleaned, but why not buy new, inexpensive ones when someone has already gone to the trouble of removing them? Unless they are customized or high-end, switch plate prices range from $2 to $20. When shopping for replacements, the most important part is finding compatible ones that will fit: One that has two openings won't work when there are two switches and a dial, for example.
Once the new plates are ready, shut off the electricity and remove the old ones with a screwdriver. If it's bonded to the wallpaper, carefully remove it with a blunt-edge tool or butter knife. Screw on the new plate, but don't tighten it. Walk back and look at it from a distance to ensure it's straight. Then, use a level and readjust if needed before securing the screws.
Peel-and-stick floors

Peel-and-stick flooring is a great way for renters to temporarily upgrade floors in apartments. The pieces have an adhesive backing and look just like brand-new floors once installed. It's typically made from vinyl but looks like anything but — some resemble wood or tiles, and others look like stone. This flooring is sold in countless colors and patterns, and in different price ranges.
After cleaning and drying the floor, it will be ready for installation. It's wise to use tile spacers to make the end result more even, and it's best to start from the center and work out to the edges. The seams should be carefully matched up, especially when there is a pattern. For edges and hard-to-fit spots, make a template and use it to cut pieces out with a utility knife. And if the landlord insists on its removal at the end of the lease, this can be done with a few tools and a good adhesive remover. If you're worried about the glue ruining the floor underneath, layer painter's tape across the entire floor and add the tiles on top.
Upgrade cabinet hardware
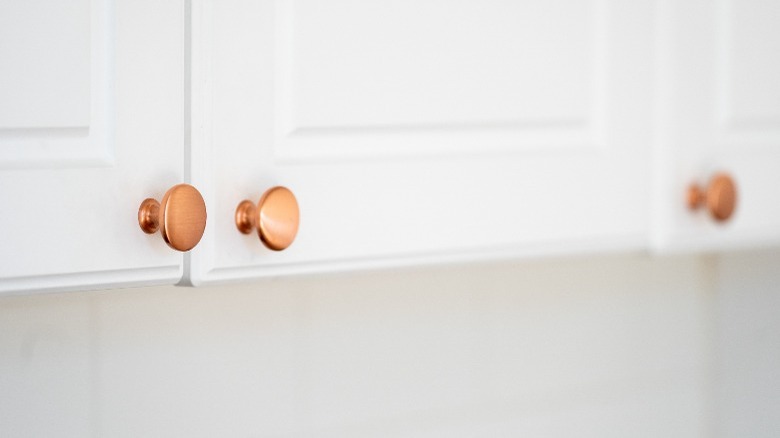
Cabinet hardware, especially in kitchens, are high-use items that show signs of age quickly. And besides that, people often forget to clean them. New ones make a noticeable impact and are a worthwhile, minimal investment. To see if this fix can be done, remove one of each kind of hardware and use these to shop for new ones. The replacements must have the same fittings in most cases, but adjustable hardware can also be used with different types of existing holes.
Modern cabinet hardware is slimmer and sleeker than the basic knobs of bygone days. If they fit, good options include tubular bar pulls, satin and matte black finishes, and cool-looking copper. When removing the old hardware, take care not to damage the cabinets. Have several plastic bags or containers ready, so you can remove the new hardware and reinstall the original ones before you move out.
Install LED light bulbs
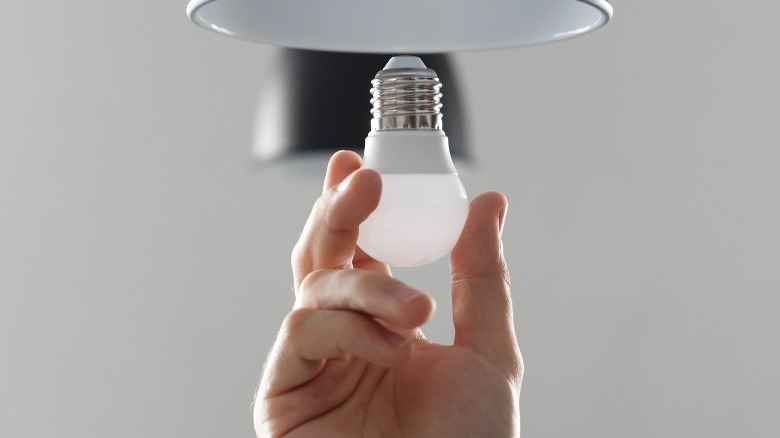
Apartments that have incandescent light bulbs in their built-in fixtures cast duller light and waste energy. LED lights eat much less electricity, are less resistant to shattering, and last longer — they're also not as hot to the touch. The bulbs are not expensive either and are available in 40 to 100-watt sizes.
Tenants are usually expected to change their own lightbulbs, but changing them to LEDs makes good sense even when the lights aren't burned out. The exception is when doing so puts a tenant's well-being at risk. If the bulb is in a ceiling light or other hard-to-reach area, it's safer for the landlord to change it. Of course, they will be less likely to change functioning incandescent ones to LEDs, but it never hurts to ask. In some cases, tenants will be charged for this service unless the bulbs are in common areas.
Peel-and-stick wallpaper
Floors are not the only apartment surfaces that can be fixed up with peel-and-stick products. These adhesive-backed coverings also provide new life to walls and backsplashes and will stick to concrete, painted drywall, and other kinds of walls. The surfaces need to be prepared just like floors, and measured out before installation commences.
Before installing the wallpaper, lay the sheets on the floor to ensure any patterns match up. The wallpaper can be installed from the top of the wall first, flush with the ceiling line. And as with peel-and-stick floor tiles, each wallpaper sheet should be firmly pressed into the surface without any stretching, pulling, or smooshing. All of that can distort the shape or lead to creases.
This wallpaper is also made from vinyl, so it generally doesn't last as long as the real thing. It can also have a higher price point, but doing the whole apartment is unnecessary. Peel-and-stick is perfect for backsplashes, bathrooms, and other smaller rooms. And like the other ideas here, it's a short-term upgrade that fits in just right with apartment living.