14 Things In Your Garage That You Should Be Cleaning More Often

Keeping the house organized and clean is routine for most people, but the garage often falls to the wayside and gets cluttered. However, this area is an extension of your home and is usually home to your vehicles, a host of tools, equipment, and other items. Neglecting to clean this space causes dust and grime to build up, and it can make it unsafe to walk around due to stacks of storage bins and miscellaneous things that don't have a dedicated spot. Your focus should shift to things you want to clean on a regular basis to keep them in top shape and your garage safe and organized.
It's common to skip this cleaning session, and many people shove it off until the annual garage clean-out in spring. However, your outlets, door handles, workbenches, and garage door opener build up debris and dust that can reduce how well they work or pose safety risks. Beyond the apparent debris on the floor or stains, smaller fittings and fixtures around your garage need regular cleaning to head off mechanical failures or fire hazards. So, add these to your routine cleaning schedule, and you can keep your garage neat and well-maintained.
Clean and mop the floor to remove debris
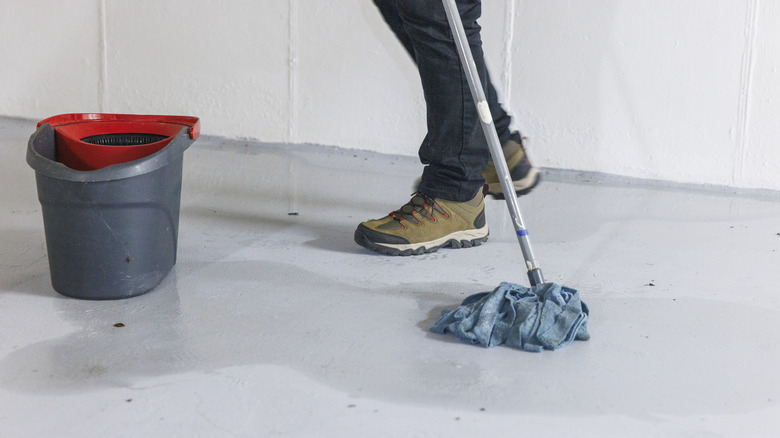
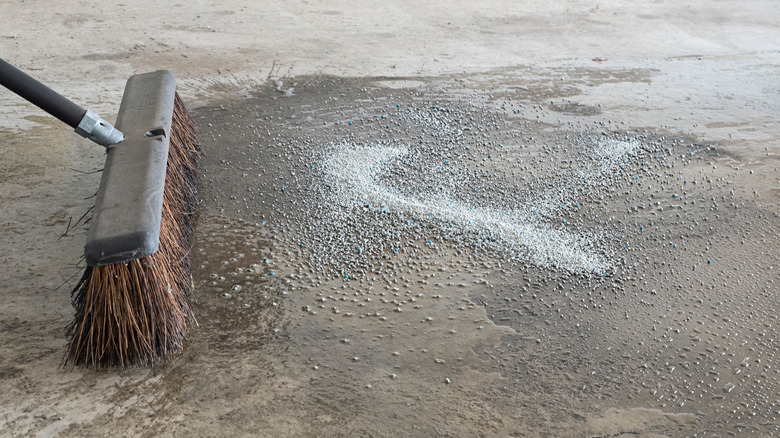
Your garage floor gets a lot of vehicle and foot traffic daily, which usually brings dirt, debris, and general grime. Since it's common to skip cleaning this area regularly, the floor quickly gets overwhelmed by leaves, dust, and odd particles. Cleaning it every week will help keep it visually appealing while making it safer to walk on. If you let debris build up, it can cause you to slip as you walk through the garage, especially in areas prone to spills or moisture buildup. Also, cleaning the floor can stop long-term damage from happening by allowing you to spot it early and fix it quickly.
Start by sweeping it with a stiff-bristled broom to remove any loose debris, including leaves, dust, and other dry materials. Once you get all the loose debris up, mix a gentle detergent with water in a bucket. Run a mop over the floor to remove stuck-on debris or dirt the broom couldn't remove. If you spot areas with stubborn grime, get a scrub brush with firm bristles and do a few passes to help loosen them up. Rinse the floor with clean water and allow it to air dry.
Clear the clutter off the workbench
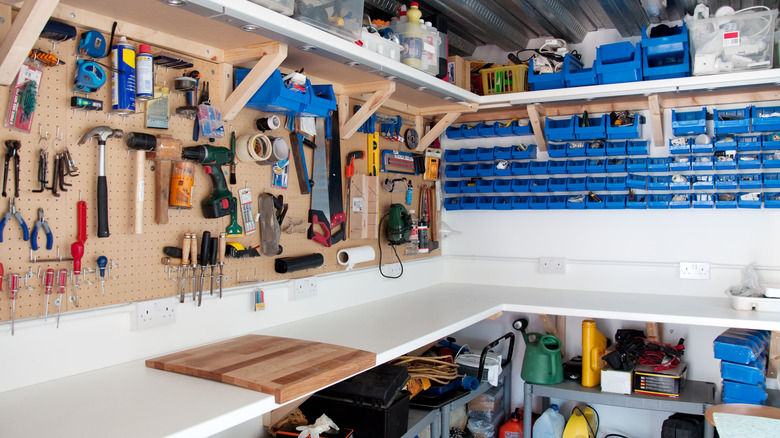
Your workbench is a busy spot in your garage, whether you're crafting, woodworking, or doing another project. Over time, as you work through your project list, the surface area can get cluttered with materials, tools, and debris. A messy and disorganized workbench makes it hard to find the things you need for your current project. It can also cause its condition to deteriorate as dust and debris build up. Regularly cleaning it off and putting the stray tools or materials away will help you stay productive, and you'll create a much safer working area by minimizing the risk of accidents from things falling or tool damage.
Once a week, carefully remove all of the materials, tools, and items cluttering up your workbench, leaving the whole thing open to clean it. When you get everything put away and neatly organized, apply a mild cleaning solution to a soft, damp cloth. Wipe down the surface to remove any residue, dust, or stains you spot. For any tight areas where debris and dust build up, get compressed air or a small brush to remove and dislodge it so you can sweep it into the garbage can.
Clean tools to prevent rust
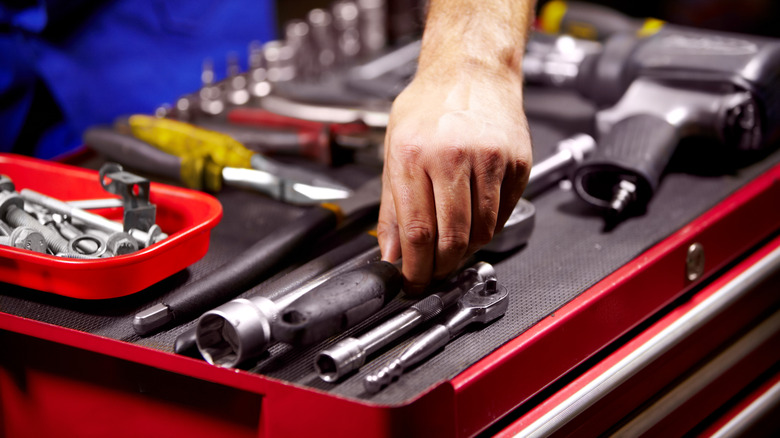
Whether you use your tools in the garden, house, or garage, they collect grease, dirt, and moisture as you handle them. This buildup makes them harder to use and takes away from their reliability while increasing the chances of corrosion or rust popping up. Rust can easily make your tools difficult or dangerous to use, especially as it spreads along the tool. Maintaining all of your tools, including giving them a quick clean or wipe-down once a week, helps prevent rust from forming and keeps them in peak shape.
Lay your tools out once a week and wipe them down with a damp, clean cloth using a mild detergent to help strip away grease, surface dirt, and residue. These things encourage rust formation, so removing them helps stop your tools from rusting. If your tools are more intricate or have small mechanisms, get a toothbrush or a smaller brush and scrub out any grime. After this light cleaning, dry them all individually to prevent moisture from sitting on them encouraging rust. For any tool with moving parts, like scissors, pliers, or shears, apply a thin coat of lubricant to ensure they work smoothly. Then, organize them all in a clean, dry space.
Organize and dust toolboxes and chests
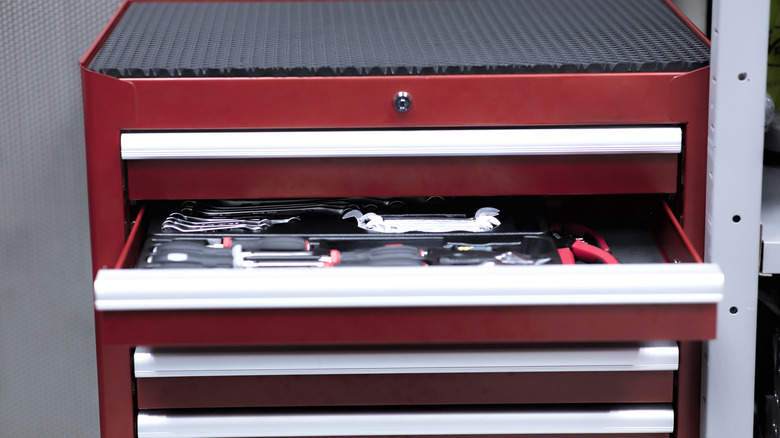
Your toolbox accumulates debris and dust as it sits in your garage, and you work around it. This grimy layer will slowly tarnish how nice your toolbox looks and can also promote rust and deterioration to the unit itself and the tools inside it. A dusty and cluttered toolbox can also be a very attractive spot for pests and rodents to nest, especially if you don't dig through it often. Dusting and organizing this space helps it stay in optimal condition and ensures your tools will last. It also makes it easier to pull out the right tool when needed instead of rummaging through piles of odds and ends.
To clean your toolbox, the first step is to carefully remove everything to give you easy access to every corner and surface. Get a microfiber cloth or a soft duster and wipe down the inner and outer parts of the toolbox, taking out dust without scratching anything. Pay attention when cleaning the handles, hinges, and drawer slides because dust collects here. Then, vacuum the whole thing with a brush attachment before organizing and putting everything back. Group the tools by function as you organize to make projects easier and more efficient.
Wipe off the garage door opener

Once you install a garage door opener, it's easy to forget to clean it. However, this small piece of equipment is vital to getting in and out of the garage quickly and easily. Over time, it's common for grime and dust to build up on the inside and outside of the housing. If you don't do something about it, this can eventually interfere with how well it works, causing it to malfunction or stop working altogether. Regularly cleaning it will keep it looking nice and working in top shape.
You want to be very careful when you take on this cleaning challenge to avoid damaging anything. Start by switching the power off and gently wiping the exterior housing with a clean, dry cloth to remove visible grime and dirt. For tougher grime, you can use a mild disinfectant or a wet wipe. Make sure it's semi-dry so water doesn't leak into the device. Pay close attention to the control panels and buttons, and use cotton swabs or a soft toothbrush to dislodge the dirt stuck in the cracks without pressing hard. Wipe the remote or your car's built-in control buttons with the same technique to eliminate dust, grime, and fingerprints. You can also use a disinfectant wipe to kill germs on these commonly touched items.
Dust the light fixtures
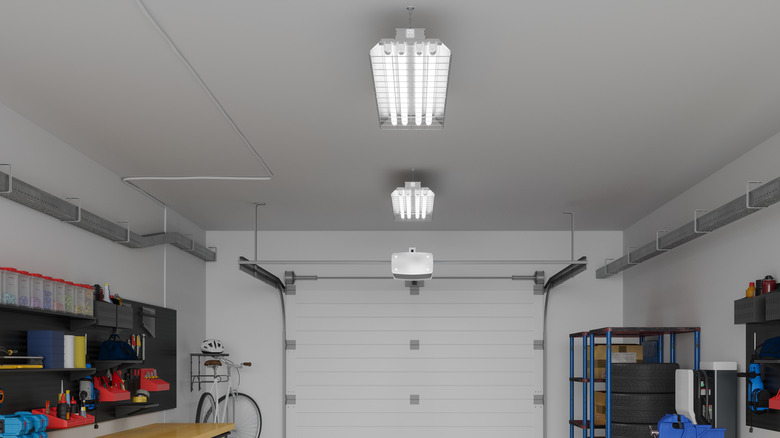
Light fixtures are very important in your garage, but when was the last time you cleaned them? Cobwebs and dust stick to the fixtures and create a grimy film, reducing how much light gets through and affecting the garage's ambiance. Dust is also an insulator, and it'll make your lights hold more heat when they're on, shortening how long and well the bulb works. Additionally, in humid areas, dust attracts moisture, and this causes corrosion or electrical hazards. Experts explain that regularly cleaning your light fixtures improves visibility and can lengthen their lifespans.
Before you clean anything, the lights must be off and cool to the touch to prevent shocks and burns. Gently dust the light fixtures' exterior using a soft microfiber cloth to remove any loose cobwebs or dust. You'll want a soft-bristled brush to dislodge dust from areas you can't quite reach on intricate fixtures. Remove glass globes or fixtures and spray them with a mild glass cleaner before wiping them with a lint-free cloth. High or ceiling-mounted fixtures may require you to get on a stepladder with an extendible duster to reach them.
Clean and shine the windows
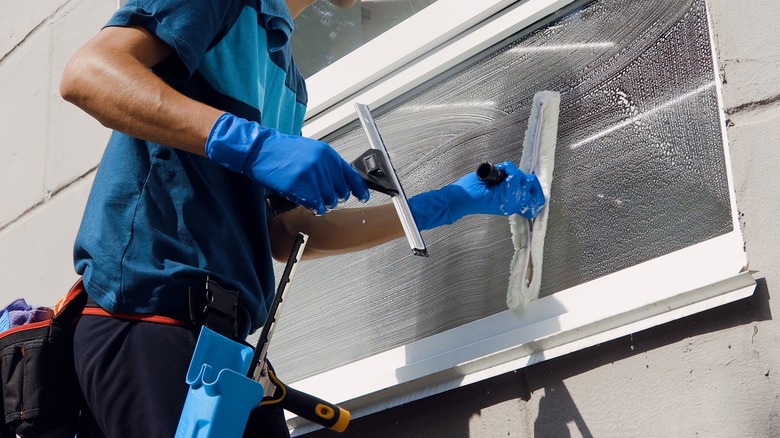
Your garage windows let sunlight stream through. But, they can build up a layer of grime, dirt, and dust from you working on projects and external factors like rain, pollution, and wind. As the grime gets thicker, it will block the natural light, making your garage look darker and less welcoming. Dirty windows also make your property's aesthetic appeal drop. Cleaning them more often will help keep them transparent and clear and help you spot problems so you can address them quickly. Dirt and debris can also scratch glass, so keeping them clean can extend your window's lifespan.
To clean your garage windows, the experts at Pella Windows and Doors recommend mixing white vinegar and water at a rate of one part vinegar to 10 parts warm water and putting it in a spray bottle. Spritz onto your windows and get a squeegee to remove it. Start at the top and drag it down the glass smoothly to strip away the film and cleaning solution and get a streak-free shine. If you don't have a squeegee, clean the glass with a lint-free cloth. Also, wipe down the windowsills and frames with a soft rag to remove grime.
Shake the floor mats out and scrub them
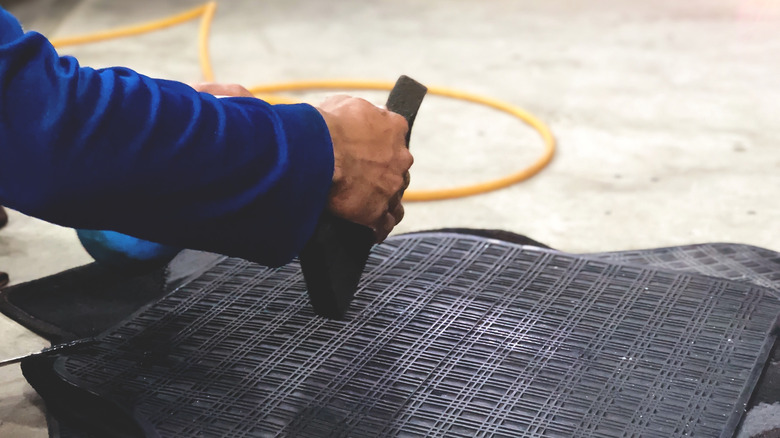
Floor mats are your garage floor's first line of defense against mud, dirt, and fluids routinely tracked in by visitors or vehicles. It's common to put them at entry points or along high-traffic areas to help absorb a good amount of wear and tear. But, if you don't take steps to clean them, floor mats get packed with debris, stains, and dirt that can lead to icky smells and a dingy look. This grime buildup also degrades the floor mat's materials, making you replace them more frequently. Regular cleaning will help keep your floor mats functional and prevent permanent stains and mold or mildew growth.
Once a week, pull the mats from the floor and shake them out to dislodge any loose dust, dirt, and debris. Doing so will eliminate surface particles that could scratch or wear down the mat's materials when you scrub them. After you shake them out, lay them on a hard, flat surface, like a driveway. Mix a solution of mild detergent and warm water and scrub the mats using a stiff-bristled brush. This will get deep stains and pushed-in grime out of the fibers. Rinse your mats with a hose or bucket of clean water to remove all the soap residue, let them dry, and put them back in their place.
Dust bins and shelving units
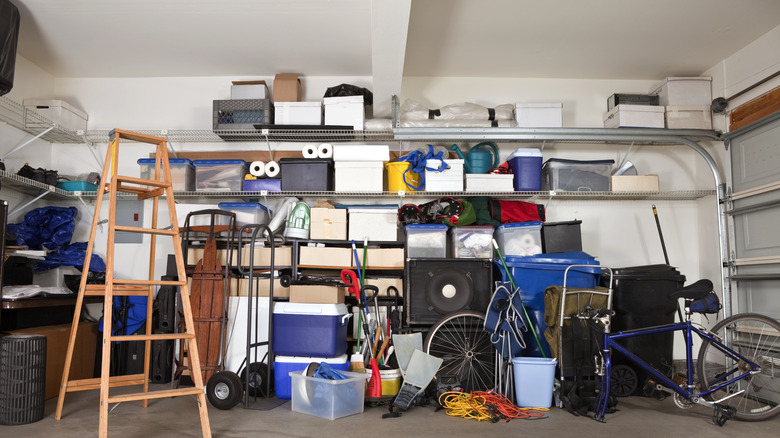
Whatever kind and size of garage storage you may have, dusting it is critical to keeping it in good shape. Over time, open shelving units or stacked bins have layers of dust due to the garage's circulation and how particles settle. This grimy layer will make your storage look dingy and can negatively impact the condition of whatever you're storing. Dust can cause sensitive materials to deteriorate, affect how well electronics work, and worsen respiratory issues like asthma. Regular dusting helps you maintain a healthy, clean, visually appealing garage space. It ensures the shelves, bins, and anything you put on or in them stay in excellent condition.
Carefully remove everything on your garage shelves so you can clean everything in one go instead of constantly shifting things around. While you remove the items, give them a quick once-over to ensure they work. Get a microfiber cloth and gently wipe down every shelf, starting from the higher ones and working your way down to ensure dust doesn't fall on cleaned shelves. For bins, make sure to carefully wipe the entire exterior and check inside for a pest breach. If you have sticky residue or stains, use a cleaner suitable for the shelf or bin material to avoid damage. When you're done, let your everything dry before returning the items.
Remove dust from electrical outlets
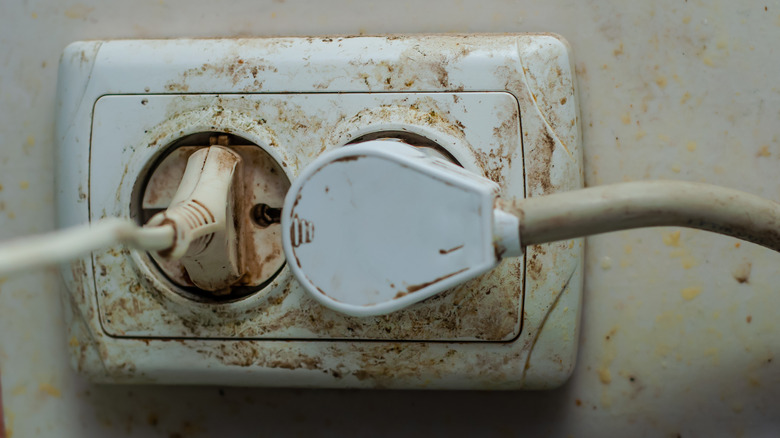
When was the last time you cleaned your power outlets? Despite being critical, it's easy to overlook these small components. Dust builds up around the outlets and blocks the contact between the plug and outlet, and this causes poor electrical connections that overheat or spark. In extreme cases, this buildup creates a fire hazard, especially if your garage has flammable items. Regularly dusting the outlets is essential to keep your garage clean and safe. This preventive measure is a simple and effective way to reduce the risk of electrical fires and make your outlets last longer.
Before you clean anything, cut the power supply to the outlets at the breaker box so you don't run the risk of getting shocked. Once it's off, use a dry microfiber cloth to wipe around the faceplates and outlet covers, removing any visible grime. If there is dust in the recesses, get a non-metallic, soft-bristled brush or a can of compressed air and use it to gently dislodge it without sticking anything directly into the outlet. You can also remove the outlet covers to clean them more thoroughly if they look stained or discolored.
Sanitize the door handles

Think of how often you touch the door handles in your garage. They're hotspots for bacteria, viruses, and germ transfer, and every time you open and close the doors, you leave microbes. Bacteria counts can double on surfaces every 20 minutes, so regularly sanitizing these surfaces is critical for your safety and health. Cleaning them at least once a week reduces the chances of spreading germs and harboring bacteria.
To clean and sanitize these spaces, pick a disinfectant that kills over 99% of germs, viruses, and bacteria like Clorox Disinfecting Mist. Disinfectant wipes are also popular for quick wipe-downs. Before disinfecting a visibly dirty handle, wipe it down with warm, soapy water and a cloth. Once clean, wipe the door handle or spray on your disinfectant, ensuring you cover the entire surface. Let it sit for however long the product recommends to ensure it kills everything. If your garage has high traffic, consider sanitizing more frequently to maintain a safe and healthy environment.
Spills from vehicle fluid containers
Containers for oil, coolant, and other essential liquids you use in your vehicle tend to spill or leak in your garage. They can happen on your floors or wherever you have your vehicle and stain or damage the flooring material. Removing coolant and oil once they sink into the floor is especially difficult, and their chemical composition can cause issues with asphalt or concrete. Spotting and cleaning these spills quickly is critical to keeping your garage space safe, clean, and visually appealing. Prompt cleaning helps prevent fluid buildup while making your garage safer.
To manage any spills, start by absorbing as much of the spill as possible to prevent it from soaking into the flooring or spreading. You can sprinkle sand, clay kitty litter, or sawdust over the spill and leave it to soak up as much as possible for 10 to 15 minutes. Depending on the spill's size, you can also allow it to work for up to an hour. Once it absorbs the liquid, sweep it up and dispose of it, ensuring you follow local regulations concerning hazardous waste if necessary. Carefully clean the stained area with a degreaser or a suitable cleaning solution designed for the fluid type and flooring. Scrub the area with a stiff brush to lift and remove the residue, then rinse thoroughly with water.
Wipe down the exterior of large appliances
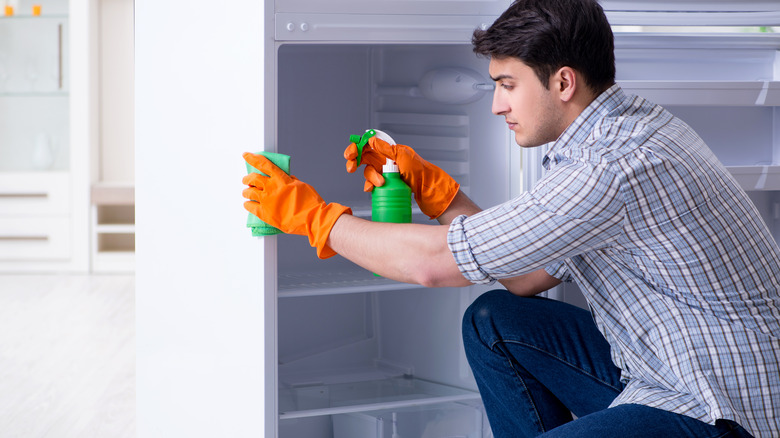
Large appliances such as refrigerators, freezers, and washing machines are particularly susceptible to accumulating dust, grime, and potentially grease. This is especially true in spaces that double as workshops or storage areas for outdoor equipment. This accumulation makes these appliances look dingy, and it can reduce their performance over time. Dust and debris on the exterior, especially around ventilation areas, can restrict air flow, leading to overheating and decreased efficiency. This could shorten the appliance's lifespan and increase energy consumption as the unit works harder to maintain its function.
To effectively wipe down the exterior of large appliances, use a microfiber cloth or soft duster to remove loose dust and dirt from the surface. Dampen the cloth slightly with mild detergent and warm water for more stubborn grime or sticky residues. Gently wipe down the entire exterior, paying special attention to handles, knobs, and the back of the appliance where dust tends to accumulate around cooling and ventilation systems. A soft-bristled brush can help dislodge dirt trapped in crevices for textured surfaces. After cleaning with the soapy solution, rinse the cloth with clean water and go over the appliance again to remove any soap residue. Finally, dry the surface thoroughly with a clean cloth to prevent streaks and water spots.
Keep your ladders in safe working order
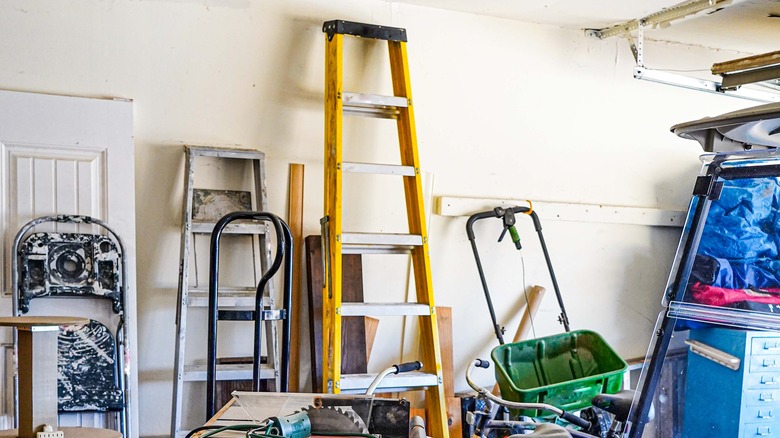
Ladders need regular maintenance to ensure they last and stay safe. With routine use, ladders can build up a variety of substances, including paint, dust, and debris. This accumulation can compromise the structural integrity and safety features, like slip-resistant rungs. Also, dust and debris can make it hard to spot defects or wear that may affect the stability. Regular cleaning is crucial to maintain the ladder's condition and appearance and ensure it is safe and reliable.
To clean your ladder, prepare a mild detergent solution and warm water. Use a sponge or cloth to apply the soapy water along the sides, rungs, and feet, where dirt and residues are most likely to build up. For areas with dried paint, tar, or other stubborn spots, use a soft-bristled brush to gently scrub these spots without damaging the ladder's surface. Pay special attention to the joints and locking mechanisms, as these areas are crucial for functionality and safety. Once you finish cleaning the ladder, rinse it with clean water to remove any soap residue and loosened debris. Then, dry it entirely with a clean towel or by leaving it open in a well-ventilated area or sunlight.