How To Cover Up Ugly Popcorn Ceilings With TikTok's Brilliant DIY
We may receive a commission on purchases made from links.
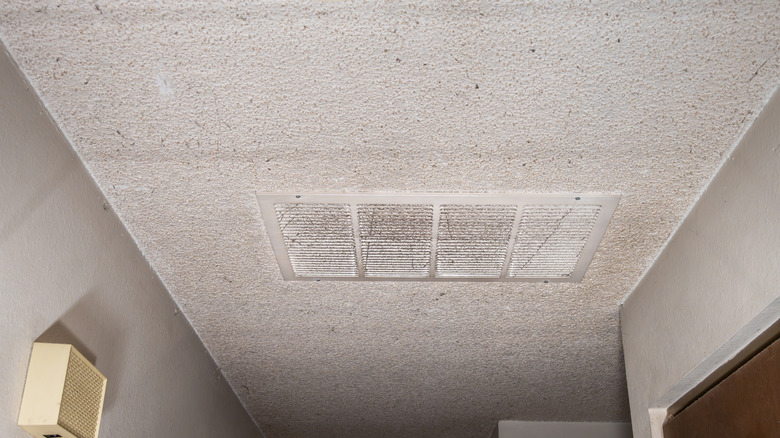
If you have popcorn ceilings in your home, you might wonder why they were ever popular in the first place. The strange texture can easily look dirty and discolored, not to mention outdated, and there are even some hidden downsides of popcorn ceilings beyond their appearance. Unfortunately, they are difficult and expensive to remove. Popcorn ceilings can have asbestos present in them, making them a health hazard, particularly during the removal process. As such, if your popcorn ceiling has asbestos, you should absolutely hire a professional. Without asbestos present, the removal will likely cost between around $1,900 and $3,900. With asbestos, it will likely be between $50 and $150 per square foot. If you are tired of looking at dreadful popcorn ceilings but do not want to go through the costly hassle of removing them, then another option is to cover them.
By purchasing glue-on ceiling tiles, you can completely cover the popcorn ceilings and get a more contemporary look without the high cost. You can even DIY the project, saving on labor costs. With an abundance of ceiling tile design options available everywhere from home improvement stores to Amazon, you are certain to find a style that better matches your space and requires far less maintenance than the difficult popcorn ceilings. Just make sure that there is no asbestos or lead in the ceiling before proceeding with any DIY to avoid accidental exposure to asbestos while trying to adhere the new ceiling tiles. If your ceiling is safe from asbestos and lead, then you can gather your supplies and get ready to completely transform your ceiling.
How to hide popcorn ceilings with tiles
To cover your popcorn ceiling, you need some supplies. First, you need to choose your ceiling tiles. Glue-up options are a great choice for the simplest process, and many glue-up tiles are made of polystyrene, a material that's popular due to its light weight and potential resistance to moisture and water. Once you know what material you are looking for and have chosen a style you like, measure the ceiling. To get accurate measurements, measure the length and width of the room from multiple spots and use the largest measurements when multiplying for the area. This will prevent any accidental empty spots due to misshapen rooms. Then, divide by the area of the tiles of your choice to determine how many tiles to order.
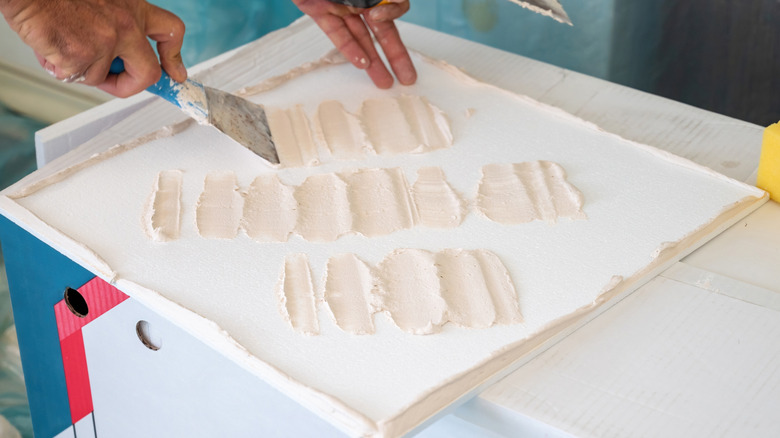
Once you have your tiles, turn off the circuit breakers and remove any fixtures from the ceiling, including lights, fans, or smoke detectors. Next, find the center point of the ceiling by creating chalk lines from the middle point of each wall. These lines will ensure that your ceiling is centered. Place quarter-sized dollops of an instant grab adhesive loaded into a caulking gun onto the back of a ceiling tile. Line up the tile, and press and hold it in place on the ceiling. Start at the center of the room, and line one corner up with the X of the chalk mark. The dollops will fill the spaces of the popcorn ceiling, ensuring a close hold. Use a utility knife to cut tiles as needed for the edges of the room.
How to choose the right ceiling tiles for your space

Once all of the tiles are installed and set, you will need to carefully cut out spaces for any ceiling fixtures to be replaced. With everything back in place, your new ceiling should be complete and looking far different than the nasty popcorn ceiling before. Ceiling tiles are a fairly simple option for most people to install themselves, and they are often easy to clean. Unfortunately, though, there are some downsides of glue-up ceiling tiles to consider before installing, particularly that it can be a messy process. This applies both to gluing them in place and potentially removing them in the future, which may cause damage to the ceiling.
If a bit of extra difficulty does not deter you, then the relatively quick and painless fix of covering popcorn ceilings with lightweight tiles is likely to be a perfect solution for your home. Just make sure you take the time to consider some stunning DIY ceiling designs that will elevate any room in your home, and be willing to look outside of the box. Many ceiling tiles are classic squares, but there are also Styrofoam options like these Euro-Deco DIY Glue-Up Foam Ceiling Tile Planks that can mimic the look of wood paneling and make your room look longer or wider as a result.