How To Clean The Outside Dryer Vent
We may receive a commission on purchases made from links.
Still waiting for your laundry to dry? With so many things to clean in the house, the last thing you might think about is the outside dryer vent. The vent itself appears intimidating. Like a black hole, you can't see through the chute very well, and who knows what else is lurking inside! You may have avoided this cleaning job, but maintaining your dryer will improve its performance and safety overall, per Dustless Duct. Regularly cleaning your dryer vent isn't difficult, it's only a matter of doing it. Before you start, make sure you have all the right tools. Protective gear such as a dust mask, rags/cleaning cloths, and gloves are a must, along with the proper tools like a vacuum, flexible vent brushes, and a dryer vent cleaning kit. From an hour to a few more, how much time you spend on the cleaning project will depend upon the status of your dryer vent. This includes the time needed to purchase any replacement parts.
Besides efficiency, one of the biggest risks with avoiding cleaning your dryer vent is the possibility of a fire. Over time, ducts, filters, and vents get congested with lint buildup, caused by excess dirt, grass, sand, or any other substance that remains after the wash cycle. Dryers are responsible for thousands of fires each year. According to Germania Insurance, these types of clogs thwart the flow of air, which leads to potential dangers. Read on to learn how to properly clean your dryer vent!
Disconnect your dryer
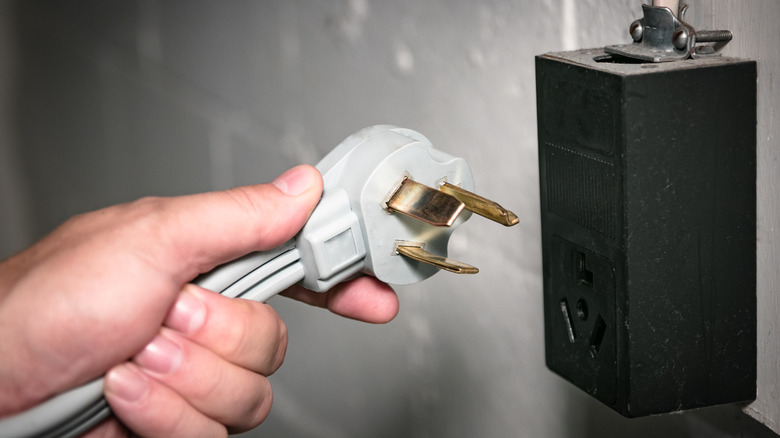
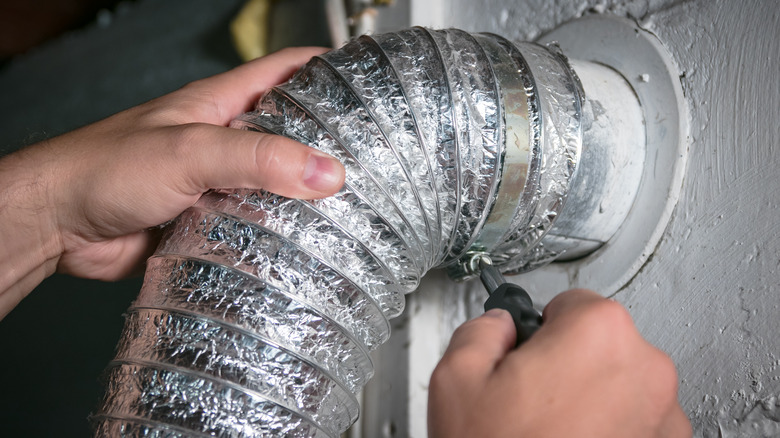
Before you begin the big clean, it's vital to disconnect your dryer from electrical sources by unplugging it. Then, pull the machine out from the wall and determine the vent's locations on the interior and exterior of your house, per Home Depot. If your dryer happens to be gas, be sure to turn off the supply valve first to stop the flow during the job; don't disconnect it completely. From there, detach the dryer duct, which may require a screwdriver to help remove the clamp. Wear protective gear like gloves, goggles, and a mask throughout the process, or whatever you need to keep safe from dust and lint exposure.
While there, inspect the duct for any damage like tears or breaks. Minor problems could be repaired with duct tape or even metal duct repair tape, but if it looks unfixable, then it should be replaced. Additionally, ribbed vent tubing often causes lint to build up quicker, thus increasing the chance of a fire. According to the International Association of Certified Home Inspectors, a rigid metal vent is the most effective type of tubing to prevent such circumstances. Its smooth interior surface promotes minimal air resistance and debris blockages.
Vacuum the vent inside and out
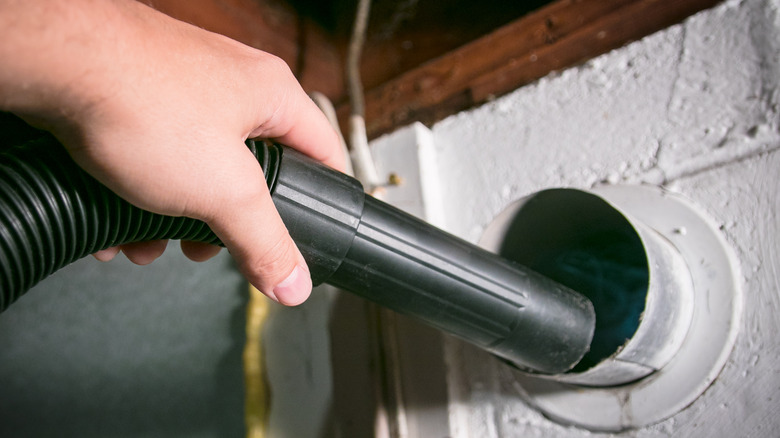
Cleaning the dryer vent proficiently requires the need of a good vacuum with a hose extension. The process depends on the amount of lint needed to be removed. Start by detaching the piece where the duct meets the wall to make cleaning more accessible. Wearing protective gear, remove any larger lint pieces by hand, then proceed to wipe out and vacuum it thoroughly. Again, check for any damaged pieces that might need to be replaced. Proceed with cleaning in the same way with the outside vent; remove the vent cover and clean with a vacuum. Change out hose extensions as needed.
If the exterior vent needs updating, along with the cover, you can remove it by cutting around the edges with a knife or cutting tool. What's the right size? Dryer vents typically measure approximately 6 to 7 inches wide and tall with a 4-to-5-inch opening, per Bob Vila. It's important for the exterior vent flap to be working properly to keep critters and other weather-related damage out. If an update is needed, your dryer will work safer and more efficient with a brand-new one. There are three types of ducts to consider: flexible, rigid, and semi-rigid. Flexible ducts are the least desirable as they trap lint easily, especially if made of plastic. Look for aluminum or steel with rigid and semi-rigid styles for lint to flow through powerfully. Rigid is the best with its smooth surface and angled joints, per the Family Handyman.
Brush out debris
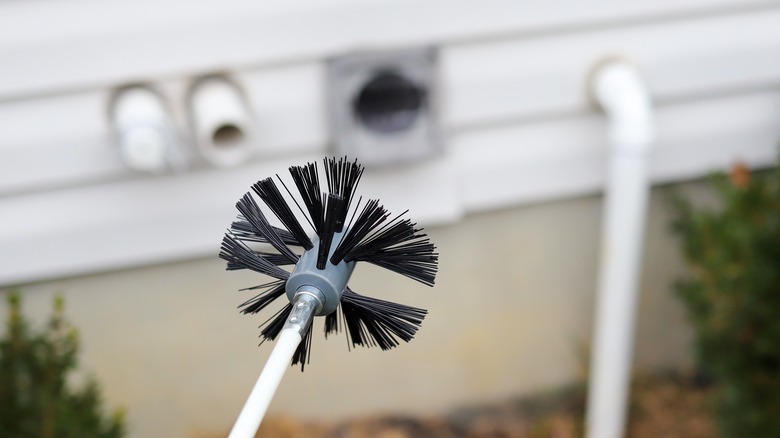
Depending on the age and condition of your dryer vent, a deeper expulsion might be necessary. You can do this by employing various items like a flexible dryer vent brush attachment or a specialized dryer vent cleaning kit. Something else on hand to try might be an unused toilet bowl brush. Common types of brushes are the classic auger brush, which has spiraled bristles, great for twisting and loosening up debris and dirt. A thinner tool is the lint trap brush. These have wider consistent bristles that attract particles easier overall. Whatever type of brush you choose, make sure it fits properly inside the vent to clean. If it's been a while since the last cleaning, or the first time, expect a larger clean-up.
If vacuuming hasn't completed the job, a brush can break up the hard-to-reach elements. Establish which opening, interior or exterior, is slightly higher than the other. This way, you can push the debris down to the side that descends with ease, per The Home Depot. To clean, place the brush inside and move it back and forth while rotating it; use extensions if needed.
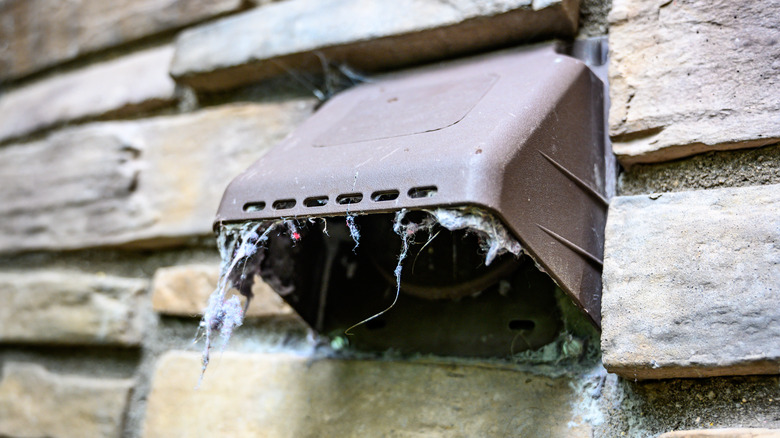
Clean the outside vent cover
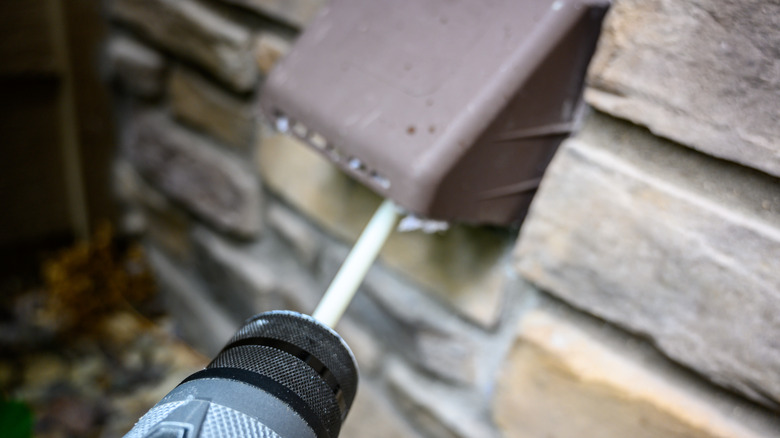
Some debris may be harder to reach or remove. Examine your outside dryer vent cover or hood inside and out, as accumulated residue may cause future clogs and fires within the vent if not cleared out. Another result of this is that the dryer may overheat and get damaged on the inside, Bob Vila. If removable, use a screwdriver to take off the outside cover, then vacuum and/or wipe it clean. Depending on its condition, you can either hand wash the cover or soak it in hot water and scrub it with a microfiber cloth. If the cover still appears heavily soiled, try adding a few drops of liquid dish soap into it, then rinse thoroughly and let it dry.
If your vent cover needs to be replaced, both metal and plastic materials are available. According to The Spruce, metal wall vent covers are the superior choice, especially if you have a gas-powered machine. Metal covers have a magnetic door that automatically opens when the air is released, while the plastic slat covers may not clasp as well when not in operation. You could paint a metal cover to match the color of your house or find a matching shade in a plastic model.
Reconnect the dryer vent
Almost done! Once you've fully cleaned your dryer vent, it's time to reattach it and give it a go. Attach the duct connections to the interior vent and dryer itself. Plug the dryer in and run the machine empty on the air-dry setting for about 20 minutes, per Bob Vila. Make certain the air is blowing strong enough by placing your hand underneath the opening as well as being free of any visible debris, then place the outside cover back on. To prevent any possible air leaks within the system, the vent duct should be securely fastened. Also, if your gas dryer is not properly attached, this may trigger an increase in carbon monoxide.
To help with the complete condition of your dryer vent, it's wise to clean out the lint trap screen after every load as well. Lint is fuel for fire, so best keep it clean throughout the machine's passageways. Limit heavy blankets and dryer sheets, which also add to the amount of lint and particles. Now that you know how to clean your dryer vent, stay current with its maintenance needs by cleaning it at least once a year, although two or more times may be necessary, depending on its state or if it accumulates debris more often.