The Best Way To Remove A Stuck Lightbulb
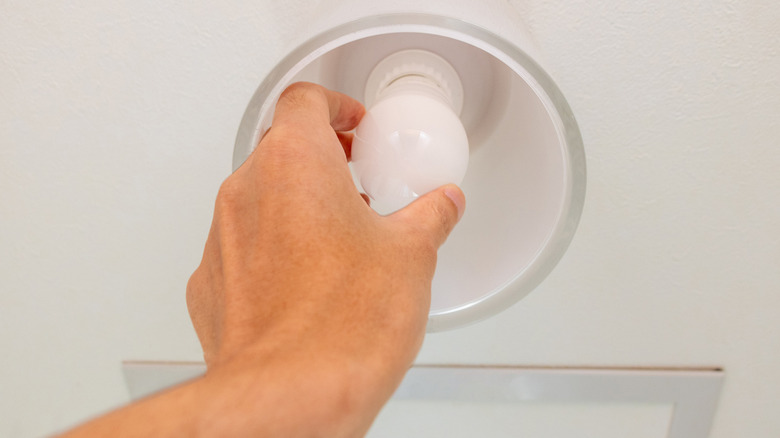
Nothing is more frustrating than trying to change a lightbulb and realizing it's stuck. Older fixtures are prone to this issue, and it can cause precious minutes, if not hours, of effort to get the bulb dislodged and replaced. You don't want to risk breaking the glass or causing any damage, but you also need to get the base detached in order to get illumination — so what do you do when your lightbulb gets stuck?
You may have heard the phrase "duct tape fixes everything," and in this case, it might just be true. Engaging the help of this iconic tool is one of the easiest and most efficient ways to remove your lightbulbs from their holdings. This trick is productive yet gentle, and won't leave you with broken glass everywhere or worse: cuts. It's always important to be very careful when trying a DIY hack, but this straightforward method should leave you with a perfectly intact bulb and a readily available socket.
According to CNET, most lightbulbs come with solid bases that are prone to holding even if it becomes stuck and has to be jimmied out, but always take precautions. Try this exercise the next time you need a little extra "oomf" changing a light and chances are you'll never go back to doing it the old-school way again.
Use duct tape to remove a stuck bulb
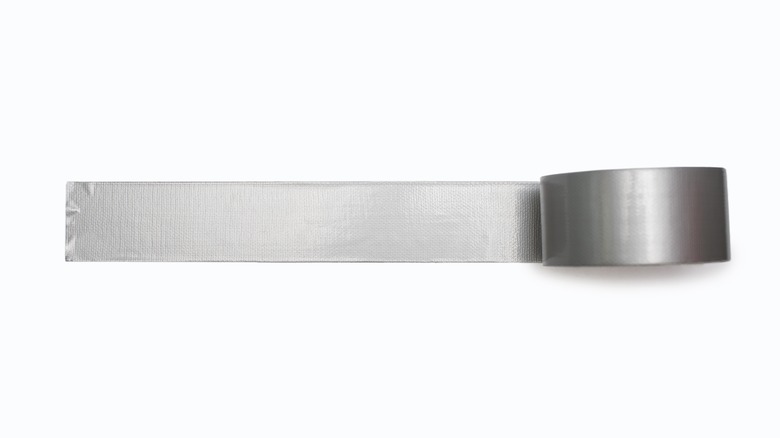
Your new best friend when it comes to replacing or changing your lightbulbs? Duct tape. All you need for this simple solution is duct tape and a pair of scissors. Before trying to remove the bulb, make sure you turn off the light and let the unit cool down. Give it a full two to three minutes before attempting to shift it, ensuring there's no heat coming off the surface. Lifehacker recommends cutting off a long strip of tape, making sure it can produce an oval shape when the ends are connected (8-12 inches should be enough). Tape the ends together, keeping the sticky part on the inside of the loop.
Once you have your shape, place it around the bulb so one hand is on either side and the light is in the middle of the oval. Stick the middle portion of the tape around the glass, creating handles with either "end" or side of the loop. You can then pinch the sides together with your fingers, creating a tab to hold onto (per Frye Electric). The duct tape is gentle enough around the lightbulb's glass that it shouldn't shatter it, but firm enough to loosen it from the socket.
Next step: Twist the lightbulb free.
Potatoes can help remove broken bulbs

With your duct-tape tab created, begin turning it counterclockwise. It's important to move in this direction to loosen the bulb from the socket (i.e., left to loosen, right to tighten), and while this method should simply twist the two apart, it might be useful to wear gardening gloves during the process. This way, if the glass breaks, your hands are protected. Continue to turn the bulb until it's loose enough to screw out.
If the glass does break, CNET suggests employing the help of a raw potato to get the broken base out. To do this, all you need to do is cut the potato into halves (across instead of lengthwise) then apply one half to the jagged pieces. Always make sure the light is turned off, then twist the raw potato into the broken pieces and turn everything counterclockwise. This instrument should grab the glass and help pull it out of the socket. Protective goggles and gloves are a must when dealing with a shattered bulb.
The duct tape should easily dislodge a stuck lightbulb without the worry of smashing it, though, and you can try this hack whenever the need arises.