How You Should Really Be Cleaning Your Wood Furniture
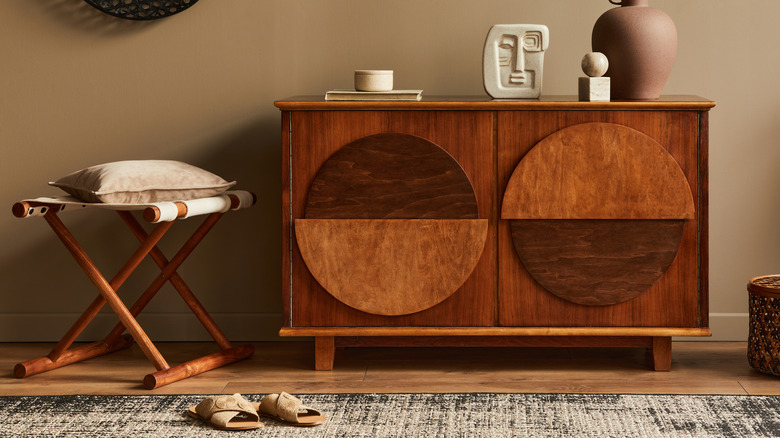
Every home has wood throughout, including the furniture within it. But there are many different types of wood and lots of cleaning products that claim to do all sorts of beneficial things for them. Which do you trust — if any? There are many tips out there, too, so we decided to branch out and get to the root of the issue. We promise not to get too sappy. But seriously, cleaning wood can be tricky, especially when you have old wood and antique pieces mixed with modern furniture. Throw in hardwood floors and painted wood kitchen cabinets, and your head might be spinning. But never fear — keeping your wood clean, naturally polished, and looking beautiful for as long as possible is just a few tips away!
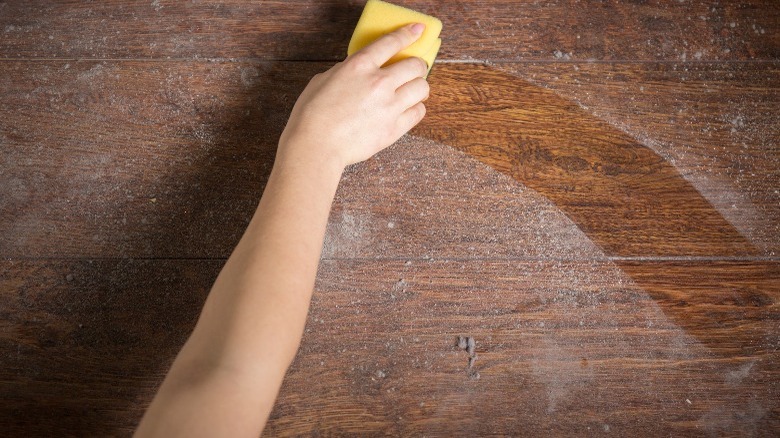
Gold Eagle tells us to always use care when cleaning different types of wood and wood furniture, as the wrong chemical can permanently damage or eat away any protective coating. In addition, they advise making sure you dust wood furniture before cleaning so the dust doesn't get into the cleaner and stick to your furniture. When cleaning wood floors, always sweep thoroughly or vacuum before applying any chemical cleaner for the same reason. For best results, condition your wood and polish it to help preserve it and make it look beautiful. We're going to show you how! Not only that, we'll show you how to do it using your own formulas. So, "wood" you please go out on a limb and join us?
Clean wood with mineral spirits
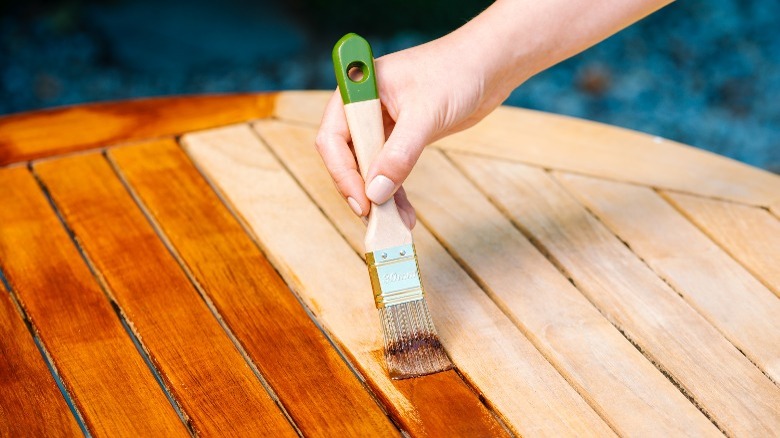
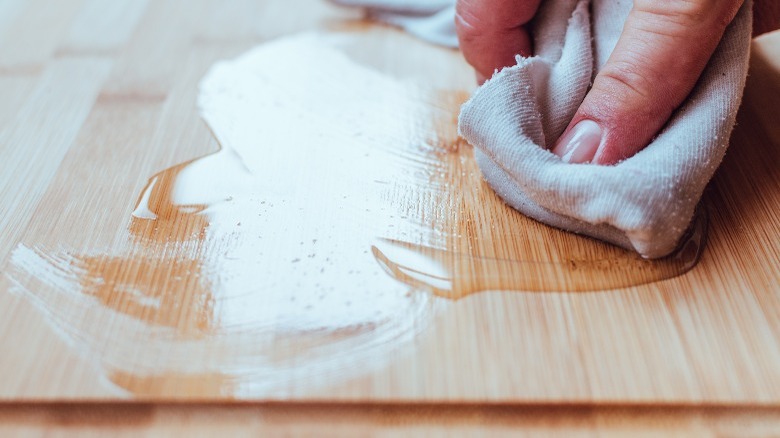
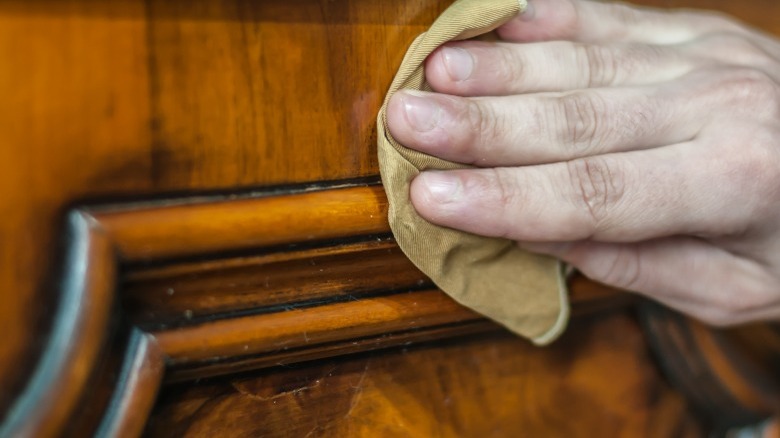
According to WoodWorkly, one of the best ways to clean your wood is by using mineral spirits. Mineral spirits remove grime and dirt that builds up over time, bringing out the original beauty. It is a solvent, so it will also remove any wood stain, paint, or oil-based product buildup. It prepares the wood to accept a stain, and renews dull finishes. If you're doing a restoration project, you'll definitely use mineral spirits. It restores the original grain and beauty of the wood, and is safe and easy to use. If you're doing a restoration or getting ready to stain a wood project, you'll first want to use mineral spirits to prepare it. After wiping down the surface, the first step is to sand it lightly in one direction, with the grain. Use no higher grade sandpaper than 220 grit, or it can ruin the grain and appearance. This is a vital step before staining or restoring wood.
For the rest of the steps, Woodworking Clarity recommends wiping down the piece with a tack cloth after sanding, which is made just for this purpose with its slightly tacky fibers. Then you'll take a different soft, clean, dry cloth and pour enough mineral spirits on it to dampen a large section. Wipe all surfaces with the damp rag, switching to a clean section or new rag as needed. Keep the rag clean and moist with mineral spirits as you go. Rub gently in one direction with the grain, and do not rub in circles or side to side. Afterward, take another clean, dry cloth and wipe dry. Finish by air drying completely. It should take no more than 15 to 20 minutes before it's ready to stain. By now, it's looking tree-mendous!
Clean wood with vinegar and water
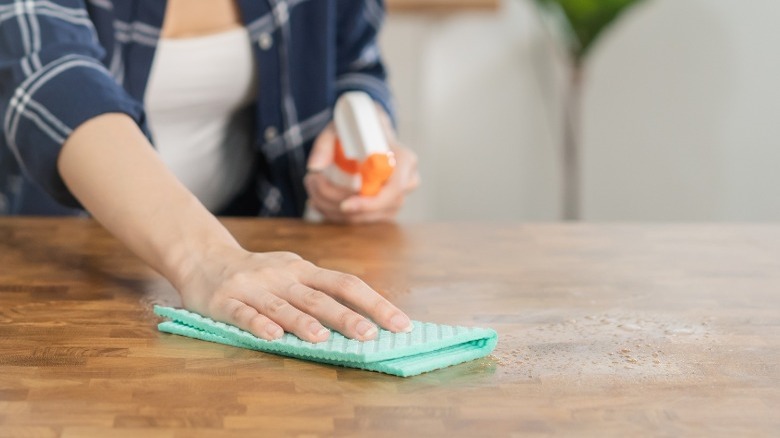
Start Woodworking Now has some great ideas for cleaning wood with vinegar, adding that it's also a great way to disinfect the wood. But you don't want to use straight vinegar due to its acidity, and there are different recipes that you can try with vinegar. However, this particular method is great for lacquered wood you want to clean (not strip), or untreated wood furniture. For cleaning lacquered wood, mix a solution of equal parts white distilled vinegar and hot water. Soak a clean rag in it and squeeze out the excess. Take the moist rag and gently wipe wood furniture surfaces, always with the grain in one direction, and follow immediately by drying with a clean, dry cloth. Proceed slowly and steadily, section by section.
For untreated wood, mix a solution of 500 ml of lukewarm water with 50 ml of distilled white vinegar. Use a soft, cotton cloth that's damp, not wet, to wipe down the surfaces. Again, you always wipe in one direction with the grain. How to Clean Things says using simple white vinegar and water is one of the best ways to clean your finished wood furniture, and it offers some additional tips. It suggests using the brush attachment on your vacuum to dust the furniture after you've removed everything from it and pulled the piece away from the wall if needed. Then grab a bucket and mix 1/2 a cup of vinegar with 1/2 gallon of warm water. A damp microfiber cloth is recommended, as well as drying each piece when finished. This source says to wipe in a circular motion, but remember, this is for prefinished wood furniture.
Clean wood with lemon juice and coconut oil
Once we get into solutions with oil, we're not simply talking about cleaning the wood but polishing it as well. Mashup Mom calls this solution a wood restorer, and uses it for older wood items, choosing not to risk products that could harm the beauty of the wood. It's also much more economical than buying specialized or name-brand products that often don't do what they claim. This is especially great for unsealed wood. The DIY recipe uses 2 parts coconut oil, 1 part vinegar, and 1 part lemon juice. Just pour the three ingredients into a bottle and mix them until everything is blended together well. Use a small amount of the solution on a clean, dry cloth and rub it into the wood, keeping with the grain. Apply in sections until the wood has a lovely shine and luster.
For our second recipe, we go to Naa Oyoo Quartey for a sealed wood remedy, where we use 1 cup of coconut oil, 1 tablespoon of real lemon juice, 1/4 cup of white vinegar, and 10 drops of lavender essential oil. This makes a nice wood cleaner and polisher in one, which also happens to smell heavenly! You add all the above ingredients together in a spray bottle and mix well. Open the spray adjustment to spritz a fine mist rather than shoot a single stream. Wipe the dust off all surfaces with a clean, dry cloth, then spray evenly and wipe with a new, clean microfiber cloth in circular motions. This formula shows how simple it is to safely and inexpensively create your own cleaning solution right from home.
Clean wood with olive oil and vinegar
You might think, wait a minute, I'm trying to clean my furniture, not make a salad dressing! If you ask us, that is precisely what makes this solution unique. After all, we don't know many salad dressings that can clean and polish wood. Old Town Olive Oil & Vinegar gives us this simple recipe that uses just two ingredients most people already have right in their kitchen cupboards. For this one, we take 1/2 a cup of olive oil and 1/2 a cup of vinegar and mix them in a bowl. Dampen a cloth with the mixture and wipe down the wood surfaces thoroughly. Let dry for about 10 minutes, and wipe it down with a clean, dry cloth. The olive oil acts as a terrific wood conditioner, while the vinegar acts as a powerful cleaner and disinfectant. Used together, the combination equals naturally cleaned wood.
Miss Mustard Seed tells us this combination is best for finished wood needing a minor restoration and cleaning. It largely depends on how badly the wood has been scarred or damaged, but overall this recipe works astonishingly well to remove marks and splotches. You can also add an essential oil of your choice to the formula to make it smell like whatever scent you enjoy. Overall, it's one of the most natural and simple wood cleaners and restorers out there.
Clean wood using olive oil and lemon juice
While several formulas utilize the same basic ingredients, some work better than others, depending on what type of wood you're working with. Therefore, where one recipe might work splendidly for most of your furniture, you might need to try out different combinations for others. This particular solution comes from Get Green Be Well, and is definitely one to remember. The post explains that many wood cleaning store products contain harsh chemicals that can actually harm the wood, and most are not made with natural ingredients. By making your own solutions, not only will you be helping the environment and reducing your carbon footprint, but you will also save money — all while cleaning wood beautifully! Who could possibly want more?
You'll measure ¼ cup of distilled water, 2 tablespoons each of white vinegar and olive oil, and 1 tablespoon of lemon juice. All you need are some clean cotton or microfiber cloths, and a couple of jars or spray bottles. Shake well before using. Follow the same primary method of dusting, wiping with dampened cloth along the grain, and then drying with a new cloth afterward. You can store the cleaner in a cool, dark place and shake it before using it. If you prefer a non-diluted formula, you can skip the distilled water. This is additionally a vegan recipe for those who prefer this. Olive oil takes the place of mineral oil, which is not considered eco-friendly or food-safe. Plus, the citric acid in lemons makes a terrific cleaner for wood because it's not too harsh for its sensitive nature.
Clean wood and seal butcher blocks using mineral oil and lemon
The Tips Bulletin offers another set of ingredients for cleaning, moisturizing, and protecting your wood furniture items. Major furniture polish makers like Pledge and Swiffer have silicone in their list of ingredients, which causes a buildup that traps dust and dirt within its layers. Over time, the natural sheen becomes dull and cloudy looking. The recipe is simply ¼ cup of white vinegar, 1 cup of olive oil, and 3 drops of lemon essential oil. Mix all together in a spray bottle and use directly, or spray onto a microfiber cloth, following the same basic method. The recommendation is to use flannel baby wipes to clean and polish your wood furniture.
Next, we have a unique method from Today's Homeowner for cleaning and sealing wooden butcher blocks. The formula is safe to use on surfaces with regular contact with food. To clean and seal your butcher block, thoroughly scrub it with dish soap to ensure all food particles are gone. Then take a vinegar and water solution in a spray bottle and spray down the entire surface, then leave to set in. Now to make a paste, start with ¼ cup of salt and add lemon juice until you get the right consistency. Use a scrub brush to work the paste into the wood, scrubbing all surfaces. Then rinse thoroughly and let dry overnight. The following day, seal the block with mineral oil by pouring a little at a time on the block and rubbing it in with a cloth. If it's the first time you've sealed it, you may have to do this two or three times before the wood stops soaking in all the oil.
Cleaning painted wood
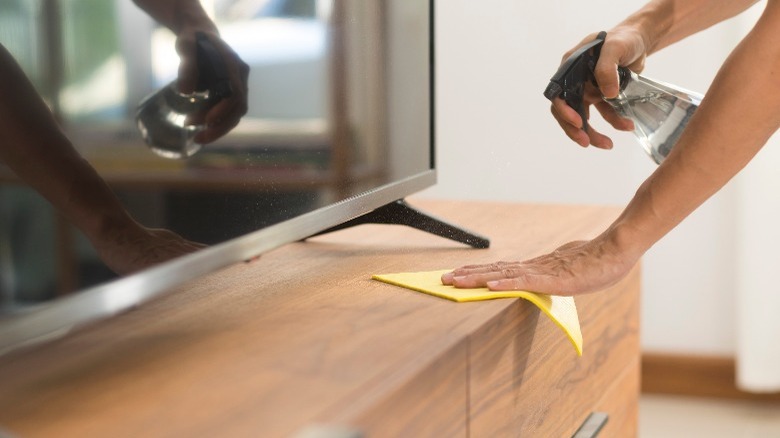
The Painted Furniture Company tells us to keep beautifully painted wood furniture from peeling, cracking, or fading, we must exhibit extra care when cleaning it. What's more, most products made for cleaning wood have chemicals that will dissolve any protective layers and can cause cracks to appear in the paintwork. As with any piece of wood furniture, the first step is always to dust off all the surfaces of the entire piece. With painted wood, dampen a cloth with water — but make sure it's not wet — and wipe down the whole piece. Do this once a week to keep it clean and bright. Additional tips from The Painted Furniture Company remind us always to keep painted wood away from heat and moisture and use coasters.
Five Star Painting says that painted kitchen cabinets can sometimes be a problem if you don't clean and care for them properly. As with other painted wood, this is emphasized to be a job handled with extra care. Indeed, these basic instructions mirror other painted wood care, shown in the above paragraph. However, there are also tips on what to use in heavy grease or buildup situations. When regular cleaning just won't cut it, use a solution of 1 cup of vinegar, 2 cups of water, 1 tablespoon of baking soda, and a few drops of dish soap for an extra boost. Dip a soft, microfiber cloth into the solution, wring out until damp, and gently work out grime and stains. Alternatively, you can use a spray formula of vinegar and water to spray the stains and allow them to set for a minute before wiping them down. Then use plain water on a slightly damp cloth to clean any residue, and allow it to dry afterward.
Cleaning antique wood furniture
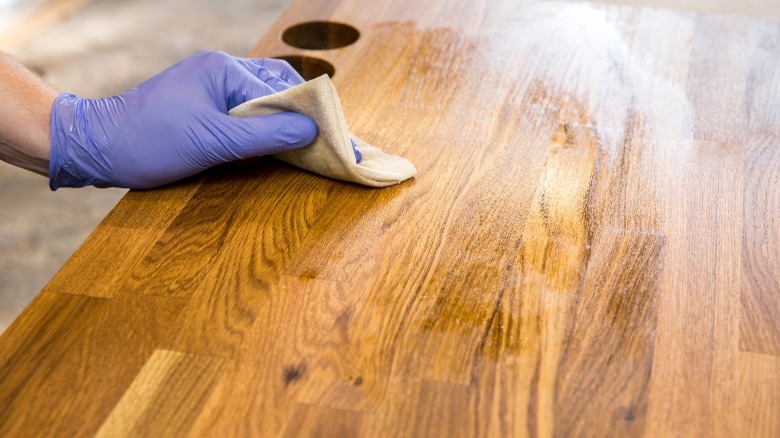
Cleaning antique furniture can be quite tedious but also rewarding. Since we all want to be extra careful not to make mistakes with precious antiques, we go to the prestigious Van Dyke's Restorers for help. The first step is determining the exact type of wood finish you're dealing with. It suggests testing an inconspicuous spot on the piece using a cotton swab soaked in denatured alcohol (use rubber gloves). Swipe a small area on the back or bottom of the piece and notice whether the finish dissolves or remains the same. If it dissolves, it's got a shellac finish, which means you'll need to refinish the entire piece. If it stays the same, you're ready to complete the steps for cleaning it. This indicates the piece either has a lacquer, polyurethane, varnish, or oil finish, in which case you can safely clean it.
You need just one main ingredient for this method: Murphy's Oil Soap. Wear rubber gloves for the process, and mix 1 ounce of oil soap with 6 ounces of water. Use a soft, clean cotton cloth to dip in the solution and wring out excess liquid so it's left damp, not wet. Start from the top of the piece and work your way down, using circular motions, rubbing with the grain. As your cloth becomes dirty, replace it with another as necessary. When you've cleaned all surfaces well, use a dry cotton cloth to dry it thoroughly in the same way, top to bottom. According to the trusted Van Dyke name in antiques, this works best for cleaning and polishing antique wood, restoring its natural beauty.
Cleaning hardwood floors
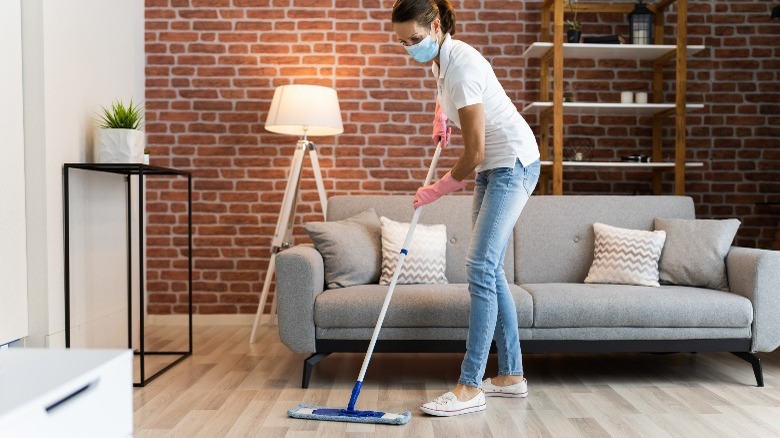
We might often do a weekly dusting and wood polishing of furniture, but are our hardwood floors cleaned the same way? The simple answer is no, but let's consult Oh So Spotless for advice. Here we're told that hardwood floors are actually quite sensitive and require a special method to clean them. But how you clean them depends on if your floors are sealed or unsealed. If unsure, you can test by using a few drops of water in a corner or inconspicuous place to see if it seeps in or sits on top. If it seeps in, the floor is unfinished. In this case, care will be different. The Maids reports it's not safe to use the same cleaners that you use on other wood furniture, such as vinegar, baking soda, and lemon juice, for wood floors. Here are some great general tips for cleaning real hardwood floors with sealed surfaces.
First of all, you should be using a flat microfiber mop. An old-fashioned string mop you can wring out will also work. Most homes have sealed wood floors that can be cleaned by mixing 1 tablespoon of dish soap with 1 quart of water. Spray lightly on a small section at a time. Move with the grain, and use just enough mist to clean the surface, because excess moisture is harmful for the wood. If you have surface-sealed floors, you don't need to wax or polish them. Daily sweeping is recommended, and you can also use a vacuum with a round brush setting for cleaning along the baseboards and between floorboards. Additionally, use distilled water in your cleaning solution to avoid water streaks.
Cleaning wood kitchen cabinets

For cleaning wood cabinets, we go to Kitchen Tune-Up for some great tips. The advice here is really quite simple and involves mainly understanding that due to the pH balance of most cleaners and DIY cleaning solutions, the best way to clean wood kitchen cabinets is with simple dish soap and water. If you use a cleaner, you'll need to make sure it's a pH-neutral one so there's no unpredictable (and likely unpleasant) chemical reaction.
Since dish soap usually has a pH balance of 7 or 8, it makes it an alkaline substance, making it safe to clean with. After wiping down the cabinets with soap and water, be sure to dry any moisture from them with a clean, dry cloth. And that's it! (Boy, was that easy!) Natural wood is beautiful, and it will last a lifetime when properly cared for. We hope these tips for cleaning multiple different types of wood surfaces are found to be helpful!