The Best Way To Clean All The Nooks And Crannies Of Your Small Kitchen Appliances
We may receive a commission on purchases made from links.
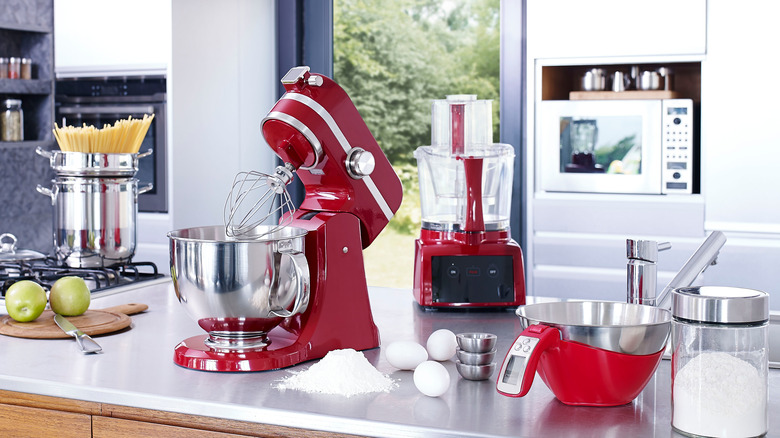
They may not be considered essential in the same way our fridges and stoves are. Still, our small appliances make certain tasks just that much easier to accomplish, whether making java in the morning or helping us defrost an ingredient at the last minute.
And while there is no doubt that most of us love our kitchen gizmos, do we show them how much we care by going the extra mile to keep them in good working condition? Likely not, since, as one study conducted in 2011 revealed, cleaning small appliances like coffee machines just "wasn't on the radar" of many homeowners, per USA Today.
Martha Stewart says most small kitchen appliances can tick along nicely with a quick wipe-down using a damp cloth and some dish soap. But if it's been a while since your devices have seen the business end of a (non-abrasive) sponge, it might be time to motivate yourself to do a deep cleaning session.
How to clean your coffee machine
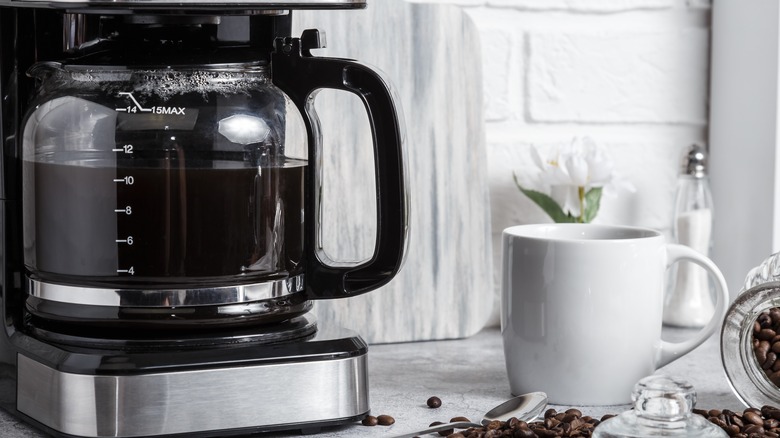
Few of us can get through a day without it. And while we acknowledge the importance of our coffee machine, we hardly give it the care it deserves, which is why it should come as no surprise that it ranks as the fifth dirtiest spot in our home, per Food & Wine. Microbiologist Lisa Yakas points out that there are parts to our magic machine that even "encourage(s) mold and yeast to grow and spread to other parts of the machine."
To keep that from happening, clean your coffee carafe with vinegar, water, and mild dish soap; gently scrubbing the insides with a soft dish sponge should do the trick. Paper towels or microfiber cloth can be used to dry out the vessel afterward, per Home Depot. Food & Wine advises coffee machine owners to allow the device's water reservoir to dry completely by keeping the lid up for a few hours after use.
Per Home Depot, a monthly or bimonthly deep cleaning will also help keep your machine from becoming a haven for bacteria. To accomplish this, fill the water tank with a commercial coffee machine cleaner or a homemade vinegar-based solution and turn on the brew cycle. Let the mix soak in the carafe for half an hour, discard the solution, and rinse well. Finish by brewing water until no residue remains.
How to clean your toaster
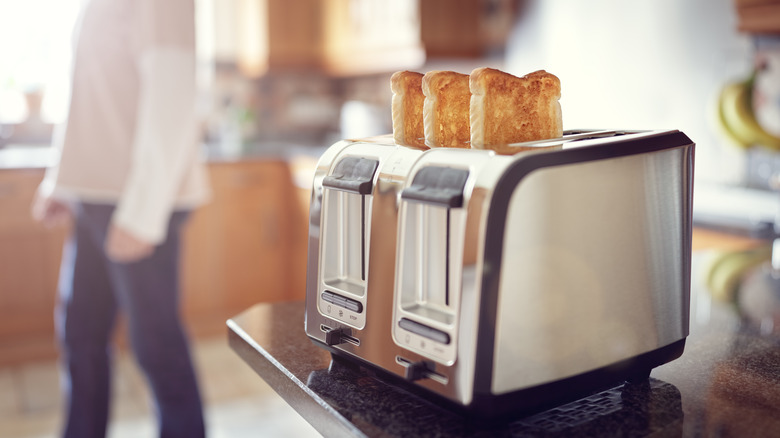
They may look and work like simple gadgets, but our toasters need far more TLC than we actually give them. As a result, when you finally get around to removing the crumb tray you didn't know existed underneath your toaster, don't be surprised if you're shocked by what you find.
But the good news is, cleaning your toaster won't require any special cleaners or high-tech gizmos. First, you'll want to unplug the device and make sure it's cool before you locate and empty out the crumb tray, which should be done every week. You'll then want to take a soft brush and clean out the heating coils gently before turning the toaster upside down to shake out any debris.
New York Times Wirecutter suggests you deal with stains on the outside of the toaster by using a damp sponge or paper towel with a bit of dishwashing liquid on it. However, make sure you avoid all switches, levers, and control panels. Once you've dealt with the stain, the toaster can be wiped down with a dry paper towel or soft dishcloth.
How to clean your microwave oven
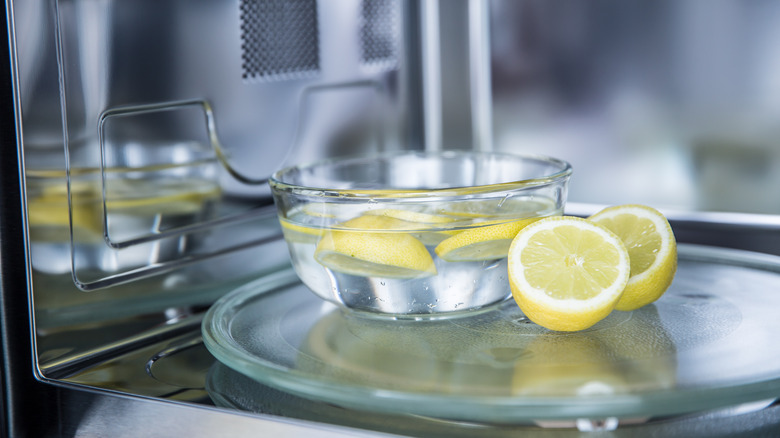
Because we rely on microwave ovens to accomplish so many different tasks, they can get pretty grimy. And if yours is dirty enough to make you cringe every time you need to use it, it's likely long overdue for a cleaning.
A dirty microwave can harbor plenty of germs simply because it often has two things bacteria find irresistible — food spills and moisture, per The Maids – and unfortunately, the longer you ignore the spills, the more difficult they are to remove.
The good news is that microwave ovens aren't that challenging to clean, particularly if you deal with spills and stains on time. One quick way of dealing with food debris is to fill a glass bowl with water, add the juice of half a lemon and run the device for a few minutes. The steam will loosen all the debris inside, allowing you to easily wipe the warm interior with a paper towel.
How to clean your Instant Pot
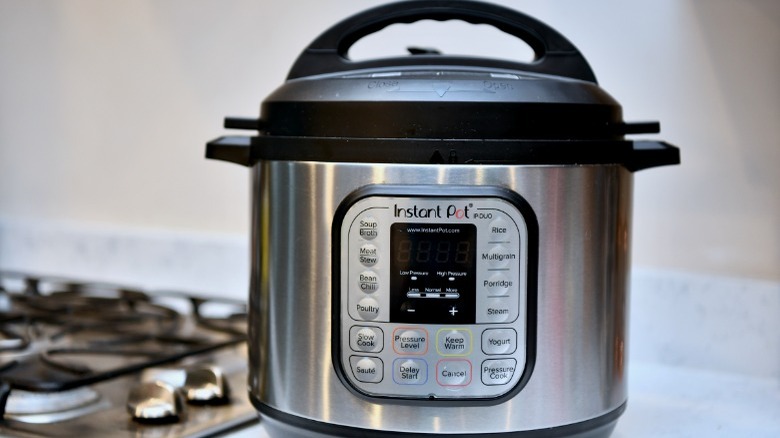
Home cooks swooned when they first got their hands on the Instant Pot in 2010. The popularity of this versatile device is such that it lays claim to being in one out of three American households, per Thrillist. And while the makers of the ubiquitous gadget say cleaning it is as easy as using it, working out which parts to clean and how to go about it may be the most challenging part for some homeowners.
Instant Pot recommends owners keep the cooker base (which contains a microprocessor and the heating element) dry at all times while cleaning the outside of the unit with a damp cloth. And while all of the device's other parts are dishwasher safe, hand washing all of the Instant Pot's components has several advantages. For one, it can be done quickly. Further, hand washing the smaller pieces will help ensure nothing gets misplaced so that your Instant Pot is ready to go when you need it.
To remove stains and discoloration, any non-abrasive cleaning solution that's stainless steel-friendly can be employed; white vinegar will also do the trick. However, keep abrasive items like harsh cleaning solutions and steel wool away from the delicate inner pot.
How to clean your air fryer

Air fryers rock because they allow us to enjoy the food we'd typically need plenty of oil to prepare with much less grease and considerably less guilt. However, just because a device doesn't require much oil doesn't mean the fryer basket won't need a good cleaning. Per Consumer Reports, you know you've neglected your air fryer if you see smoke or smell food cooking.
The best way to take care of your air fryer is to clean it with warm water and dish soap after every use, using a non-abrasive sponge on its removable parts. However, you may need to try a different approach when you cook something greasy. To deal with sticky grease residue, The Pioneer Woman suggests mixing a little water with baking soda to create a paste. You can then vigorously scrub the sticky inner tray until it sparkles. If you feel like you spend too much time cleaning your air fryer, use some aluminum foil in the basket to substantially reduce your future cleanups.