We Turned Leftover Mineral Tubs Into Raised Garden Beds With Wallet-Friendly Results
We have had a large in-ground garden for over a decade, but after several lifestyle changes, that big plot was more than we needed or could keep up with. Last year was the first year without it, and while we didn't miss all the weeding, we missed our fresh produce from the backyard and the simple joy of gardening itself.
After dismantling the old garden, we planned to install raised beds — but not just any raised beds. We want a pretty, enclosed garden complete with a picket fence and pebble walkways. For us, gardening is now more about enjoyment, fresh air, and exercise than feeding our family, but with these intricate plans comes a hefty budget to make sure it's done right. In the meantime, we still want some fresh produce and to get our hands in the dirt. That meant looking for inexpensive temporary alternatives, which is how we found out about cattle mineral tubs. Farmers have an excess of these, and they seemed like the perfect way to grow a few plants without a significant time or financial commitment. However, would they provide a suitable home for the vegetables we plan to enjoy come summer?
What are livestock mineral tubs
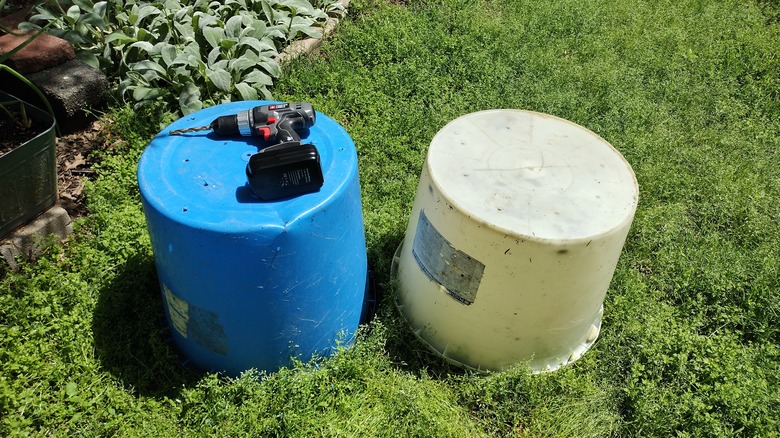
Before we get into the "how we did it," let's talk about what livestock mineral tubs are. Farmers purchase these large 125-pound tubs because the food source they contain includes the vitamins and minerals their livestock needs to be healthy. The livestock grazes the tubs until they are licked clean and replaced. The farmer is then left with a giant plastic container. As you may imagine, they accumulate these empty tubs fairly quickly when they have a lot of livestock.
Many of these large plastic tubs end up in the landfill to keep "garbage" from piling up around the farm. Thankfully, farmers have found a way to recoup a fraction of their cost by selling the empty tubs for a few bucks each. Sometimes you can even get them for free just by offering to haul them off. We got ours for free because someone else purchased them for a project, but the two we acquired were cracked at the bottom and wouldn't work for them. However, the cracks are no problem for our garden containers since plants need drainage anyway, so we began our project without spending a dime — a promising start!
How we prepared the mineral tub planters
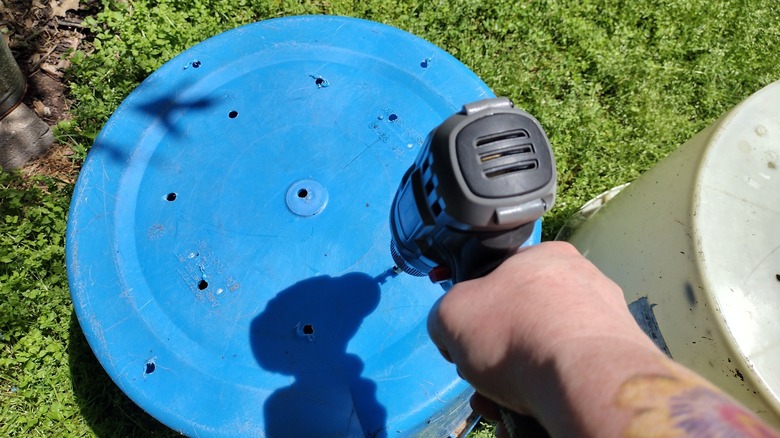
The tubs themselves require some preparation before you can just dump in some dirt and call it a planter. Since these containers are designed to hold a product, the entire tub is waterproof – good if you want to make a DIY water feature, but not if you're going to grow plants. For this step, we just used our power drill to add holes in the bottom of the container.
Because we were concerned about further cracking, we started with a small drill bit (7/32 inch to be exact), but you could use a similar size. After drilling those small holes, we went back through them with the largest bit we have, which was 3/8 inch. We would have used a 1-inch drill bit if we had one, but the whole point of this project was to make do with what we had. Knowing this, we made a plan to help improve drainage.
Filling the mineral tub planters
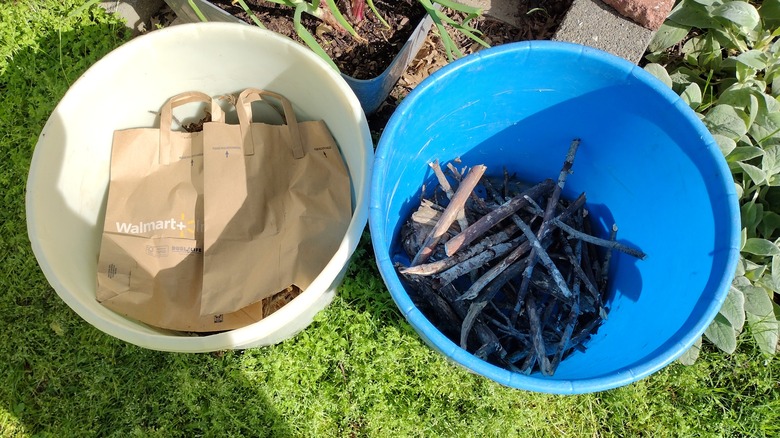
This step can get pricey, but we had a few tricks up our sleeve. The first step in filling our planters served two purposes: improving drainage and taking up space. Since we have a lot of trees on our property, we always have a pile of sticks. So we broke those sticks into small pieces and filled the bottom 6 inches of the tub. This meant we could buy less soil mix while helping excess water flow out of the drainage holes more easily.
The next step was filling the planters. Typically, we like to use equal parts topsoil, compost, and coconut coir, but since we were looking for the cheapest options, a Master Gardener friend told us about a trick they use. To add lightness and condition the soil in containers, they add layers of cardboard between layers of soil. We didn't want to mess with cutting cardboard to size, but we had brown paper bags from grocery deliveries that fit perfectly. We placed a double layer of bags on top of the sticks, then mixed equal parts cheap topsoil and compost in the wheelbarrow. We added about 4 inches of soil mix on top of the bags, added another layer of bags, then topped the rest off with soil. It took two 40-pound bags each of soil and compost for a grand total of about $12. Not bad for two large containers!
Selecting the right plants
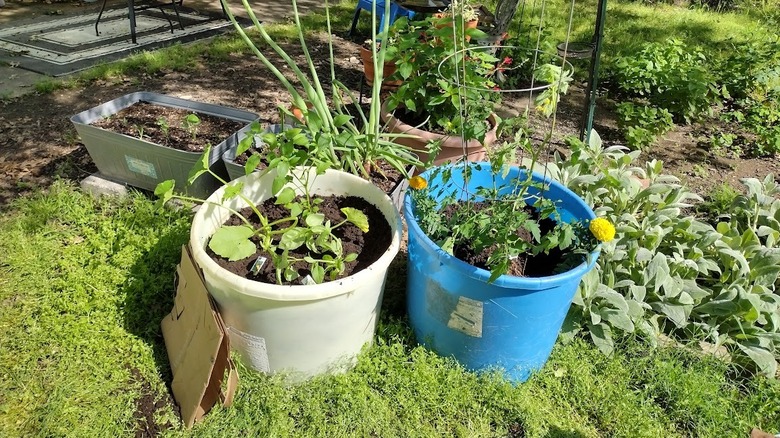
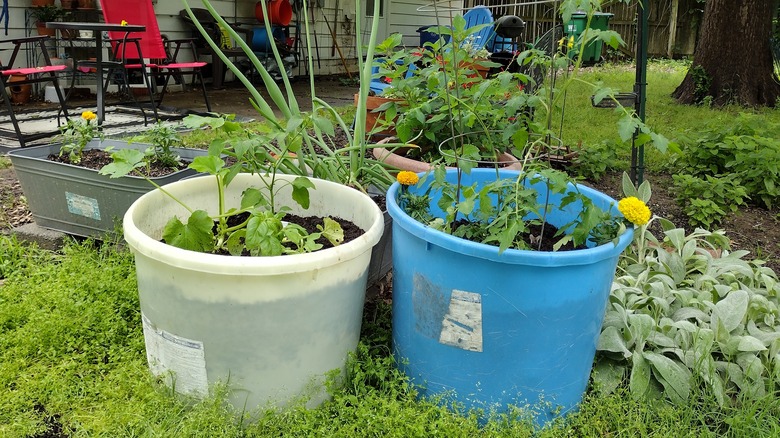
With all the heavy lifting out of the way, we got to do the fun part: shop for plants! We know what we like to eat, so we focused on that. Although it would go against our general recommendations, we purchased an indeterminate cherry tomato plant which we plan to keep pruned well enough to stay within the confines of a large tomato cage. We also added a few small marigold plants to the container to keep pests at bay.
For the other container, we focused on one tall plant, one sprawling plant, and an herb. We purchased a pepper plant, a yellow zucchini, and two basil plants. For us, the combined smells of tomato, marigold, and basil plants provide the perfect aromatic backdrop to summer. We hoped everything we bought would fit in the containers when we got home because the tomato plant was already quite large. This was the most expensive part of this project. At our local plant nursery, it was about $25 for all the plants. That may be the least money we've ever spent on one visit. (Probably because we diverted our eyes and walked quickly past the tropical houseplant section.)
The planters were sturdy and functional, if not pretty
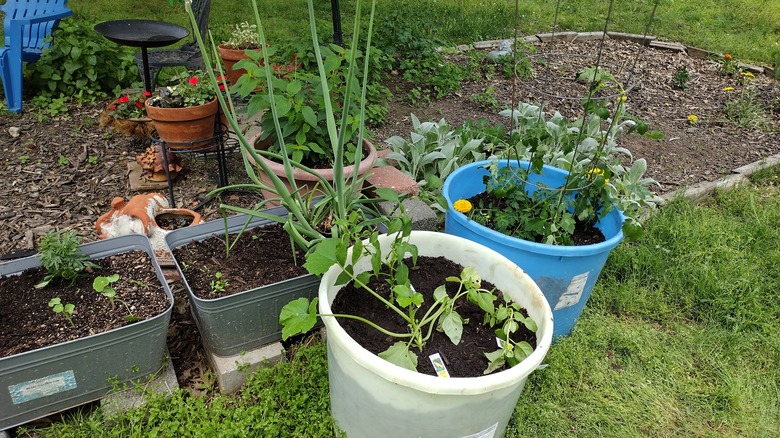
Thankfully, all our plants fit in the containers, although we expect them to be overflowing at the end of summer. The soft, freshly mixed soil made everything easy to plant, but getting the tomato cage's bottom prongs through four layers of paper bags was a challenge. We really had to push and wrestle to force them through. Knowing this now, we might have opted for a different type of tomato support. It was also very sunny and warm when we planted, so everything looked a bit droopy after planting. However, after they get over the shock of transplanting, they should perk up. Next time, doing this on a cooler day in the shade would work best.
While they are functional, the livestock mineral tubs aren't exactly pretty – a far cry from our dreamy raised beds and pebble paths – but we could add some paint and sealant if we're ever feeling creative. For now, they seem to serve their purpose well and are definitely sturdy enough for the job. It was also easy to prepare them, and we managed to fill two large containers with soil and plants for around $35. We expect these planters to last as long as we want to use them. After trying out this project, we are eagerly anticipating those first tasty tomatoes.