Tools That Make Painting Your Kitchen Cabinets Much Easier
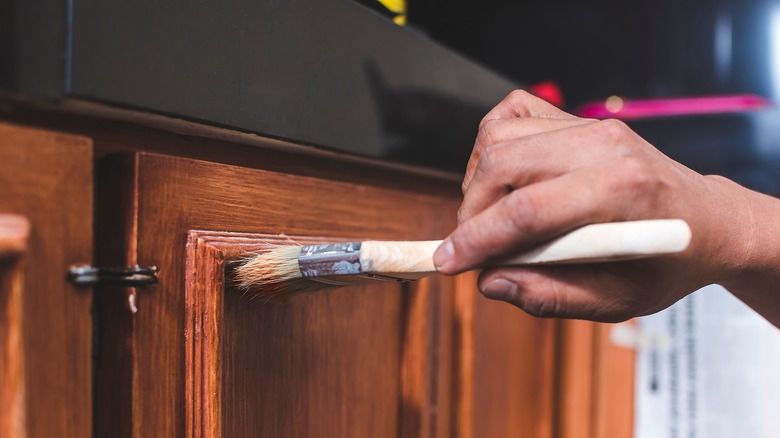
Anyone who has ever tackled a painting job on their own knows that it can be a painstaking process of patience and attention to detail. When painting your kitchen cabinets you have to worry about ensuring that all the other surfaces surrounding the cabinets don't suffer nicks or paint dribbles while you are working. That's why it can be a good idea to unhinge the cabinet doors and work freely on them to get the job done right. However, this process also has its own difficulties, such as being able to paint with one hand while the other holds the door upright. This method could lead to smudged prints on the edges of the cabinet as well as time wasted to let the bottom dry so you can flip the cabinet over to finish painting.
Luckily, there is a homemade stand you can use to make this job a breeze, which involves a piece of 2x4 for the backing that is screwed into a triangular base, as per Reader's Digest. This base should have two nails sticking up from the bottom so you can pop the cabinet door into place. Then with a little piece of wood attached to the upper area of the 2x4 with a removable nail to secure the top of the cabinet door, you are left with a free-standing cabinet so you can easily get to all surfaces of the door without missing a spot. Low-grit sandpaper and a small foam roller are two other must-have tools to tackle a kitchen cabinet paint job.
Using low-grit sandpaper on your kitchen cabinets will ensure a smooth-painted finish
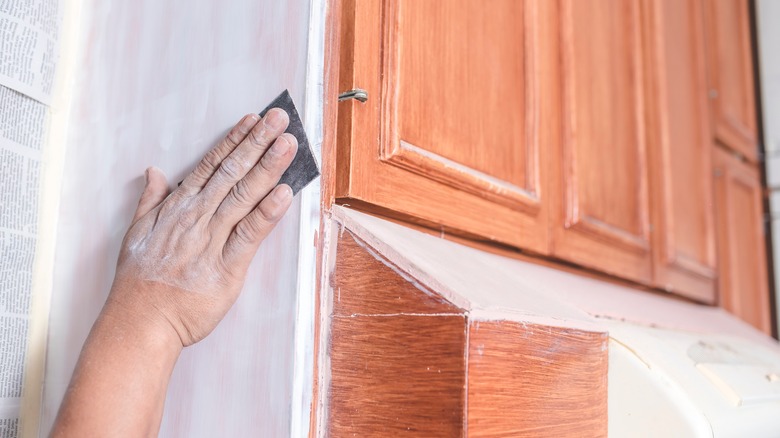
Painting your kitchen cabinets can be a lot of work, and at the end of the project, you want to be left with a nice seamless finish. There is nothing more frustrating than putting in the hours to delicately paint your cabinets, just to be left with glaringly obvious paint brush marks and blemishes for the final result. The key to a nice smooth finished surface is to not skimp on the sanding. Making good use of low-grit sandpaper can help to take out any bumps or brush stroke marks as you go through the process of painting.
First, when repainting your kitchen cabinets, you should prepare the veneer by sanding off the old paint or stain. Use anywhere from 220-grit to 400-grit paper for extra fine sanding. When removing the old layers, you don't have to work yourself too hard to take off every last inch of the coating. Instead, just ensure that the entire surface has had some light sanding before priming the area. After you have brushed on your primer and the paint has dried, grab that sandpaper again and give it a light once over using minimal pressure. This will take out the imperfections as well as give the surface a little texture so that your next layer of paint will adhere better. Plan to do a light sanding in between every layer of paint and you will notice the difference in the end.
Painting your kitchen cabinets with a small roller will help big time
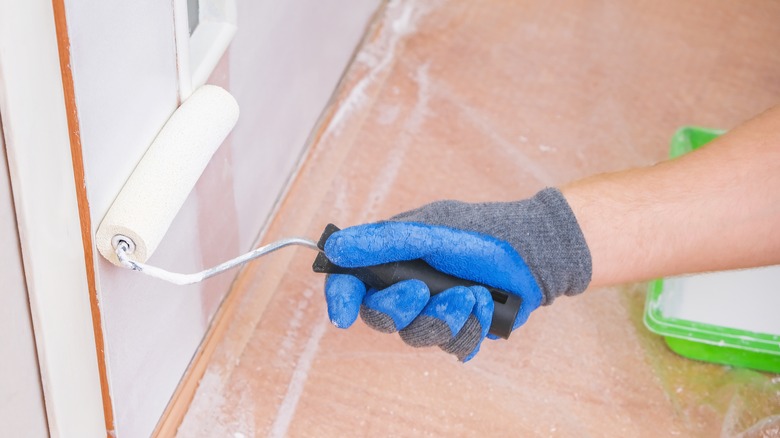
When painting your kitchen cabinets, using a small foam roller can be your best friend. It's important to stick with a foam roller as opposed to a fabric nap roller because you don't want to be left with a bubbled texture for this small surface. Higher nap fabric rollers are ideal for walls or drywall areas where nominal texture is not as noticeable as it would be on your kitchen cabinets. Ideally, a high-quality 4-inch foam roller is the best choice for this painting project. The soft surface of this small tool is able to create smooth passes along the wider areas of the cabinets as well as cover the fine details that are found in the trim. The spongy texture form fits to reach the spots that could be missed by a larger roller or even the bristles of a paintbrush.
Before coating the roller with fresh paint, it is beneficial to stir your can of paint thoroughly as well as give it a quick strain to take out lumps or imperfections. Then apply enough paint to your tool so that it is covered but not sopping in access paint. Too much paint on your roller will result in unsightly drips or could even deter the roller from spinning properly. This could cause the roller to drag along the surface of the cabinet and smear the paint as opposed to evenly distributing it over the desired location.