Turn An IKEA Plastic Chair Into Elegant Outdoor Furniture With This Genius Cement Hack
We all want patio furniture that lasts. The last thing you would want is to spend a bunch of money on chairs just to wind up with faded plastic furniture after a few seasons or, worse, break under the pressure of a summertime of sitting. For a solution to your worn-out furniture woes, there is a growing trend in investing in concrete sitting arrangements for your outdoor space. Before you scoff at the idea of lugging around a 500-pound chair in your vehicle just to sit painfully in a drab gray monstrosity, you need to check out this incredible idea shared by HomeMadeModern over YouTube.
Using an inexpensive plastic chair from IKEA as a mold, they created a concrete seat that looks great and is durable and sure to last you for many years to come. Unlike plastic and wood, which can wear down over time, concrete furniture can withstand even the harshest elements. Without the splitting, splintering, cracking, and fading you could see with other patio furniture, making the switch to concrete may just be the best move for your patio furniture. Plus, if gray is not your color of choice, you can customize the paint that best works to fit in or revamp your patio space. Now, let's take a look at what you need to make your own cement chairs.
The trick to perfecting this viral concrete chair idea
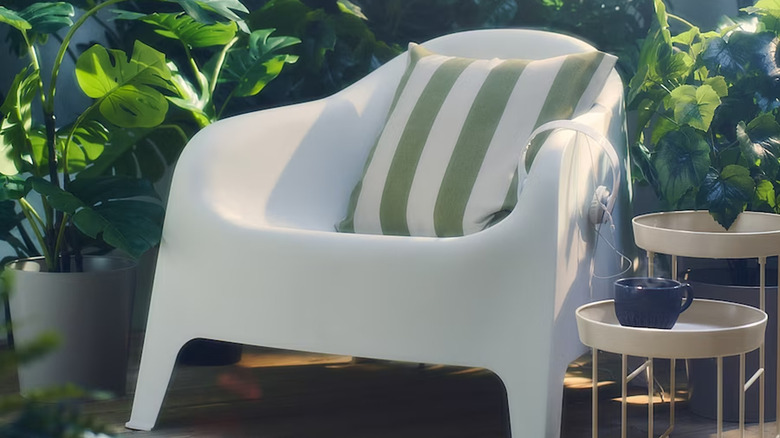
First, pick up one or two solid plastic patio chairs like the SKARPÖ from IKEA. When you flip the chair over so that the underside is facing up, the thicker build of the chair acts as a perfect chair mold. Then open and prepare one bag of quick-drying cement at a time until you have filled up the gaps. You could use a long wooden stick to dab into the mold after you pour the cement so that you can get rid of all the air bubbles, which — if left untouched —could lead to little divots or air pockets on the surface of the final product. Vibrating movements will also help to get rid of air pockets, so feel free to shake the structure gently so that the cement can work through the mold. This is probably one of the most important steps in this project. You want your results to be nice and smooth, so don't skip this stage.
Once you reach the legs of the chair, make a simple reinforcing mold using water bottles, as shown by @thesorrygirls TikTok. After they are duct taped and secure, pour more cement into the area, then allow the whole chair to dry and harden for one to two days. To remove the plastic chair from the cement, just gently work around the edges with a flat-head screwdriver so you don't risk breaking the mold.
Why this hack works and how to improve it
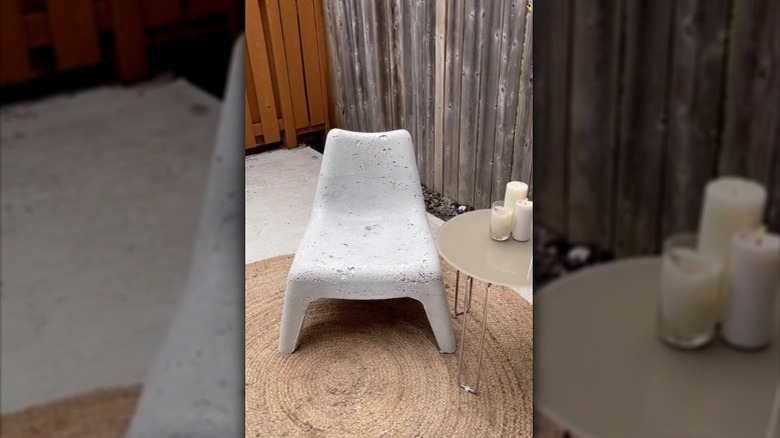
One of the main reasons that this hack works is that you start with a ready-made chair mold in the plastic IKEA patio chair. The solid structure has a deep set and smooth underbelly so that when you flip it over, it has an ideal basin to hold concrete. The lack of holes in the design makes it so that concrete can't escape when you are pouring it in, so it saves time in patching up possible problem areas. Although you can DIY your own concrete chair mold using spare wood and other materials, as shown by HomeMadeModern on YouTube, the process is time-consuming and requires some precision measurements and attention to detail. Instead, with just a little alteration to the support of the legs, you pretty much have a perfect chair mold ready to go.
If your final product has a few rough edges, it can be easily smoothed using an angle grinder with a fine-grade disk. This can improve the overall look and give it a cleaner appearance. The only drawback of this project would be the overall weight. Obviously, working with concrete, you can expect the final product to be a little heavy; however, one way to counter this would be not to utilize the entire mold and stop pouring in concrete before you reach the edge. Also, you can incorporate lightweight concrete instead, which uses lighter aggregates in its mixture, such as clay, slate, or shale.