The Perfect DIY Pumpkin Bird Feeder For The Fall
Nothing signals the start of fall like the sight of pumpkins. But come November, all those pumpkins quickly turn obsolete as people transition to their winter holiday swag. All your excess pumpkins don't have to wind up in the trash, though. You may not use them for your own consumption, but one alternative to throwing your gourds away is creating a DIY birdfeeder. There are a couple of different methods for doing this, and both can be done with new or carved pumpkins (such as those past-their-prime Jack-o-lanterns).
By turning your old pumpkins into DIY birdfeeders, you create an additional food source in the area as the natural ones grow scarce, and you manage to reuse something that would otherwise just be thrown away. It's also a great way to keep the fall vibes alive throughout the rest of the season — you just need a pumpkin and a cutting tool. Here's how to get started.
Cut your pumpkins in half to make DIY open feeders
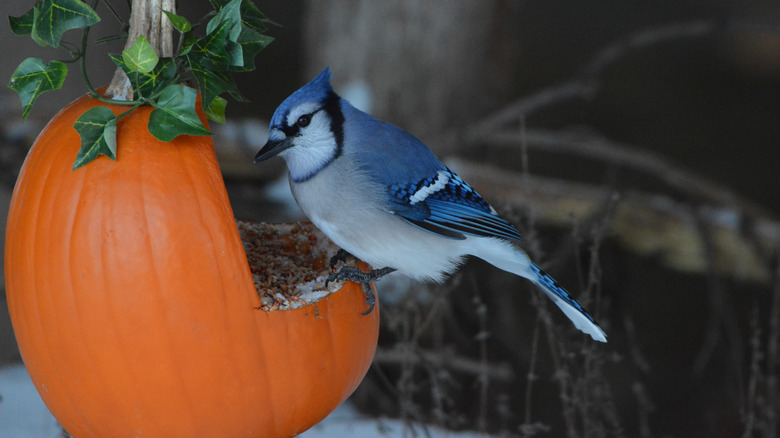
Whether you've got an uncut pumpkin or one that's just retired from Jack-o-lantern duty, you can make open bird feeders out of them by cutting them in half horizontally. If this is the first time you're opening this pumpkin up, clean all the innards. For the seeds, set them aside to dry and either roast them for yourself or add them to your birdseed mix when your feeder is done.
Once your pumpkin halves are ready to go, drill four holes at compass points around the circumference — two holes on opposite ends north and south, and two holes on opposite ends east and west — big enough to accommodate two dowel rods that are long enough to slide all the way through and still leave several inches outside the gourd. Before inserting the rods, soak the pumpkin halves in a diluted vinegar solution to prohibit mold growth and allow it to dry. Insert the rods and tie one end of a piece of twine onto each — one string for one rod and another for the second. Fill it with birdseed and toss in your dried pumpkin seeds. Use the strings to hang the feeder wherever it is most desirable, and watch the birds feast with delight.
The Jack-o-lantern approach
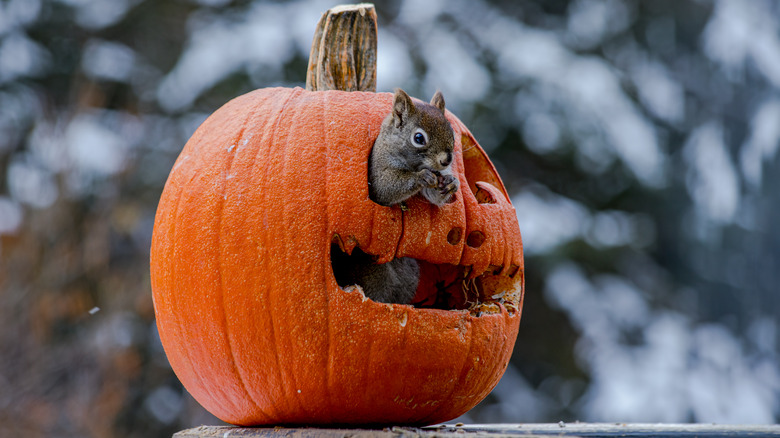
If you've ever watched "It's the Great Pumpkin, Charlie Brown," you know that our titular hero fumbles his way into a ghost costume made out of a sheet with at least a dozen holes cut out of it. Well, you can bring that same aesthetic to your old pumpkin as you turn it into a DIY birdfeeder. This method is particularly good to use with all those old Jack-o-lanterns, as they're already carved. However, if you're using an intact pumpkin that had previously been decorating your front stoop, that works, too. First, you'll have to cut off the top and remove the pumpkin guts, as you do when carving Jack-o-lanterns, but after that, you don't need to make a face or have any artistic ability.
Take a sharp knife or other cutting tool — even a handheld drill will work — and make holes of various sizes all around the circumference of the pumpkin. If you previously carved a face into it, you can cut a few additional holes on its sides and back. When this is finished, briefly soak your pumpkin in a diluted vinegar solution so it doesn't go moldy, and let it dry. Place the pumpkin wherever you like, and sprinkle birdseed in and around each of the entrances to lure them in. Many different birds — and other wildlife — will feast on the flesh and seeds.