Smart Ways To Repurpose Those Old Or Broken Window Blinds In Your Home & Garden
We may receive a commission on purchases made from links.
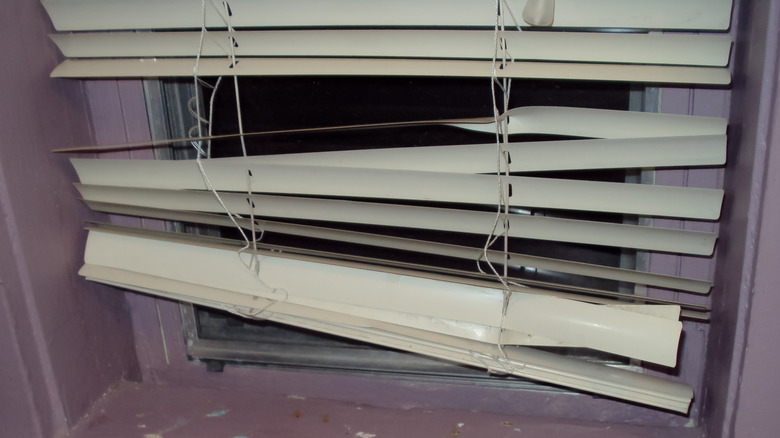
If fixing broken window blinds that were destroyed by a child, pet, or regular wear and tear isn't an option, reconsider before condemning them to a grim fate in the garbage bag. Lurking within those slats is a treasure trove of innovation awaiting the moment you unleash your creativity. Imagine upcycling old window blinds into smart, resourceful, and simply fabulous items that can upgrade your home or garden, adding both flair and utility. Whether repurposing them into U.S. flag art, handy plant markers in your garden, a striking starburst mirror, or mini Christmas trees, the possibilities are astounding.
Repurposing old or broken window blinds won't just satiate your creative appetite. With a dash of creativity, the old or broken transforms into something far more valuable than its original purpose, saving your wallet from the burden of having to purchase new items. And let's not forget the green credentials. You're participating in saving our planet by turning what was deemed junk into something breathtaking and useful, slashing your contributions to landfills. However, amidst the artistic journey of repurposing window blinds, strike a healthy balance of excitement and safety, as you'll likely cross paths with various tools (some whose motion poses inherent risks). An example would be the miter saw, whose rotating power demands mindful handling without gloves, as loose clothing can easily get entangled and cause unforeseen mishaps.
Repurposing window blinds into garden markers
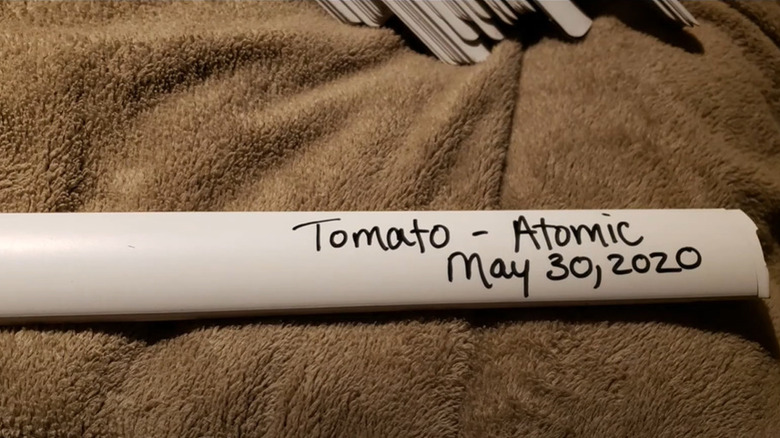
Picture repurposed window blinds gracing your rows of vegetables, herbs, or blooms as ingenious, eco-friendly garden markers. Start by treating the slats to a thorough cleanup and slicing them into equal lengths. You must ensure each piece has sufficient room for the plant's name and is long enough to stick firmly into the soil. Using a waterproof marker (think acyclic paint markers), inscribe the plant names on both sides of your homemade markers. You could go a step further and add sowing dates or plant-specific care instructions. The grand finale arrives as you anchor the non-script end into the soil alongside the corresponding flora.
Blinds-to-headboard transformation
How about a stunning bedroom transformation courtesy of old linen blinds repurposed into an artistic headboard cover? Kick off this DIY project by measuring your headboard, which will determine the amount of blinds you'll need. Then, unleash the blinds from their housing and brace yourself for a cleanup mission. Next, think outside the box by customizing the blinds into a canvas of your own — a splash of paint and LED strips here, an embroidered motif there. Then, thread those blinds into a creation that matches your headboard's measurements. Wrap it up by draping your masterpiece over the headboard, ensuring a snug fit with staples.
Storage solution from your old slats
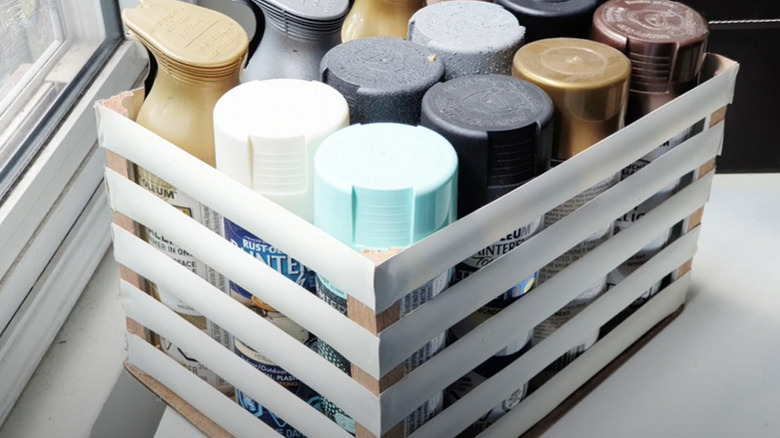
Is your living space drowning in unsightly clutter and disorganization? Seize the opportunity to reinvent those old vinyl blinds into a functional and visually-appealing storage box. This project involves no weaving — simplicity at its best without compromising elegance. Begin by chopping off the strings to liberate the slats, then step into some woodwork. Here, four appropriately-sized wooden strips attached to a wooden square base in the corners form your creation's skeletal frame. Then, start horizontally wrapping the frame with the slats from the bottom, keeping them tight for an additional layer of sturdiness and securing each to its rightful place using staples or glue.
Stunning starburst mirror from blinds
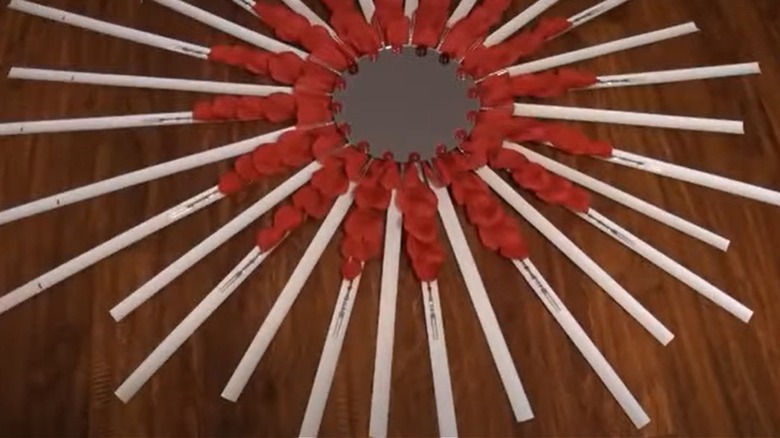
From this hack for repurposing window blinds, a mesmerizing starburst mirror is born. Begin by bringing those dusty vinyl blinds out from hiding and cleaning them. Next, slice those slats into assorted lengths that scream starburst. Now, arrange these pieces onto a solid flat backing, their ends converged at the center with glue. Next, glue your mirror to the backing. Suddenly, what was once a collection of blind slats becomes a small universe. Decorations, perhaps shiny beads or artificial flower petals, can be strategically-placed around the mirror for an added touch of opulence. Finally, let your starburst mirror take the spotlight on your wall.
Personalized bookmarks
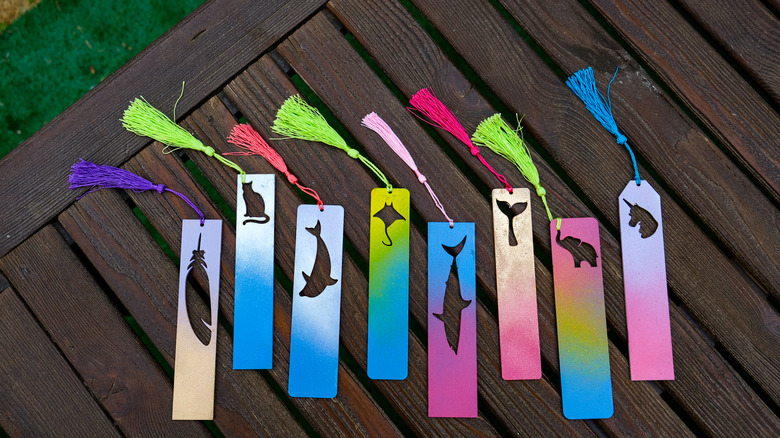
Imagine your reading haven transforming into a vibrant display of your personalized touches with customized bookmarks from your upcycled window blinds. Freeing those slats from dust is your first task here. Next, trim them to your desired length, sand any rough edges, and embellish them with acrylic paint, stamps, patterns, quotes, or stickers. A neat punch hole at one end of each bookmark lets you thread a fancy ribbon or tassel, adding a final flamboyant touch to your sustainable bookmarks. Your transformed blinds-turned-bookmarks are ready to make your reading sessions unique while doubling as thoughtful handcrafted gifts for your fellow book lovers.
Barrier for stress-free painting
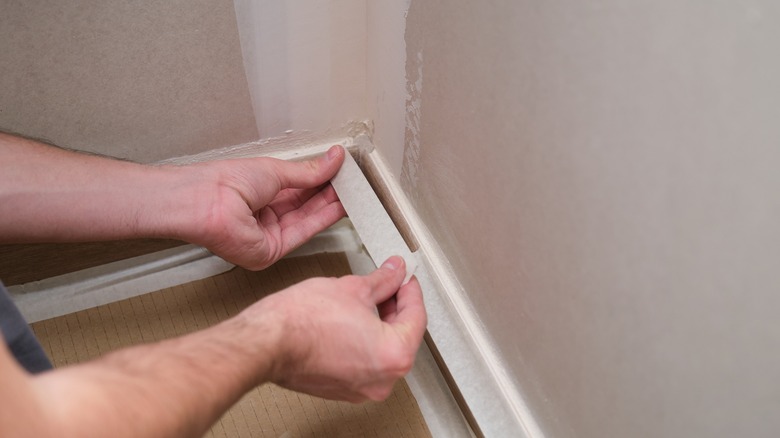
No paint masking tape? Well, don't let splatters ruin your precious surface when your seldom-used old blinds can find new life as paint barriers. Lie or hold them flat and press them gently along the edges of the wall yearning for a makeover, forming a protective shield that will keep your floor or carpet from rogue drips or splatters of paint. When new sections beckon for color, simply swap out the paint-splattered slats for pristine ones until you are done. It's a simple, environmentally-friendly hack that lets you repurpose items that would have ended up in the trash, all while executing your dream home makeover.
Adding vibrancy with a window blind accent wall
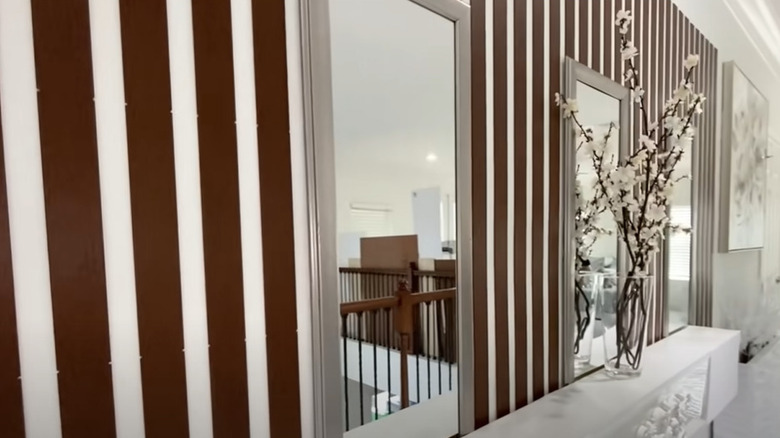
Adding a captivating twist to a seemingly-dull wall can seem daunting, but with your upcycled vertical blind slats, it can become a joy-filled journey of your home redesign. Once you give the slats a thorough clean, channel your inner "Van Gogh" to paint them in contrasting hues or intricate patterns that spark a certain je ne sais quoi in your plain-jane room. Sanding them down before would shed any weary old look. Wielding a nail gun, mount each strip onto the chosen wall. Don't hold back your artistic instincts — consider an arrangement that suits your style, whether overlapping them or creating patterns.
Drawer dividers for clutter-free organization and storage
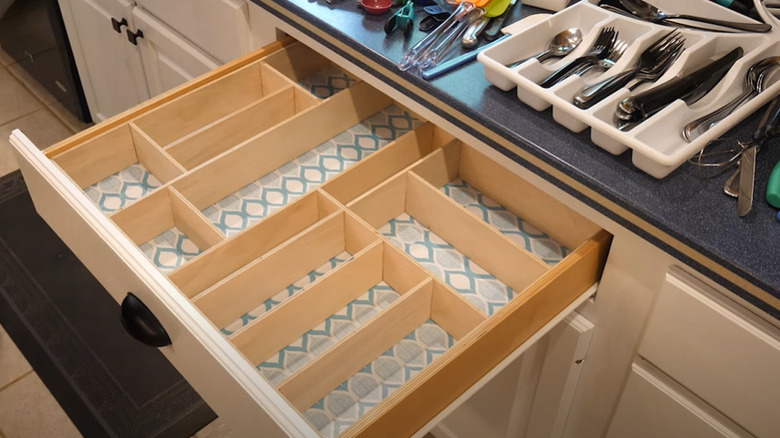
Continually fighting the chaos of untamed drawers can feel like an uphill battle, but by reframing those old blind slats into practical drawer dividers, you can achieve household harmony with an added touch of personality. Measure each drawer's length and width, ensuring your blind slats match the dimensions. A quick snip and fit, and voila! Your repurposed slats are ready to create custom compartments that keep everything at your fingertips — from kitchen utensils to your treasure trove of crafts supplies. Feel a rush of satisfaction whenever you open a drawer and find what you need in seconds.
Gift tags that make unseen love seen and felt
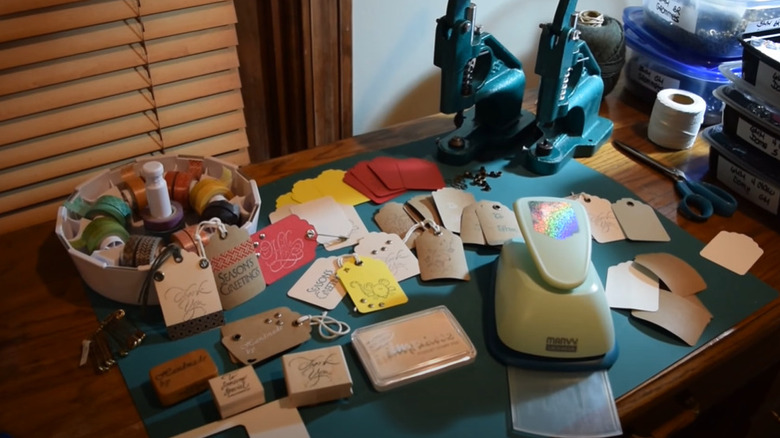
Transforming your old blind slats into bespoke, handmade tags will provide an unmissable charm to your gift-giving routine. Begin by transforming your slats into charismatic shapes with a simple snip, from rectangles and circles to adorably-festive hearts. Next, use vibrant paints, express love with beautiful calligraphy, or shape fond memories with rubber stamps. For the final elegant touch, punch a hole and run a whimsical ribbon or rustic twine through it before attaching it to your thoughtful gifts. These customized tags speak volumes of your dedication and creativity to those receiving your gifts.
The practical and aesthetic garden trellis
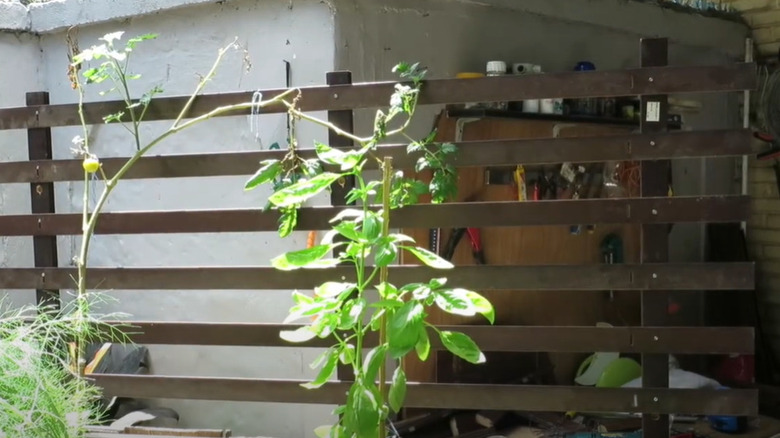
Old blinds upcycled into a trellis could help your climbing plants soar to new heights — a timely savior when your green-thumb passion ambitions are up against limited space. Set off this creative adventure by juxtaposing the slats horizontally and vertically, securing them at each intersection using screws, nails, or durable twine that can brave the whims of weather. Plant this thrifty trellis in your garden and witness it become a resident backbone for your climbing crops like tomatoes, snake beans, or sweet peas. A testament to resourcefulness, this revamped trellis makes the most of your limited garden space while letting your green climber thrive.
Show-stopping bamboo pendant light
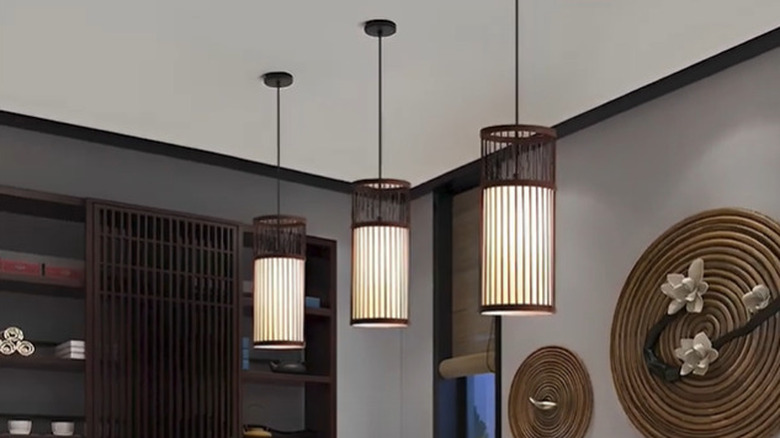
Fancy an illuminating, captivating feature in your living space? That's precisely what you'll get from repurposing old wooden blind slats into rustic pendant lights. Ignite your creative spark by cleaning, cutting, and sanding the slats, then apply the paint color that matches your room's styling. Whether you opt for a chic, minimalist design or a bold, bohemian statement, artistically weave or secure the slats into a basket-like shape to encase the lightbulb. Finally, safely mount the light fixture along with the appropriate wiring. With this one-of-a-kind pendant light, your living space is no longer dimmed by the mundane but instead ignited by your creative flair.
The soul-stirring U.S. flag art tribute
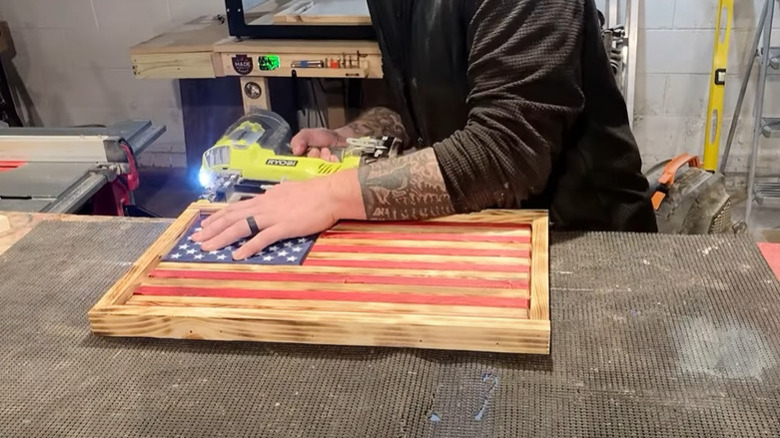
Next up on upcycling old window blinds, unleash your inner craftsman with eye-catching American flag art. Start by slicing a set of rustic wooden blind slats to replicate the 13 stripes on the U.S. flag. Paint alternating slats in bright red, leaving the rest in the original untouched wood glory. Then, grab a star stencil like the WISYOK American Flag 50 Star Template on Amazon, place it on a blue wooden block preserved for the blue field, and spritz white paint to birth the stars. Finally, bind the pieces from behind using braces and 18-gauge nails, and enclose the masterpiece in a frame.
The enchanting dollhouse shingles makeover
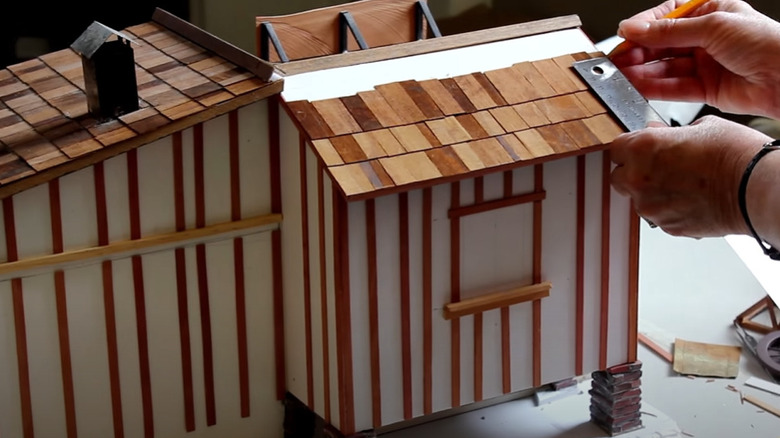
In this case, it's about bringing the art of fairytales to life by transforming old blinds into captivating, realistic dollhouse shingles. As you meticulously cut the slats into small, even sections, picture the miniature world for which they are destined. Paint them with the desired shade, never hesitating to explore different patterns, textures, and dimensions for a more authentic impact. Once dry, glue the petite tiles onto the dollhouse's roof, watching your skillful efforts transform a wooden toy into an alluring and magical mini dwelling.
Vinyl blinds planter slat wall
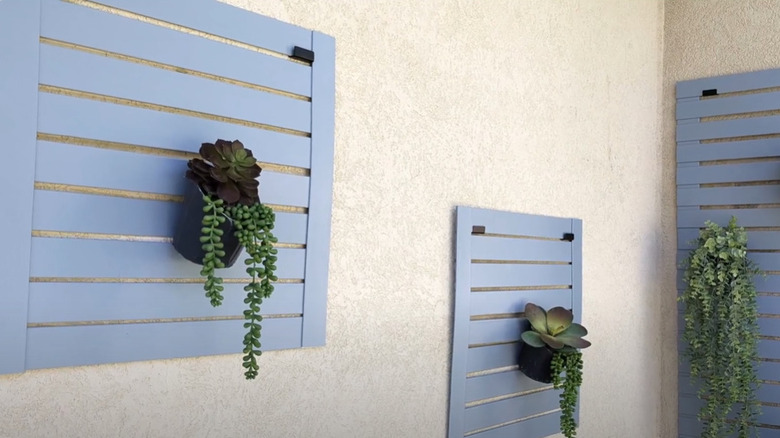
How about injecting life into your home or outdoor space with versatile vinyl blinds transformed into a planter slat wall? Initiate this transformation by measuring and cutting your blinds into the required lengths, then assemble them on a flat work surface. Next, paint the outlines in lively colors that will serve as a striking backdrop for your greenery. Once the paint is completely dry, use sturdy brackets to secure the planter slat wall to your desired location. Position the brackets at the top of the planter wall, ensuring it's firmly anchored and safely supported. Finally, attach your chosen planters, evenly spreading them across the slats.
Mini Christmas trees
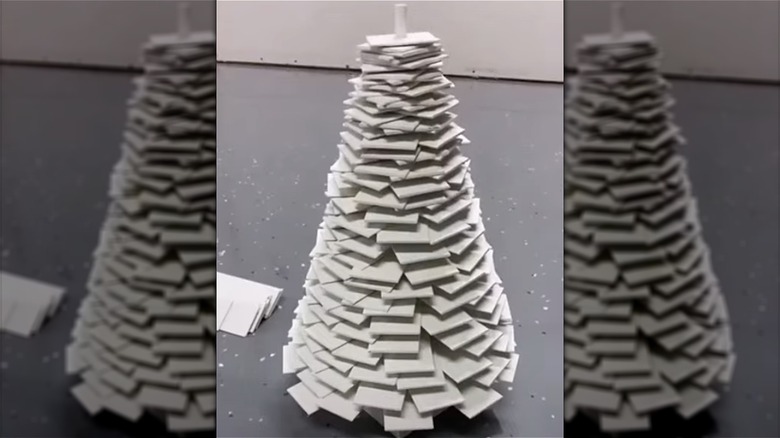
Rather than letting a demanding real tree or impersonal store-bought decoration dominate your holiday season, create your magical mini Christmas tree using wooden blind slats. Start by cutting slat pieces in various lengths, then select a solid pole or pipe as your central trunk attached to a sturdy wooden base. Insert the pieces at different positions through the pole, graduating from largest at the bottom to smallest at the top to mimic the shape of a traditional Christmas tree. This eye-catching and space-efficient conversation starter is perfect for tight quarters or as a memorable table centerpiece.
Bamboo placemats that fuse sustainability with style
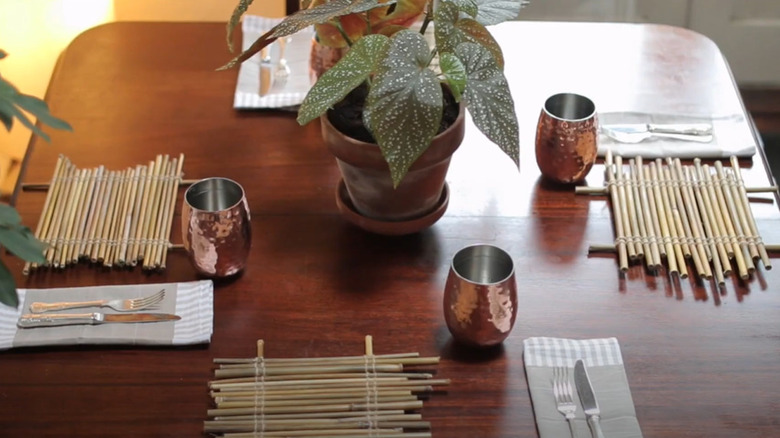
This hack will see you repurpose old bamboo window slats into fashionable placemats for your dining table. Begin by measuring and slicing your bamboo blinds into an appropriate placemat size that will complement your table settings. Before using them, thoroughly clean your window blinds to rid them of any residual grime, then leave them to dry completely. Feel free to brush on a protective, food-safe finish like LED hardwax oil, polyurethane, or shellac stain for a refined look and added durability. Small felt pads on the bottom corners or a non-slip backing could suffice as a finishing touch to ensure your creations stay put.
Wooden blind slat bottle tags
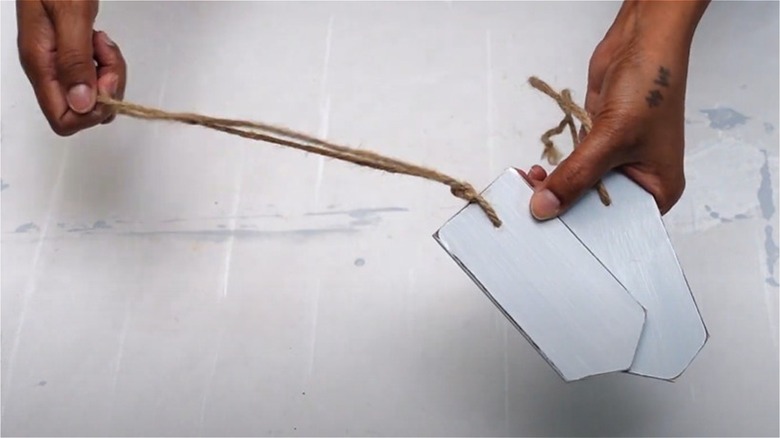
Ideal for bottles housing clear liquids that might be difficult to identify at a glance, custom tags fashioned from old wooden blinds are certain to annihilate ambiguity. Commence by cutting petite rectangles from the slats. To escape the mundanity of a regular cuboidal tag, slant one end at 45 degrees, mirroring the tips of a traditional picket fence. Next, drill a hole near the straight end. Cover the piece in tape first to avoid any unfortunate splitting. The final act of this repurposing hack is jotting down the essential details for each liquid on the corresponding tag.
Wooden slat privacy or sun screen
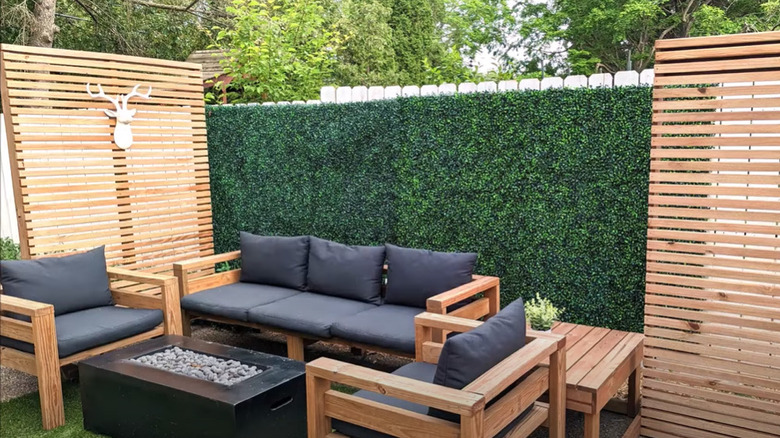
This intricate yet gratifying wooden blind craft transforms your outdoor space into a personal, private oasis. Central to success with this transformation is finding the perfect dimensions for the desired fixture and cutting your wooden slats accordingly. Lay down the pieces parallel to each other, maintaining the desired width apart, to create a ladder-like effect. The spacing between these should align with your privacy and sunlight control requirements. Secure the structure by stapling the horizontal blinds to evenly-spaced vertical supports, attach screw hooks to a wall or deck railing, and hang the screen accordingly. A free-standing screen, however, would require a sturdier frame.
Wooden blinds poster frame
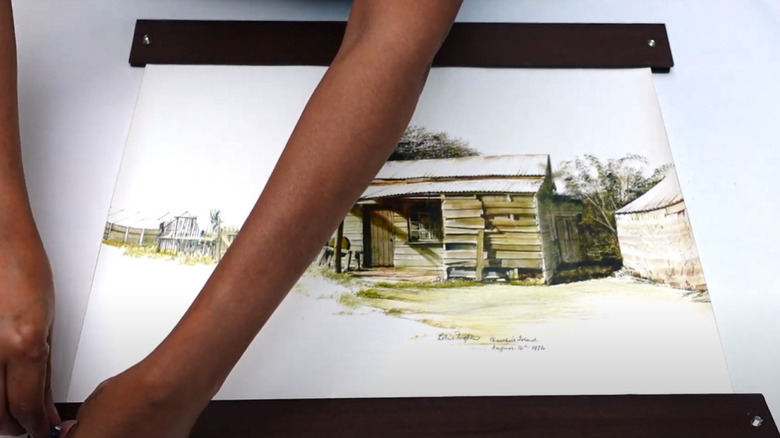
How about transforming your old wooden blinds into stunning, custom frames for art or posters? Begin by cutting four identical pieces of wooden blind slats to just over your poster's width. Adorn the back of the upper wooden blind pair with a hanging fixture. Glide a thin stream of adhesive along the inward-facing facade of one slat from each pair, drape your poster, and gently imprint it on the glued areas. Finally, secure the twin slats in each pair together with screws to sandwich the poster edges. Here, the upper pair is the mount, while the lower pair acts like a counterweight, keeping the poster straight.
Fashioning picture frames from wooden blind slats
A picture is said to hold a thousand words, but when encased in a custom picture frame made from upcycled wooden blind slats, its narrative gains depth. Begin by measuring and cutting slats at a 45-degree angle to fit snugly around your periphery of cherished memories. Then, assemble pieces in a square or rectangular frame, relying on reinforcement options such as wood glue. Sand the edges smooth, paint, stain, or decorate your frame, then slide in your favorite photo. Your window blind picture frame, with mounting hardware or a stand on the back, becomes a testament to your creativity and sustainability.
