13 Warning Signs That Mean It's Time To Deep Clean Your Oven
We may receive a commission on purchases made from links.
When was the last time you cleaned your oven? It can be a dirty job, and it's easy to shut the door and ignore the mess. However, pretending the oven isn't messy can cause problems. Although it'd be nice just to focus on cleaning visible spills and preventing ovens from smoking when they preheat, you have to focus on the subtle but essential signs that it's time for a deep clean.
To keep your oven in top shape, you have to learn to recognize and understand the minor signs your oven gives you. This is more than figuring out how to get rid of smoky smells or stains. Instead, it's about realizing how ignoring these issues can impact how well your oven works, your energy consumption, and how safe your home is.
Each sign hints that something isn't right, from lingering bad smells of hidden food particles to banging sounds that indicate loose parts or debris. In worst-case scenarios, ignoring warning signs can result in increased energy bills, uneven cooking, and fire hazards. Understanding the "why" behind each sign will empower you to keep your oven in peak condition, ensuring safe, efficient, and flavorful cooking experiences.
The oven is smoking during preheating
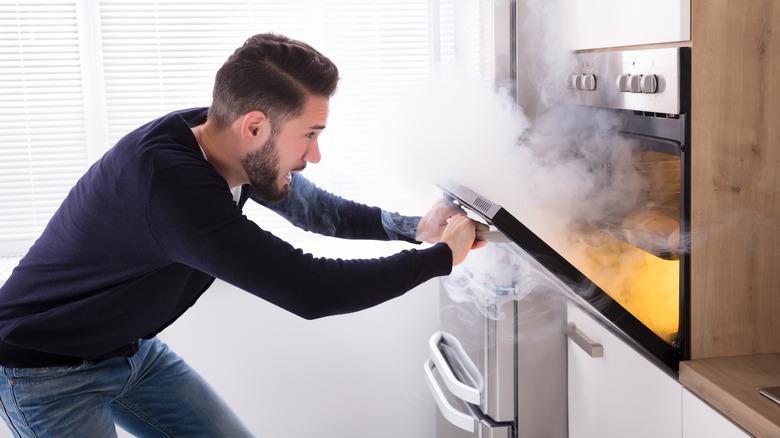
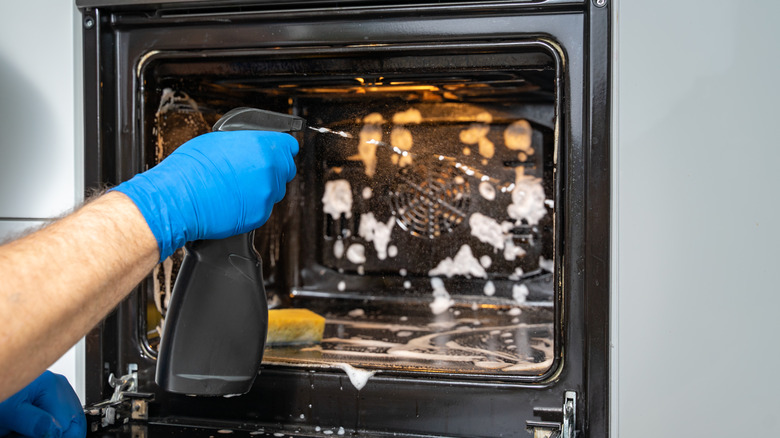
If you notice smoke when you preheat your oven, it's a clear warning sign that you should learn how to deep clean the oven. The smoke usually comes from built-up grease, food residue, and oil splattered on the interior during previous cooking sessions. As the stove heats up, the deposits scorch and burn, creating smoke. The smoke can make your food taste bad and smell long after the oven cools, and it's a fire risk. This is especially true if you don't make a point to clean up any spills or messes as they happen immediately. Surface cleaning usually isn't enough to prevent the oven from smoking, and a deeper clean is necessary to get the burnt-on residues out.
To remove these fire hazards, mix warm water with a few squirts of dish soap and use a cloth or non-abrasive sponge to wet the oven's interior. This solution works to loosen up and remove fresh grease or food spills. Scrub gently, paying attention to any obvious dirty spots you see. Use a commercial-grade oven cleaner for burnt-on residue or stubborn grease spots that are too strong for the dish soap mixture. Follow the instructions when using these products to ensure safety. After applying the oven cleaner, let it sit for the recommended time before wiping it away. Get a clean, damp cloth to wipe away any residue, and let it dry to finish.
It's difficult to open or close the door
If you have to work to open or close the oven door, you should take a closer look. I Clean Ovens says it's common for food residue to build up on the door gasket or rubber seal that runs around your door's outer edge, making it stick. This seal helps keep the oven at the temperature you want, but when spills or crumbs get caught on it, the door won't close correctly. This can cause uneven cooking, heat loss, and higher energy bills, as your oven works harder to stay at the set temperature. A non-sealing door is also a fire hazard; ignoring it can cause more damage that requires expensive repairs or replacement.
Cleaning this gasket is a very delicate task, and you have to be careful so you don't damage it. Mix water with a few drops of liquid dish soap, dip a clean cloth or sponge, and carefully wipe down the gasket. You may have to do a few passes of heavily stained areas or spots with visible residue. Don't use harsh chemicals, rough scrubbing tools, or abrasive cleaners for this part because they can damage the gasket, ensuring you don't get a tight seal. Rinse the gasket with clean water and a sponge to prevent moisture buildup, which can lead to mold growth.
There is faulty temperature regulation
Not being able to regulate the temperature in your oven is frustrating, especially when you're over or undercooking your food as a result. This problem pops up when your oven can't hold or get to the set temperature, and a layer of grease, grime, and food particles on the thermostat sensor can be to blame. Best Service Company notes that this sensor plays a massive role in monitoring and adjusting your oven's temperature, ensuring it reaches and stays at whatever temp you set. However, if the sensor gets caked in residue or obstructed, it misreads the oven's internal temperature. The buildup can also insulate the sensor, which stops it from accurately gauging the true interior temperature. However, the sensor is a very delicate component, so you must take care when cleaning it to avoid damage.
To clean around this thermostat sensor, turn off and unplug the oven first. Get a damp, soft cloth and add a drop or two of dish soap, wringing it out to remove any excess moisture. Wipe around your thermostat sensor, ensuring you don't directly touch or move it as you do. The goal is to eliminate buildup without changing the sensor's position or calibration. When it looks clean, get a dry, soft cloth and wipe away any lingering moisture. Never use abrasive chemicals or scrub directly on the sensor because it's easy to damage or move.
You see crusted heating elements on floor
If your oven isn't heating up, buildup on the floor of your oven or the heating elements themselves may be to blame. This buildup usually features grease, burned-on food, and general cooking residue. This crust makes it harder for your oven to reach the correct temperature and can start to smell as the oven heats up. The odors can get into your food, making it taste bad and impacting its quality. The heating elements are critical parts of your oven, and this crust can stop them from distributing heat evenly. You risk damaging the components or the oven's interior if you don't address it.
Cleaning your crusted heating elements is tricky. According to Homeserve, you should never put cleaners directly on them. Adding something as simple as water can make them short or cause other damage. So, you'll need to get a dry cloth and gently wipe any stuck-on gunk off. Applying a small amount of baking soda and gently rubbing with a damp rag on any tough spots is possible for the floor. Once they're gone, clean the floor with a damp cloth to remove the residue, dry the interior, and it's ready to go. As a bonus, baking soda will deodorize to eliminate unpleasant burnt food smells.
You see a stained oven window
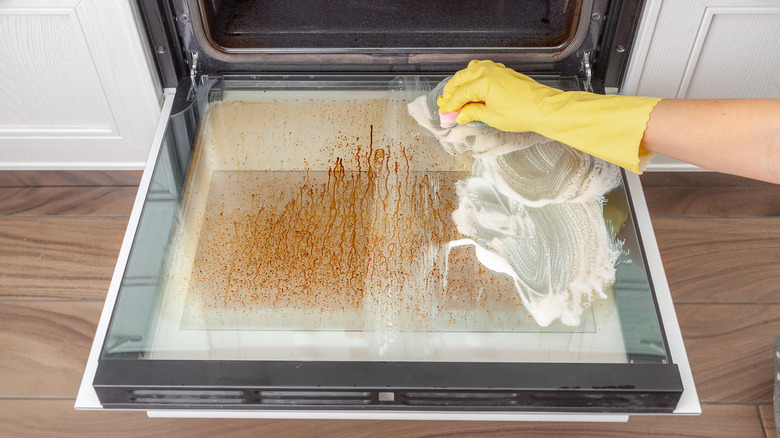
When you look at your oven, it's common to have a grimy or stained window. The stains are usually a result of grease splatters, oil, or food particles spilling when you put food in or take it out of the oven, and they bake onto the glass surface as you cook. As they build up and bake, they turn opaque and hard, blocking your view of the oven's interior. This can affect your cooking, as you're no longer able to glance in and see your food cooking. This can be critical to help you gauge how done it is without constantly opening the door and losing heat. Additionally, the longer you leave the buildup on the door, the harder it is to clean, even if you use a magic eraser to wipe at the grime. It gets more complicated when you realize you don't want to aggressively clean the door because you can crack or break it.
To clean your stained oven window, KitchenAid recommends mixing baking soda with water to make a thick paste to break down the baked-on film. Put the paste onto the stained areas and leave it alone for 30 minutes to give the baking soda time to work. When time is up, get a damp cloth and remove the paste and grime. Use a vinegar spray to finish for a streak-free shine that removes any lingering odors. Use a clean, soft cloth to buff the oven window dry.
There are worn or damaged oven racks
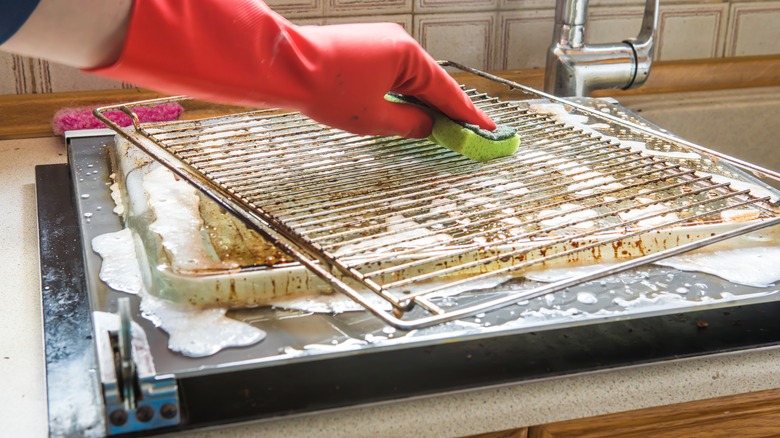
Damaged or worn oven racks can also impact how well your oven performs. You may notice warping, discoloration, or a heavy coating of baked-on food. Discoloration comes from exposure to food spills and high temperatures, and warping happens due to uneven heating or excessive weight. This buildup makes your oven look grimy and may smoke or smell bad as it heats up. Damaged racks can also cause uneven cooking because the heat doesn't circulate properly.
You'll need a bit of elbow grease to clean your oven racks, and you start by removing them from the oven and submerging them into soapy, hot water to soak. Let them soak for several hours or overnight to loosen up any baked-on gunk, and ensure every part of the rack is under the water. After you soak, use a heavy-duty scrubber to strip away the grease, focusing on heavily soiled spots. Rinse the cleaned racks and dry them to prevent rust before returning them to the oven.
There is rust formation
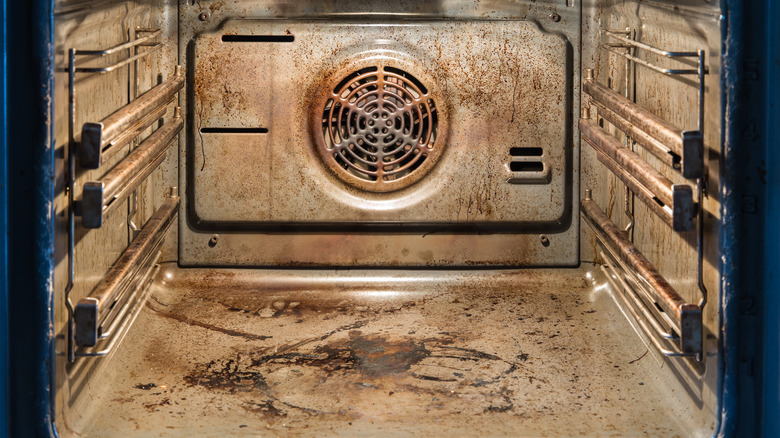
Seeing rust spots on your oven racks or inside the oven usually happens when the metal surfaces have moisture exposure for a long time. This can be from high humidity, spills, or not drying the interior after cleaning it. Rust can cause safety hazards in your oven, like weak racks that can collapse if you put a heavy pan on them. The rust could also flake into your food. Rust usually means that you're neglecting to clean your oven properly, such as not wiping up spills as soon as they happen or not drying it thoroughly after cleaning.
However, you can use many common kitchen ingredients to tackle rust, including baking soda and water paste. Put dollops of the baking soda paste onto the rust spots inside the oven or on the racks and give it a few hours to start breaking it down. Use a non-metallic scrubbing pad or soft cloth to scrub at the rusty spots gently. If the rust has enough time to compromise the metal, replace the component. When you finish, Eco Fresh Oven Cleaning recommends thoroughly drying the racks and the oven to stop the rust from coming back.
You hear unusual sounds during operation

You don't want to hear odd clicking, rattling, or buzzing sounds when you turn your oven on. If you do, they're a warning sign that you have something wrong, and it's usually loose debris or loose components with grime buildup. For example, rattling may indicate that you have loose panels or oven racks. Hawkins Commercial Appliance points out that you could have a problem with the impeller fan or a loose panel if you have a convection oven. A grimy film or debris around the moveable parts or fans can also cause noise. Also, while some sounds can be harmless, others can signal that you have more expensive, significant issues.
The first thing you have to do is look at your oven to see if you can spot any loose debris you can pick out. Turn the oven off and unplug it before cleaning or fixing it. Check for small utensils, fallen food particles, or other objects that may rattle or make other noises and remove them. Look at the heating elements, oven racks, and any components you can reach to ensure they're secure, and tighten anything loose. To clean around movable parts, like the door hinges or fan, use a damp cloth to remove buildup gently.
The fan isn't working correctly
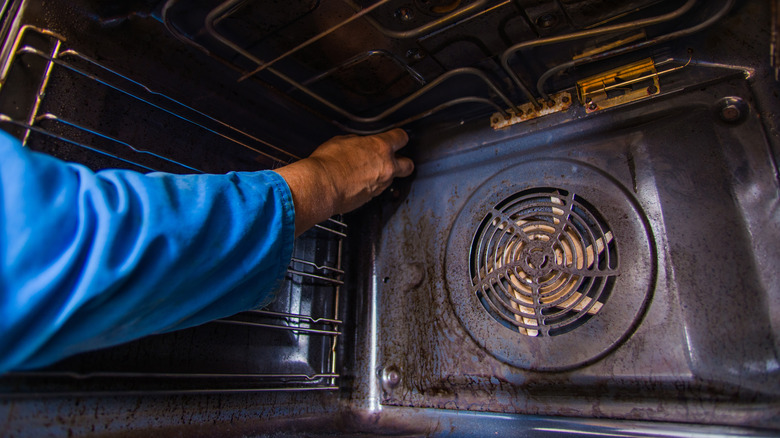
The fan is significant for convection ovens because it circulates the air around the stove, ensuring everything cooks evenly. If food is taking longer to cook or things aren't cooking evenly, the fan could be to blame. Appliance Insurance says dirt and grease buildup on the blades or housing can make it malfunction, or the motor could be having problems. A non-functioning fan takes away the main advantage of using a convection oven, so checking it and ensuring it's working is essential. However, since this may require you to look at several things, calling in a professional is something to consider.
Turn off your oven and unplug it before looking at your owner's manual to see how you should get to the fan. You may need to pull off the oven's back or interior access panels to reach the fan. Get a damp cloth and gently clean the blades and the surrounding area, stripping away grease and grime. Skip the harsh chemicals and water for this step because they could damage the electrical system. If this doesn't fix your problem, call a professional to check the motor and fan connections.
There is a clogged filter
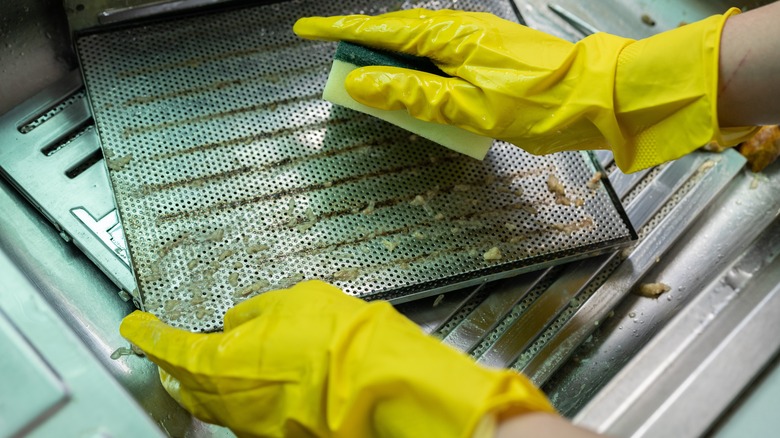
If the filter clogs, this restricts the airflow and can cause nasty odors when you use it, especially when you bake or roast something. Filters get clogged as food particles, grease, and other debris accumulate and stick. A clogged filter also makes the fan work harder, and this can cause premature wear and tear that requires expensive fixes.
Before you clean anything, switch off the oven and let it cool. Remove the filter from your oven. You can usually pop or slide it out from its position to do this. Fill your sink with hot, soapy water and soak it to help loosen any grime, grease, or food particles. If you see stubborn buildup, add baking soda to the water to break down the grease. Give it at least 30 minutes to soak before using a soft brush to scrub the whole thing gently. Rinse it under running water to remove any residue and set it aside to dry before reinstalling it. Proline Range Hoods suggests cleaning the filter every two to three months to prevent clogs.
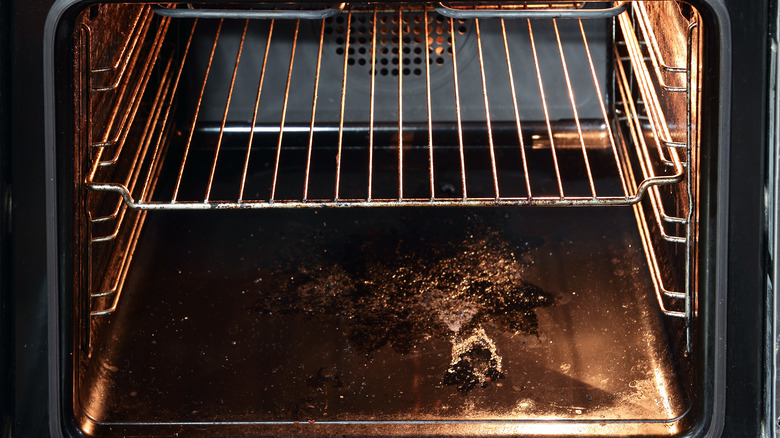
You see visible grease and food splatters

If you can see grease and food splatters on your oven's door, walls, or racks, Ally Maid says it's time to clean it. This happens when you cook; fats, oils, and food particles go airborne and settle on your oven's surfaces. If you don't clean them immediately, they build up and become more challenging to remove while posing a fire hazard if they drip near the heating elements. These substances can make your oven look grimy, smell, and smoke when you use it. Along with being an aesthetic issue, splatters also make your oven work harder, contributing to wear and tear.
Luckily, there are natural ways to clean your oven to remove grease and food splatters. Apply a degreaser to start or mix a 1:1 ratio of vinegar and water and spray the oven's insides. Vinegar's acidic nature will break down any greasy residue without chemicals. Spray it generously on splatters and give it 10 to 15 minutes to work. Then, take a non-abrasive sponge or cloth to gently rub at the spots to remove them without scratching anything. Finish by rinsing spots with water and dry the interior to prevent moisture buildup. As a bonus, vinegar will deodorize your oven.
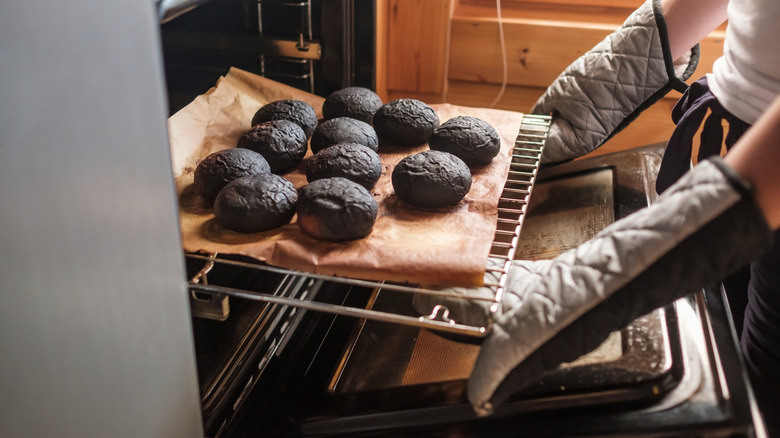
It doesn't cook correctly

If you pop your food into the oven and it takes way longer than recommended or isn't cooking evenly, this is a sign that it's not working right. Obstructed heat distribution is usually why this happens, and a buildup of residue or grime is typically the cause. These residues can build up on the floor, walls, and heating elements, acting like an insulator and stopping your oven from reaching the correct temperature or distributing the heat evenly. It negatively impacts your cooking's consistency and boosts your energy consumption because your oven will struggle to stay at the proper temperature. Regularly cleaning your oven stops this buildup from happening, keeping your oven in excellent working order.
Before you clean anything, BSC Appliance Repair recommends pulling the racks and soaking them in soapy, hot water to loosen up any grease or baked-on grime. While they soak, make a thick paste of baking soda and water and apply a generous layer to the oven's interior, keeping it off the heating elements. The baking soda is a gentle abrasive that will help break down grime, allowing you to wipe away grime without scrubbing heavily. Use a damp sponge or cloth to wipe away the paste. When it's clean, rinse it with water and leave the door open to dry. Finish by popping the cleaned racks back into the oven and closing the door.
Persistent bad odors

If you open your oven and smell a lingering odor, it can be embarrassing, especially if you have other people in the kitchen area to smell it, too. Food particles, splattered grease, and oil left inside your oven can burn and stink as you cook. When you switch on the stove, you reheat these residues, and they release the icky smell. If you don't remove them, the smells can permeate your dishes and negatively impact the taste of your food. If you don't clean these residues, you risk your food's quality and increase the chances of smoke and fire hazards. However, wiping the oven down after each use might not be enough to remove the odors. Baked-on residue is hard to remove without a deep clean.
To clean the oven, The Maids suggests making a non-toxic, safe, and effective cleaning paste by mixing ¾ cup of baking soda with ¼ cup of water. Carefully spread a generous layer over your oven's interior, keeping it away from the heating elements. Leave the past overnight to give it time to break down the grime and soften it. Next, get a soft microfiber cloth and wipe away the loosened grime and remaining paste. If you see stubborn spots, get a plastic scraper and gently lift them without scratching the interior. Finish by spraying vinegar inside the oven and wiping it down to deodorize.