The DIY Paperwork Storage Organizer You Can Make From A Few Dollar Tree Items

Desks in our homes often end up being the most cluttered spots. Even if you don't have a habit of piling everything on your desks, such as jackets and bags to all sorts of bits and bobs, tidying up your office desk can still be a tricky task. Sure, there are loads of storage organizers out there, but finding one that suits your style and budget can be tough. If you're up for a bit of creativity, how about giving that popular DIY hack on social media a shot? It involves creating a paperwork storage organizer by going to Dollar Tree for the items you can use to organize your desk. These include wire or mesh squares, trays, and some cable ties or zip ties.
Most DIY storage organizers on TikTok feature square wire nets joined with wire net connectors. However, a quick heads-up: Dollar Tree seems to have phased out these items. Don't worry; there are still fantastic alternatives at Dollar Tree. You can switch things up by using wire trays or metal cooking racks, which are sold at Dollar Tree or its website for $1.25 per piece. It's all about being resourceful and innovative with what's available! Then, grab some cable ties, and you're good to go.
How to make your Dollar Tree storage organizer
If you've somehow luckily laid your hands on the elusive square wire-shaped nets on Dollar Tree, then that's great! Start by connecting the nets to form the bottom, back, and side structures, creating a hollow cube. Next, decide how many shelves you'd like — you have the flexibility to go for as few as two or as many as four or five. You can also place shallow plastic trays on the shelves, especially if you're storing smaller items that might slip through the nets. You can also use jewelry jump rings instead of zip ties, similar to what TikToker @madeby_miko used for her project. Jump rings offer a neater look compared to zip ties. However, you'll likely need a pair of pliers to secure the rings in place properly.
Alternatively, you can use wire trays for the structure, as TikTok DIYer @dana_burke did. You'll only need three for this project. Start by positioning one tray vertically; this will act as the backbone of your organizer. Then, place the other two at each end of the vertical tray to form your organizer's top and bottom sections. Since these trays have edges, you may need to exert some force to align them correctly. Secure them together using zip ties and cut all their loose ends. For a cleaner look, you can spray paint the zip ties the same color as your tray.
Alternative paperwork storage organizer project
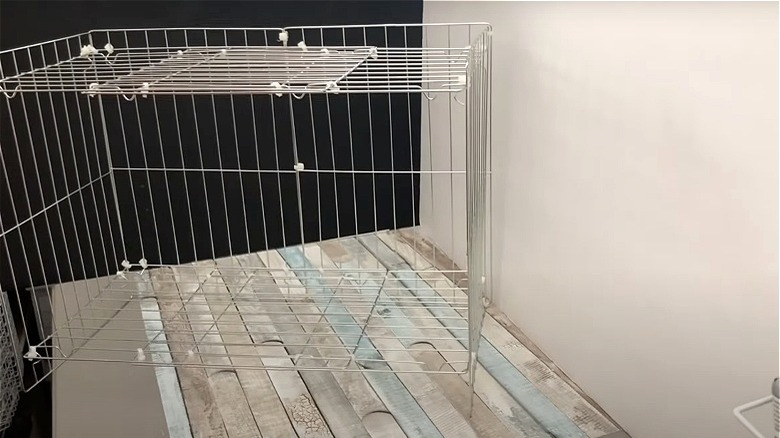
Here's another way to give your home office a makeover: turn metal cooking racks from Dollar Tree into an organizer. Following LifeDIYJosie's tutorial on YouTube, you'll need to use around eight racks. Begin by laying out the racks to form the structure. For the top and bottom shelves, overlap two racks to create a longer horizontal shelf and secure them with zip ties. To construct the back, join two racks vertically. Keep in mind that zip ties alone might not offer enough stability, so a glue gun could come in handy to keep the structure more secure. For the sides of your organizer, use two separate racks. It's crucial to ensure everything is perfectly aligned before securing it with zip ties; pay attention to the small legs on the racks, as they can affect how evenly your organizer sits. Once everything is lined up, use the zip ties to hold your creation together firmly.
You might want to conceal the less appealing zip tie locks since this DIY uses more of them than the other DIY projects mentioned above. You could spray paint them to blend in better. Another idea is to craft shelf bases using cardboard or foam core boards. Wrap these boards with self-adhesive shelf liners, available in various designs at Dollar Tree for $1.25. These bases serve a dual purpose: they hide the zip ties at the base and add an extra style touch to your organizer.