How To Replace The Bottom Seal On Your Garage Door Like A Pro
We may receive a commission on purchases made from links.
Imagine finding a tiny lake where there shouldn't be in your garage, or perhaps you're getting a chilly draft, all while the door is down. More often, this is a quiet alarm bell for a worn-out garage door bottom seal failing at its job of keeping the elements outside where they belong. But as much as we hate to admit it, it's bound to happen, especially with the door going up and down a handful of times daily. Fortunately, replacing the bottom seal on your garage door is a task you can nail like a pro with a bit of guidance and the right tools (including a replacement kit).
The price tag for this DIY project boils down to the cost of garage door bottom seal kits. An M-D Building Products 10-feet kit from The Home Depot, for example, will set you back $37.48. And a heads-up: these seals aren't cut from the same cloth; they come in a medley of materials, sizes, and shapes. You'll likely be replacing a T-style seal, but don't sleep on the others like P-Bulb and T-Bulb.
As for the signs your garage's weatherproofing needs replacing, keep your eyes peeled for gaps at the bottom of the door, a cracked seal, or little bits of what used to be the door seal on the garage floor. Wait for too long, and you might as well roll out the welcome garage flooding and cold drafts.
Steps to install a new garage door bottom seal

The quest to replace a garage door bottom seal kicks off by gathering the essentials, including a tape measure, screwdriver, utility knife, and wet piece of cloth. Next, measure the garage door width, as well as the old seal's width. Then, procure the appropriate garage door seal type that's 5 to 6 inches longer, just to be safe.
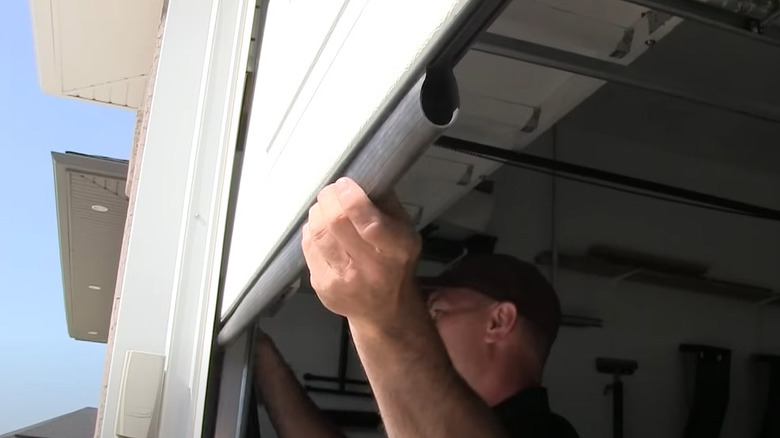
Begin the installation by deactivating the opener and hoisting the garage door to a height that doesn't have you awkwardly bending over or reaching too high, then clamp the side track with vise grips like the IRWIN 7-Inch Curved Jaw Locking Pliers on Amazon for $11.50. Slide out that weary seal, but if it's playing hard to get because of screws at the retainer's end, unscrew those first. Or for a bit of DIY thrill, slice the seal with a utility knife and then pull it out piece by piece.
Next, scrub away the dirt and debris on the retainer with a stiff brush, after which you feed the rubber gasket into the retainer and slide it to the other end. You don't want the rubber popping out and having to start from scratch. Got some extra seal hanging off the end? Neatly tuck it inside the retainer. You can now reinstall any screws removed earlier, close the door, and ensure there are no gaps at the bottom. For a trackless door, you'll only need to treat the new seal to a few nails.
Extra considerations for replacing the bottom seal on your garage door
Unplug the garage door opener to sideline any chance of an accidental activation — imagine the chaos if your kid hits the remote while you're mid-project. For a rusty retainer, a gentle scrub with a wire brush will suffice. Follow up with a rust-preventative spray like the Rust-Oleum Stops Rust Flat Primer at Walmart for $6.98. For those bent sections of your retainer, needle nose pliers will be your go-to tool for coaxing it back to its original shape.
Now, let's talk about getting the seal onto the retainer. If it's proving stubborn, a dab of silicone-based lubricant will make this step smoother. But in the case where a lubricant is missing in action, dish soap will do the trick in a pinch. Feeling like playing quality control? Simulate a mini storm with a hose along the bottom edge of the garage door and keep your eyes peeled for any pesky leaks — that should tell you if you've nailed the seal.
But what if your garage door starts acting all dramatic, closing down only to back up? Well, it might be throwing a fit over the extra thickness of the new seal. You might just need to align your garage door sensors or tweak the down travel settings. But should the garage door seal replacement turn into a head-scratcher or the job's intensity ramps up, it might be time to bring in a second pair of hands (or even better, a professional).