Turn An Existing Door Into A Beautiful DIY Interior Dutch Door
We may receive a commission on purchases made from links.
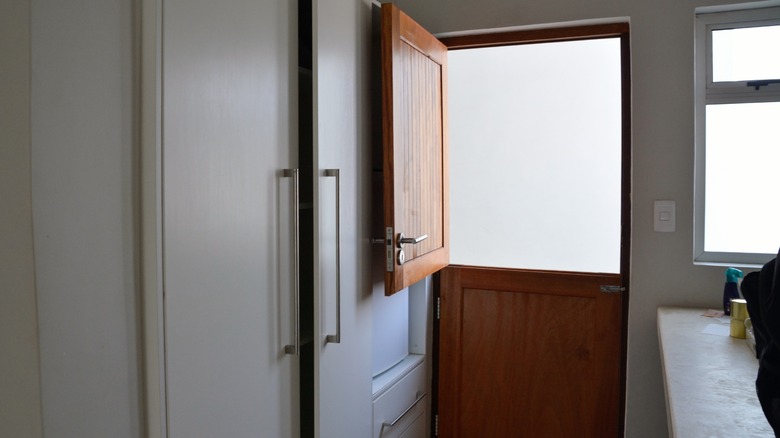
Caught yourself swooning over those adorable split front doors in sophisticated home improvement mags or drool-worthy interior design blogs? Maybe you revel in the thought of a cool breeze drifting in through the top half of the door while the bottom half does a solid job of keeping your playful pets or adventurous toddlers securely on one side. Why spend a small fortune on a pre-made Dutch door when you could fashion one from an existing door? It's an achievable project that will demand only about three hours of your weekend and is a fantastic way to repurpose an old door. This DIY involves slicing your old door in half (horizontally, of course), tweaking the halves here and there, screwing in a few pieces of hardware, and reinstalling the sections, welcoming a fresh vibe and functionality into your home.
Dropping cash on a pre-fab Dutch door from the store can lighten your wallet by several hundred to over a thousand dollars. In some cases, prices are in excess of $2,500. However, by channeling your inner DIYer and using your existing door, you could dramatically cut that expense to roughly $100. The bulk of the budget would likely be limited to a few pieces of hardware and possibly interior paint, like the Glidden Door & Trim Grab-N-Go Paint from Walmart. Not only does this make the whole project way easier on your pocket, but it also sprinkles a bit of that personal, handmade charm into your living space.
Turning an existing door into an interior Dutch door
Repurposing an old door into an interior Dutch door starts with rounding up all the essentials. For the project, you'll need an old door, a nail gun, nails, sandpaper, hinges, wood glue, a drill, and an electric saw. Thinking of giving your DIY Dutch door a fresh look? Latex-acrylic paint will do just that. Next, unhinge that door you want to repurpose, lay it on a workbench, and remove the doorknob and hinges. Got a deadbolt hole? Just grab a plug from the hole saw cutter, clean it up, slather on polyurethane glue, and pop it into the hole. Don't forget to patch up those hinge spots with a Dutchman (an industry term for a wood patch) and some wood glue.
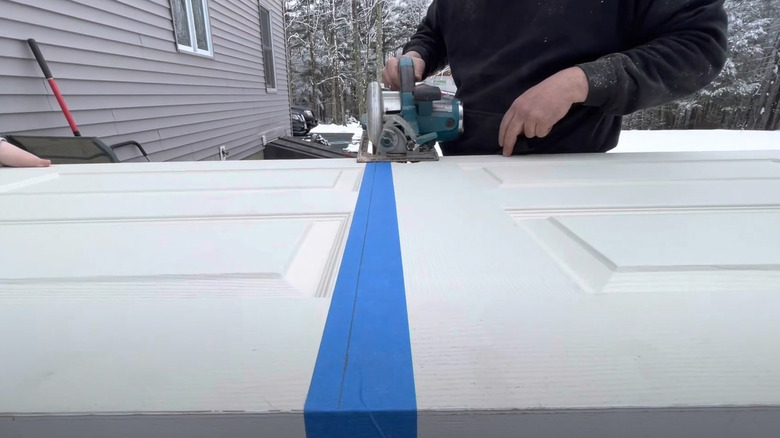
Now, decide where you want to cut your door. Halfway is usually a good bet. Make your mark, then slice the door into two pieces. If you're using a hollow core door, secure a wooden filler into the splits. After this, smooth out your door with sandpaper into a silky-smooth texture. Two coats of interior latex paint will turn those sections from drab to fab. Next, attach new pull knobs to make your DIY Dutch door as functional as it is beautiful, and carve out two nooks for the new hinges, one for the top and another for the bottom section. Finally, hook up those halves onto the door frame, secure everything, and conduct a test swing.
Extra considerations for repurposing an existing door into a Dutch door
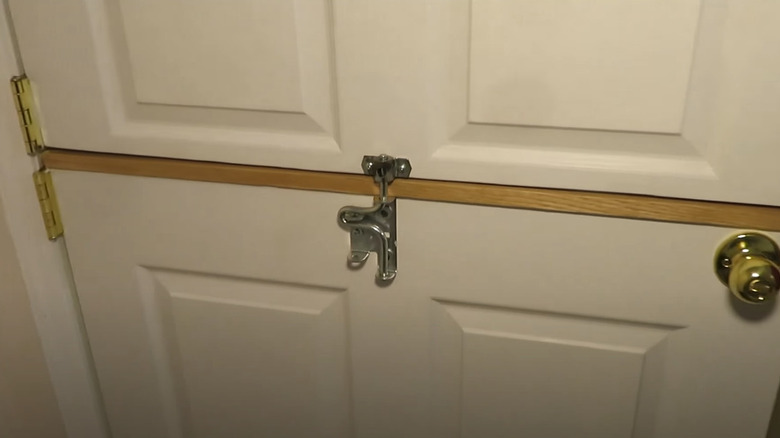
Imagine a scenario where the hinge mortise is too deep for the hinge, or the hinges don't line up — it can be immensely annoying. When popping those hinges on, be mindful of the placement and mortise depth. The last thing you want is to end up with a door face looking like it had a run-in with a porcupine, thanks to accidental splintery edges that can not only be a pain to your fingers but are also a real eyesore. Slapping some painter's tape over the line where you're about to cut is your weapon against wood tear-out. Slicing the door might leave a gap that rolls out the welcome mat for drafts; to avoid that, tuck in a filler piece at the top of the lower half and the underside of the upper half.
Placing a door draft stopper at the bottom of your DIY interior Dutch door will keep the chill and bugs out. And why not throw in a latch on the upper half to keep it closed when needed, and perhaps a magnetic stopper to prevent it from slamming into the wall behind? If you fancy a clever way to hide the cut line when both halves are shut, cap the bottom section with a piece of trim. And to make things easier, you could first mount the two new hinges on the old door while it's whole before making the cut.