DIY Your Own Bike Hanger Ceiling For Easy Storage
We may receive a commission on purchases made from links.
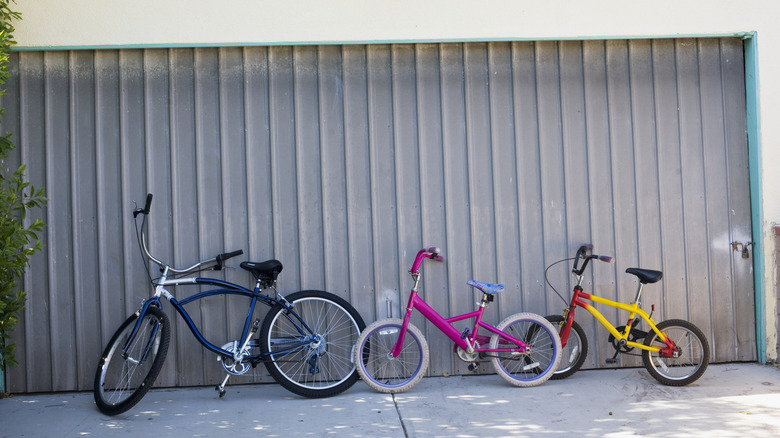
It is easy to simply prop your bike against the closest wall in your garage and call it a day. But you can't argue against the importance of a proper storage system for your bicycle, especially the convenience of a ceiling-mounted one. Ceiling-mounted systems offer efficient space utilization, increased safety, and convenience, making them one of the clever ways to store your bike indoors. Also, setting up these systems is a feasible at-home project, requiring minimal tools and basic DIY skills.
By storing the bikes overhead, you save valuable floor space and keep the area from looking cluttered. This type of storage keeps your bikes safely out of the way, ensuring they don't become a trip hazard and they're protected from accidents or spills that might damage them. Ceiling-mounted storage also promotes organization, especially for households with multiple bikes that always look cluttered.
While there are different types of bicycle ceiling-mount systems, rail-and-hook system like the Teal Triangle ceiling-mounted rack offers a unique approach to bike storage. It is mounted directly to ceiling joists and uses hooks to hold up multiple bikes by the tire. The hooks on the rails offer safe and secure mounting since they're strong enough to hold around 50lb per hook. They can also easily accommodate multiple bikes. Installing this bike hanger should be on your list of DIY projects for maximizing space in the garage because of how easy it is. You just need a few materials — spirit level, screwdriver, hex key, stud finder, impact driver, tape measure, and wrench.
Measuring for your ceiling bike hanger
Before you begin, you need to ensure your garage or storage is suitable for this particular ceiling-mount system in the first place. If your ceiling is higher than eight feet, it won't be easy to load and unload your bikes from the ceiling. In this case, you might want to look into a wall-mounted system or opt for a rope-and-pulley hoist ceiling storage instead. Or, if you're handy, you could build a DIY bike rack that swivels and saves space effectively.
For ceilings that are eight feet or below, confirm the vertical space is enough to keep your bicycle wheels off the floor. The ideal height should be equal to or a bit longer than your bike length (plus the length from the inside rim of the first wheel to the rail — typically 7.9 inches) for minimum floor clearance. Get your bike length by measuring from the inside of the front rim to the outside of the back wheel (if you have a collection, measure your largest bicycle). The minimum allowance needed between the bike and the floor is about one inch. Also, when picking a spot on the ceiling beams for the rail, make sure to leave an approximately 24- to 28-inch gap with the wall to allow the bike to spin and slide freely. If you have angled ceilings, there is an Angled ceiling mount from SpaceRail that will suit them more than the straight ones.
Hanging up the bicycle rail system
Once you've decided on your mounting location, use a spirit level to confirm your ceiling is flat. Always ensure the rail is mounted on a stud, not the ceiling plaster/drywall, for a sturdy installation. Use a stud finder to locate your beams and mark those points. Measure the distance between the mounting points, and mark them on the rail.
After this step, assemble the rail mounts by placing the provided bolts through the washers, and then through the holes in the mounts. Fasten the bolts with the t-nut provided, making sure not to tighten fully. Do the same to assemble the end caps and joiners if you have more than one rail. Once assembled, slide the mounts into the rail, each mount on the mark you made earlier. Tighten the bolt loosely with a wrench. Next, lift the rail, and align the attached mounts to the mounting points you marked on your ceiling. Then use the impact driver to install screws into the rail mount, securing the rail to the ceiling. Wood screws and cup washers are provided in the kit for wooden ceilings. If you have a concrete ceiling, you'll need anchor bolts to hold down the screws.
Finishing up your ceiling bike hanger DIY
The next step is to figure out if you'll need spacers on your trolley. The trolley is the part of this system that holds the hook, and it needs to be the right width to prevent your bicycles from damaging each other. Spacers increase trolley width, and to confirm if you need one, measure the widest points of your bike's axle. If it's greater than 5.9 inches, you'll need the two spacers, while lengths less than that don't need any.
After this, pour the lubricant you'll find in the kit into the bullet of the hook and slide the trolley into the rail system. If you have a ton of bikes that need hanging, you would have to add additional rails to the setup using the joiners provided, since one rail holds up to just four bikes. For multiple rail systems, join the second rail to the first one after you're done mounting it on a ceiling. Do this before inserting the trolley or end caps. If you have one or two hooks to spare after hanging your bikes, you can hang helmets and other cycling gear on them.
Other bicycle gear and tools can be stored conveniently, using wall-mounted shelves right beside your bikes. Options like the WAREYEASY bracketed shelf system can hold larger objects like toolboxes and tire pumps efficiently, leaving them easily within reach when needed.