Skip Store-Bought Back Panels And DIY Your Own Custom Island Wrap
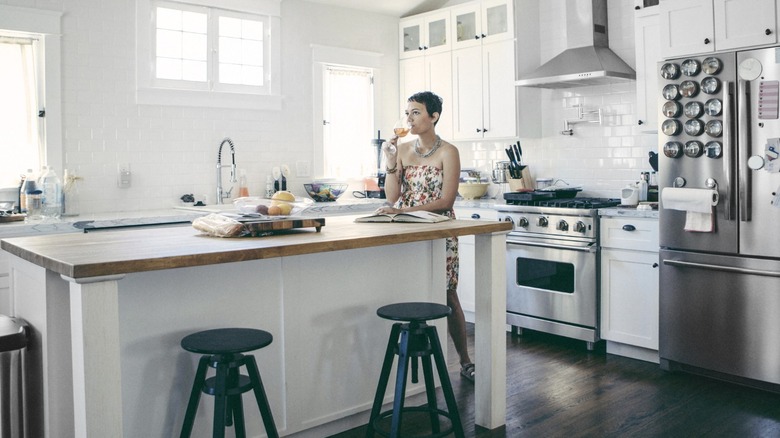
Installing a new island counter is that coveted kitchen upgrade that's sure to get anyone excited. But the price? Not so much. Any island beyond a bar cart is typically going to start around $1,000, with labor adding at least another few hundred dollars on top. While there are some projects that are best left to the professionals, like hooking up an island sink, this may be one area to consider the limits of your DIY aptitude. Save money managing the simple stuff, and you can get the island of your dreams at a reasonable price.
You may find several points where you can test your skills, but one of the best places to start is the back panel. Despite being a substantial part of the kitchen island's skin, the backing also doesn't take advanced skills to place. It just needs careful measurements and a creative eye. The right tools wouldn't hurt either, but if you're handy with a drill and a brad nailer, you can get your local home improvement center to cut your panels. You can then worry about installing the trim and finish up with a stain or paint job. Of course, a few decorative details, though easy to add, can take your design to the next level.
Tools and materials for a DIY island cabinet wrap

To make the brunt of your DIY kitchen island panels, you'll need sheets such as medium-density fiberboard (MDF) or plywood. MDF is generally less expensive and makes an ideal surface if you plan to paint. Plywood, by contrast, is sturdier, less prone to water damage, and better at holding fasteners. High-quality plywood may also have attractive natural grains you can show off with an accentuating stain. If you know the secret to choosing a good piece of plywood, you can get a grade and hardwood variety with the flat, sanded, and aesthetically pleasing finish you want.
Since the backsides of base cabinets don't generally have many usable mounting points, you may need furring strips to run across the island backside to give you something solid to hold your panels. You can also take this opportunity to extend the back of the island. If you want a deeper counter, you can make a thicker frame with dimensional lumber to create more area for a larger surface.
On the face of the panel, trim pieces like one-by-four wood or MDF board can form frames, creating rectangular sections you can decorate further to define your style. Bringing it all together, you'll need a brad nailer with finish nails (or drill and screws) and heavy-duty construction adhesive. Grab some wood filler and sandpaper to fill nail holes. Depending on the desired finish, you may need caulk for the trim as well as wood stain or primer and paint.
Assembling your custom kitchen island wrap
Start your DIY island wrap by mounting any support pieces (i.e., furring strips) to the back of the cabinets. Adding these rigid supports is particularly critical if you're using thinner panels (e.g., ¼-inch MDF) that can't support other features you may want to add, like corbels, brackets, or shelves, by themselves. Cut and install your panel sheet, attaching it to the supports with adhesive and nails. Hopefully, you can cover the entire back with one sheet. If not, plan the cuts and seam placement so any molding or overlay will hide it.
Measure, cut, and install decorative molding, if desired, like rectangle patterns with lumber. Account for any baseboards you'll put on later, ensuring the molding layout sits above them. To make your design, cut and attach the pieces one at a time to the panel. You can also connect the various sections of trim with pocket screws on the backside and install it as one piece to the panel. Fix the molding in place on the panel with adhesive and nails.
Install baseboards as desired to clean up the transition between the kitchen island wrap and the floor. If you put molding on the panel, you may have to add blocks where you can nail the baseboard so it sticks past the rest of the trim. At the corners where the island's side meets the back, use beveled lumber to wrap the corner and clean up the look. Alternatively, you can install corner molding, a simplified solution if you aren't doing anything other than flat panels for your wrap.
Custom add-ons for a professional look and more function
A straightforward build, this DIY island wrap also leaves plenty of room for custom considerations, like adding a seating area. In this instance, you'll need side supports to hold an overhanging countertop where chairs can slide under. Building the side wall out with a two-by-four frame and wrapping paneling around it will maintain a cohesive look around all sides. For an easier approach, you could instead install two separate legs at the corners of the overhang, making posts with strips of plywood around a supportive lumber frame. The seating area can also be a separate project later on if it seems too daunting now. Make a simple DIY island wrap, and consider extending your kitchen island with a DIY wood add-on when you need more counter space down the road.
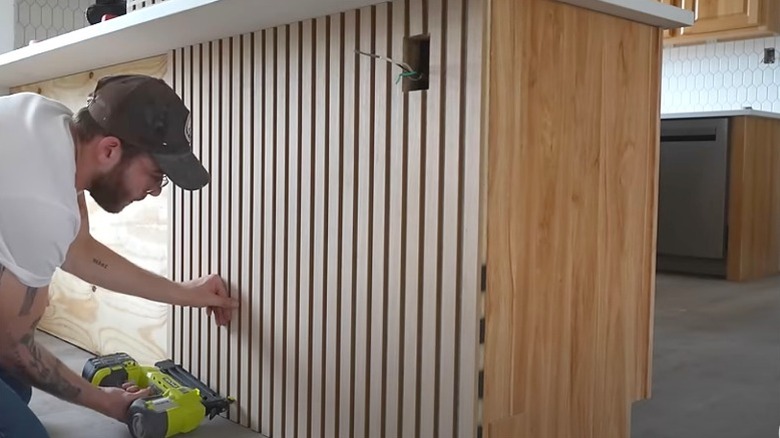
Aside from the various ways you could build out the island with this project, you can affect the look and stylistic direction as you see fit. The aforementioned molding you can add to your kitchen island back panel will give you a Shaker-style procession of rectangular frames. End it there, or consider more decorative customization. Quarter round or narrow strips of trim molding on the inside edge of the boxes, for instance, add ornate details for a more interesting, traditional style. Or you could forgo the molding entirely and apply trendy accents. Shiplap is easy to attach to a sturdy plywood panel, or you could install wood slats for a classic fluted look. The possibilities are endless, and with your initial panel in place, you'll have no issue defining your unique style in a custom kitchen island wrap.