Can You Use Wrapping Paper As A Budget-Friendly Alternative To Wallpaper?
We may receive a commission on purchases made from links.
When you're looking for a pop of pattern and color to make a statement, it's hard to beat the unique designs that wallpaper offers. The one thing you can beat, though, is the price. At around $25 to $30 a roll, wallpaper may cost a bit more than you care to spend, especially when you have only a small area you want to perk up. For a cheaper option that still gives you all the style and flair you demand, this can be a perfect opportunity to reach for a budget-friendly alternative you may already have hanging around. Wrapping paper comes in countless textures, colors, and designs at a fraction of the cost of wallpaper. And while it takes a few special considerations, a successful application on the wall offers an impressive effect.
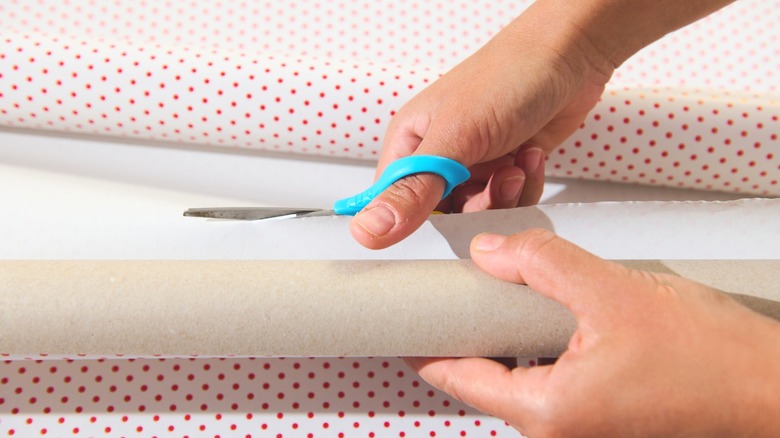
Wrapping paper can be a sleek wallpaper alternative for a stunning accent wall in small spaces, like closets, over the mantel, or within wall trim panels. For an easier application, look for thicker wallpaper that will be less prone to wrinkling and damage. Grab some scissors and a sharp craft knife with a cutting mat, as well as a measuring tape and adhesives. Depending on how permanent you want to make it, you can use double-sided tape, wallpaper paste, like Roman Wallpaper Adhesive, or even staples. Ideally, you can have a helper to hold the paper in place, but you can also use glue dots or pieces of tape to support sections as you work.
How to use wrapping paper as DIY wallpaper
Remove any shelves, hooks, fasteners, outlet plates, and other items on the wall before putting up your gift wrap wallpaper. Then, decide on the orientation for the wallpaper. Some designs will work better vertically, and others will only look right when horizontal. If using double-sided adhesive tape, apply painters tape along the edges of the wall and at various points along the wall's field to hold the double-sided tape. Painter's tape will be easier to pull off the wall later. You can also use wallpaper adhesive. Roll it onto the wall or apply it to the back of the wallpaper with a sponge brush, adding it as you move along the wall.
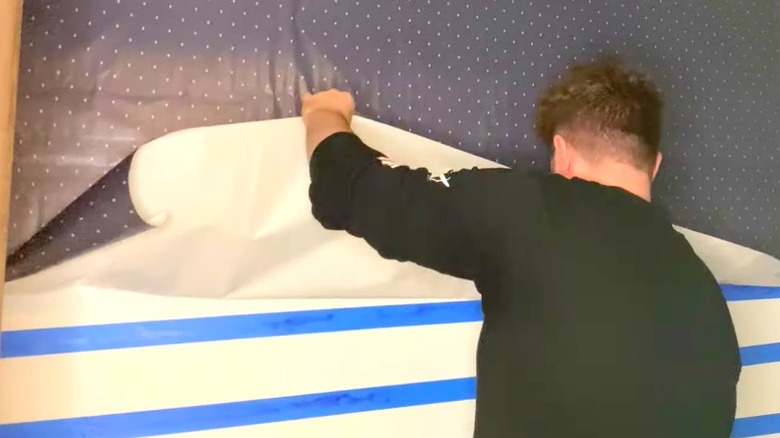
Measure and cut the gift wrap to fit the wall, adding extra for overhang so you can trim it neatly at the end. Start at a corner, running it top to bottom if applying the wallpaper vertically. It's okay if there is some overlap past the corner, as you can cut that off later. The critical point is ensuring it's perfectly vertical or horizontal.
Smooth bubbles and wrinkles as you apply the paper by carefully running a clean cloth or a straight edge (e.g., a squeegee) across the paper. Line up the design where the strips meet. If there's some overlap between one row and the next, you can try to hide the wallpaper seams with a tool you already have on hand — your craft knife. After laying the wallpaper strips and cleaning up the seams, use your knife to cut any excess paper around any trim and ceiling and wall edges.
Pitfalls to avoid and tips for a clean installation
Wrapping paper is a little out of its element when you use it on the wall, so a few cautious considerations can help you get the best effect. Start with your location and choice of product. Bubbles and wrinkles can easily set into thin paper, which any amount of glare will accentuate. Choose a place without a lot of harsh lighting. Consider a matte wrapping paper as well, as it won't reflect light as readily as glittery and glossy varieties.
When you choose your wrapping paper, get more rolls than you think you'll need. Getting extra will ensure you only use one strip for each row so you don't have to awkwardly piece small sections together and ruin the look. Plus, any leftovers can easily find a home as stylish drawer and cabinet liners.
When applying the wrapping paper, work slowly to prevent tears. Ensure your craft knife is sharp, as any dragging while cleaning up the edges can rip the paper. If you don't like the look of the cut edges, you can also consider installing trim over them for a cleaner installation and a more interesting accent. Alternatively, you can add a step and eliminate some of the uncertainty by putting the wrapping paper on a backer, like foamboard, before installing it. You'll likely have an easier time putting these up as patterned panels on the wall than applying the wrapping paper directly.