The Easy Trick You Need When Caulking Baseboards & Trim For Expert-Looking Results
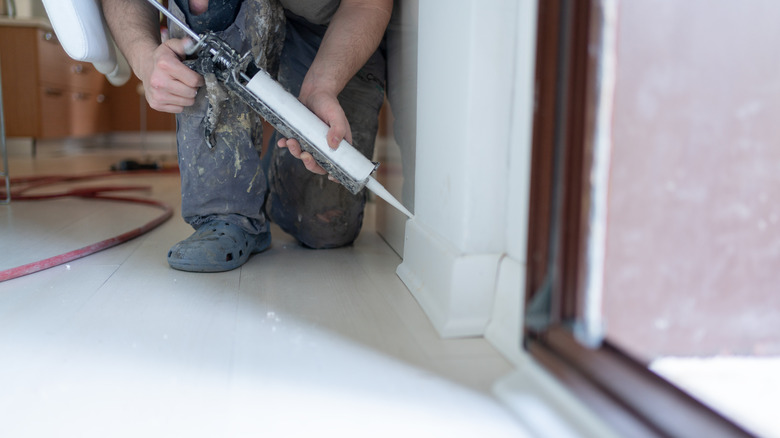
When you think of a home renovation project, tasks like painting the walls and installing new fixtures might be the ones that come to mind. However, there's one element of renovation that can have a big impact on the final appearance of a space, yet is often overlooked: caulking. It may feel like achieving expert-looking results on this final touch is complicated, but there's a simple method that involves using your finger and a paint scraper to get that professional finish. One of the best parts of learning how to caulk baseboards with a paint scraper is that this tool can be repurposed after the project for painting a room or another DIY adventure. While some pros like to use a damp rag to smooth out and evenly embed caulking, the finger trick is so simple and precise, there's no reason to mess up another shop cloth.
If you're new to DIYing, you might be unfamiliar with what caulking is overall. The term caulking refers to using a variety of flexible sealant materials to fill small gaps in areas like baseboards or windowsills where air can creep in. Beyond technique with the application process, choosing the right caulk for your project is crucial for a clean appearance and best results. For example, most basic interior baseboard projects will require acrylic latex caulk. Regardless of what variant you choose, learning how to caulk baseboards with tools like a paint scraper is ideal for creating a sharp edge and clean lines. Additionally, once the project is complete, you can repurpose the leftover caulk in unconventional ways around your house.
How to get a professional finish when caulking your trim boards
Before diving into adding caulking to your baseboards or door and window trim, it's important to make sure the area is prepped and ready for this step. Any recent paint should be completely dry, then clean the area with isopropyl alcohol if desired. Next, use painters' tape to mark off the gap where you'll be applying the caulking to promote a smooth edge. Try to apply the caulking at an angle, starting at one end of the baseboard and working towards the other in a swift, continuous motion. It's okay if you need to go back and add a bit of caulk to any areas missed.
Once the entire baseboard has been caulked, it's time to smooth out the bead for expert results with this easy trick. Wet your finger with warm water and run it along the edge of the caulking to create a smooth finish. Be sure to wipe your finger clean and remoisten between passes to prevent caulk from transferring. You can then take the project to the next level using a paint scraper to fine-tune edges and corners, and tighten up the caulk even more. They do make tools specifically for this purpose, but a paint scraper is something you probably have at home already. Be sure to work quickly after application so the caulk doesn't have a chance to dry. If you enjoyed this trick and want to try out even more at-home DIY hacks, some find that using a drinking straw can create smooth caulk lines.