Transform Your Typical Closet Into The Most Functional Tool Storage Space
Inefficient tool storage and poor organization waste time and money due to tools become damaged or lost. Whether you have a smaller home or just a lot of tools, difficulty with tool storage space is a common complaint. The ideal solution may be to transform your typical closet into a functional tool storage space with a creative DIY project.
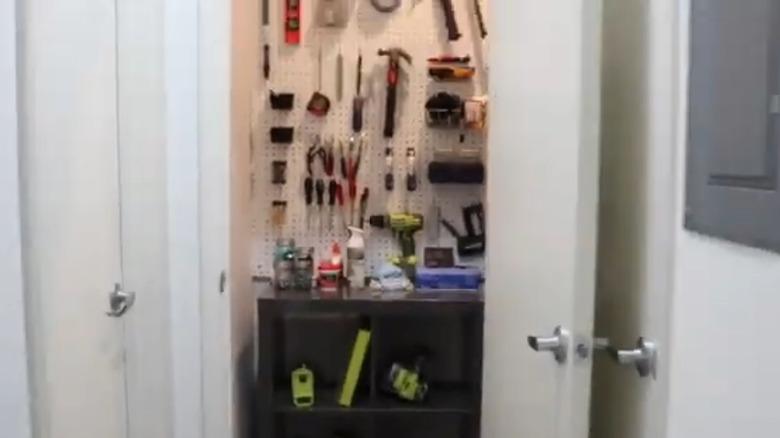
Even when you find the perfect storage solutions among the best tool organizers that cost under $50, typical closets often lack storage space to hold tools, organizers, and toolboxes. Many average closets have a single high shelf and a large, open space, making organization difficult. These spaces are often where the clutter piles up.
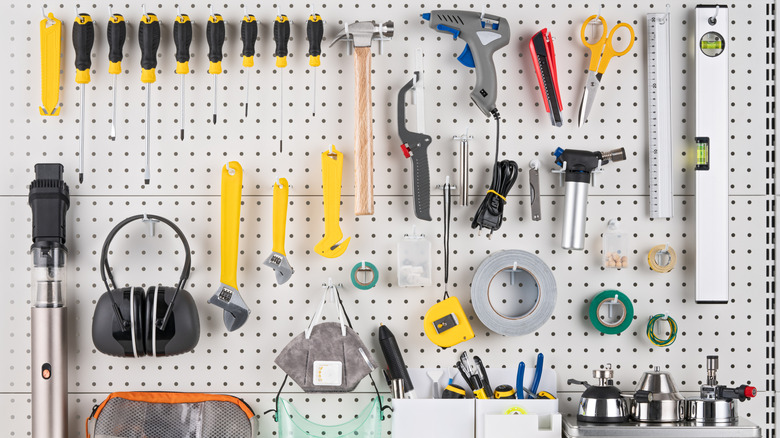
This lack of organization leads to frustration when starting a DIY project or when you can't find a screwdriver for a quick household repair. Creating a functional tool storage space with a pegboard and shelves improves visibility and access, protecting your valuable tools from damage.
Guide to creating your tool storage closet
Making a plan, taking measurements, and determining the specific materials and amount needed before you start will ensure that your tool closet is practical and functional. The basic materials required for creating a functional tool storage space in a typical closet include particle board, wood strips, peg board, peg board accessories, screws, washers, liquid nails, and paint. Additionally, you will need some tools, such as a drill, circular saw, tape measure, stud finder, paint brushes, and rollers.
The number of materials needed to complete the job will depend on your specific requirements, preferences, and available space. Decide if you want just a few shelves or a closet filled with them from the floor to the ceiling. Shelves can be installed on the back wall, under the peg board, and the side walls of the closet.
Once you have determined the number of shelves, their size, and the distance between each shelf, locate the studs and predrill small holes before screwing the wood strips into the studs. Cut particleboard to fit the space and paint the wood strips and the inside of the closet. When the paint has dried, attach the particleboard shelves to the ledge created by the wood strips with a nail gun or liquid nails. Cut the peg board and attach it to the wood strips. Then, you'll be ready to arrange and organize your new tool closet.
Ways to customize your tool storage
When you transform your closet into a tool-storage space, you can customize the closet to meet your specific needs. For example, the size of your peg board may vary, depending on the number of hanging tools you want to store within easy reach. Take stock of the items you need to store so you can make decisions about the number and size of shelves you'll need to provide sufficient storage space. You may want to consider including shelving with baskets to hold smaller items.
An organized tool storage space keeps your tools within easy reach, prevents damage to expensive tools, and reduces issues with lost tools. You can get creative with your storage space with pegboard pegs that lock in place and won't fall out. Old containers like mason jars can even be repurposed to organize smaller items with a bit of DIY magic.
You can incorporate tool organizers or make your own to accommodate your unique needs. A simple 2x4 with holes drilled into it and attached to a shelf can become a handy screwdriver-organization hack that will put the right tool for the job within easy reach. Do you need a storage solution for cordless drills and accessories? You can easily organize your cordless drills when you dedicate part of the wall space to creating a drill storage station. Small spaces create unique challenges, but with a little time and effort, you can design an innovative solution.