5 Essential Steps To Cleaning Your Toilet The Right Way

We may receive a commission on purchases made from links.
Once you finally stop procrastinating on cleaning your toilet, it's important to follow a solid process. This isn't a job to rush. You don't want to miss a crucial step, or worse, skip some areas entirely. The result can be a toilet brimming with germs, bacteria, and unpleasant odors. Dirty toilets also contribute to an overall unhealthy bathroom environment and can even make an otherwise-clean space feel gross. Luckily, giving it a thorough scrub doesn't require much effort. We're going to break this process down into five easy, actionable steps so you can tackle the project with confidence. You'll be able to approach it with efficiency, even if it's the first time you've ever attempted cleaning the commode.
Even though it's no one's favorite chore, you should strive to clean your toilet weekly. Ideally, disinfect it every time you tidy up your bathroom, which, sorry to say, should also be a weekly habit; if you have a sick family member though, you should clean it once a day. The longer you wait, the more bacteria and grime can flourish, potentially making you sick. A delay will also make the task more time-consuming. Start by gathering your supplies: clean microfiber cloths or rags, disinfectant, toilet or bathroom cleaner, rubber gloves, and a toilet brush. Once you pull on the rubber gloves and gather your gear, it's time to clean.
Step 1: Dust the toilet with a clean towel or feather duster
The first step in cleaning the toilet should always be to fully dust it. Ideally, you've already dusted the rest of the bathroom to avoid disturbing particles that might settle on the toilet as you clean. Be sure you also remove any bath rug or mat nearby so you avoid having particles transfer as you work. Dusting beforehand helps prevent stubborn dust and debris from mixing in with your cleaner or disinfectant. Skipping this crucial step means you can find yourself having to repeatedly scrub the toilet trying to remove that stringy wet debris stuck on the surface. If you've ever had that happen, you know how annoying it is. Be thorough. Dust the entire toilet, including along the top, tank, and the bowl. Don't skip any other spots where dust often collects.
Start from the top, working your way down so any debris doesn't fall into spots where you already cleaned. Use a clean, dry microfiber cloth to trap dust and hair. It's a more effective option than using paper towels or toilet paper, which may fall apart or leave behind lint on the surface. If you opt for a feather duster, make sure it's easily washable. Even the top of your toilet tank can harbor germs, and the last thing you want is to spread them throughout your home. You can also use a vacuum with an attachment, such as a soft brush, especially for hard-to-reach areas like the back of the toilet base. Once the toilet is dust-free, it's time to move on to disinfecting and scrubbing.
Step 2: Clean and disinfect inside the toilet bowl
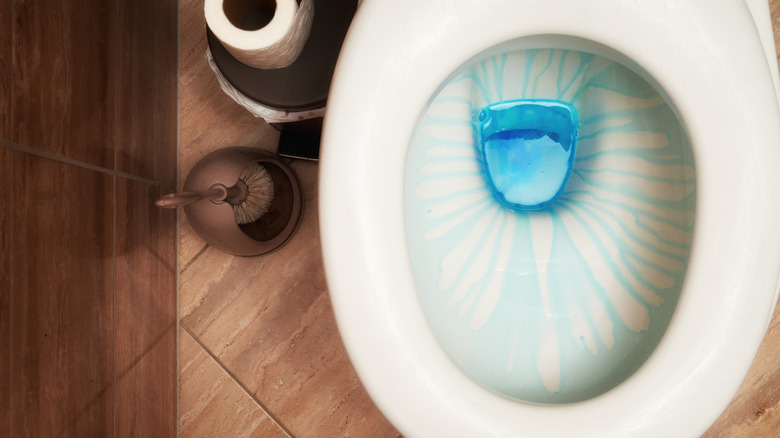
Start by flushing first to dislodge any debris and rinse away loose stains or buildup. Alternatively, some people remove the water quickly by pouring about half a gallon of water into the bowl, aiming towards the back to trigger a flush. This method helps lower the water level so the cleaner sticks more effectively on the bowl's surface. When there's too much water in the bowl, it can dilute the product and reduce its effectiveness, especially around the rim and sides. Next, apply your cleaner to rim's underside, making sure you fully coat the entire inner surface. Let it sit for the recommended time on the manufacturer's label.
A common toilet cleaning mistake is not letting the solution sit for enough time. Step away and resist the urge to scrub it right away so it can do its job. If you're using natural options, such as vinegar, to clean your toilet, you can let it sit up to 3 hours to thoroughly break down the rim's limescale deposits and general gunk. Never mix vinegar with any other chemicals, such as bleach or other chemical cleaners, as doing so can create dangerous, toxic fumes. Once your cleaner has had enough time to work, scrub the bowl thoroughly with the toilet brush. Focus on the rim and waterline, both common hotspots for grime. Use extra pressure to remove any stubborn stains or tough residue. After you're satisfied with the results, flush the toilet again to remove any remaining cleaner. Now you're ready to clean the outside.
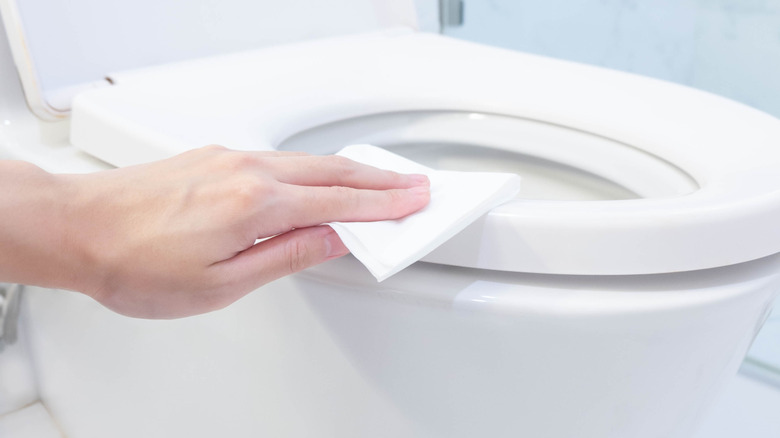
Step 3: Clean the outside of the toilet and its seat
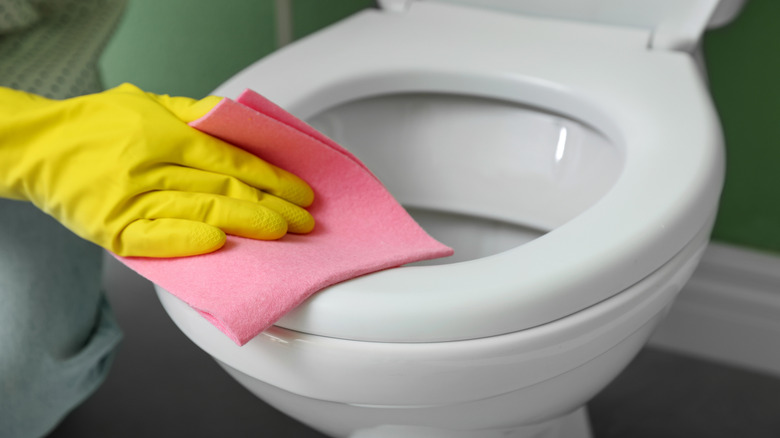
After you've tackled the bowl, move on to cleaning the toilet's exterior, including the tank, lid and base. Avoid using anything abrasive, harsh, or bleach-based as these chemicals can irritate your skin. Spray your cleaner and let it sit for a few minutes to break down any grime, then wipe everything down with a clean cloth or paper towel. Pay additional attention to the crevices around the seat hinges, as these spots often collect buildup. Some professional cleaners even recommend removing the seat entirely, especially if there's a persistent smell of urine. The area under the seat can be a popular breeding ground for bacteria and lingering smells, in particular, in busy family bathrooms. Some seats may feature a design for easy removal and then can snap back in. If you are unsure about how it detaches, check the manufacturer's website or if available, the owner's manual. Whatever you do, don't force it or you might end up breaking it.
After you disinfect it, rinse the surface well with clean water to avoid any cleaner residue coming into contact with sensitive skin. After rinsing, dry well with a clean cloth or paper towel. If you're unable to remove the seat, lift the seat, scrub underneath, then dry. For grungy hinges, use an old toothbrush or a clean towel with a cleaner to tidy the area. With these areas clean, you can move on to another important area: the handle or push-button.
Step 4: Clean toilet handles or push buttons
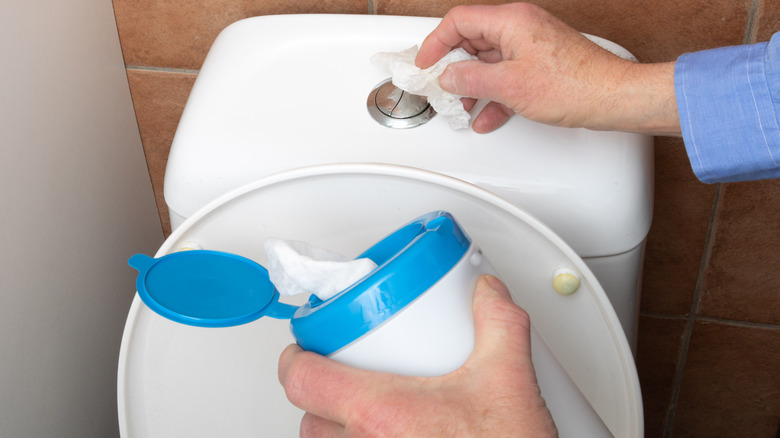
High-touch areas of your toilet require special consideration during cleaning. The flush handle, or if your toilet has it, push-button, can have up to 83 bacteria per square inch. Neglecting this step or attempting a half-hearted swipe with a cloth could make your family sick from the accumulated bacteria. Consider the fact that not everyone washes their hands after using the bathroom. In fact, one 2013 study published in the Journal of Environmental Health found that only 67% of participants attempted to wash with soap. Anything someone with unclean hands touches afterward is a potential source of germ transfer.
Waiting to disinfect and clean these areas last reduces the possibility of cross-contamination. Spray cleaner directly on the handle, and let it sit for a few minutes, following any directions on the product label. For instance, with Lysol Disinfectant Spray, the surface must be wet for at least 3 minutes to effectively kill germs. If using a disinfectant wipe, thoroughly wet the handle and be sure it stays damp for the required time. As the disinfectant sits, remove your gloves and wash your hands. Next, wipe the area with a clean towel. You're not required to take off your gloves, but you must have clean hands during this stage. If you don't, you'll just recontaminate it with any germs picked up from scrubbing the bowl. During this process, you should also avoid touching your face or clothing. These few extra steps will ensure your bathroom, even the frequent-touch areas, are healthy and safe.
Step 5: Air dry your bathroom to clear out product fumes

The last step for cleaning your toilet the right way is also the most crucial for your health: ventilation. Bathroom cleaners, especially if bleach-based, can be quite powerful and emit heavy fumes. Working with any type of disinfectant in your bathroom should always end with ventilation. Vent your bathroom by running the exhaust fan, and if possible, open a window so you can let in fresh air. This process not only helps dissipate any lingering chemical droplets in the air, but it also helps ensure the space is clean and ready to use again. Ventilation is also effective for reducing humidity buildup, which contributes to mold and mildew growth.
A good rule of thumb is to let your bathroom air out for at least 15 minutes after cleaning with products. Avoid using the shower or bathtub during this time, as this just adds more humidity to the air, counteracting your efforts. Letting the space dry improves your indoor air quality and helps protect the bathroom against damage caused by continual humidity, such as peeling paint or warped flooring. Finally, give yourself a high five because you're done with one of the most dreaded chores in the home.