Create Mosaic Floating Shelves Using Backsplash Tiles
We may receive a commission on purchases made from links.
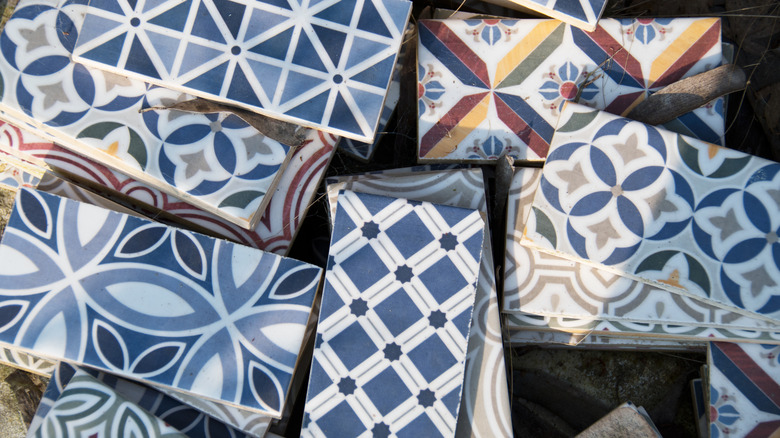
If you've ever completed a DIY backsplash installation, you know that it's not uncommon for some tiles to chip or crack during the process. This can leave you with piles of broken tiles destined to sit and collect dust. Instead of letting them go to waste, you can use old backsplash tiles to DIY your own floating shelves with a mosaic pattern. The process requires securing the small pieces with adhesive and then locking in the design with grout. The final product is a unique piece of decor that will truly stand out wherever installed.
An important part of this DIY project is making sure you have all of the materials on hand before starting. First, you'll need to have your pieces of broken backsplash tile (or whole tiles if they are small) and some form of adhesive like the AcrylPro Ceramic Tile Mastic. Additional items include a grout float, a tile cutting tool, and a sponge to clean the surface. You'll also need grout to lock the tiles in place, and as much as possible, try to avoid some common grouting mistakes made during a DIY tile installation. One issue is using the wrong type of grout for the project, which can lead to damage or the pieces not adhering properly.
How to DIY floating mosaic shelves from old backsplash tiles
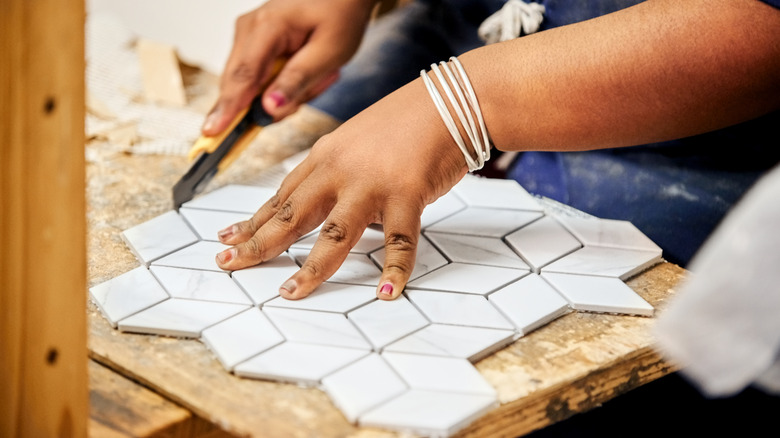
The first step to this DIY mosaic hack is to lay out your tiles and create a visual of the final design. This is the time when you'll want to make sure you have enough tiles to cover the shelf and make any cuts to the pieces. When you're happy with the design, remove the tiles and add a layer of your chosen adhesive to the top of the shelf. Gently press the tiles into the adhesive and repeat until the entire surface is covered. Repeat these steps for all sides of the shelf and, depending on how high you plan to install them, the bottom portion as well.
Once all the tiles are in place, you'll need to be patient and wait at least 24 hours before moving on to the next steps. Ideally, you should let them set for 48 hours, but this number can fluctuate depending on factors like how humid your house is. Apply the grout the same way you would any tile project by using a float to smooth the product through all the lines and wiping away any excess with a damp sponge. You might notice a haze left over, but this can be removed with a dry paper towel. Give the grout a few days to fully dry before hanging your shelf or placing any heavy items on it.
Customizing your DIY mosaic installation
One major perk of this DIY mosaic shelf project is that you can customize the final look to match your home's decor. For example, use all of the same color tile to create a shelf with a cohesive look or stagger colors and shapes to help add a fun pop to your space. Depending on how big your shelf is, you can try creating designs with small details like flowers or animals. In all cases, ensure to follow the steps to make your mosaic tiles lay flat and always clean the surface after grouting for a polished final look.
Another way to customize the look of your new decor is to choose the best height for floating shelves. Instead of feeling like it's necessary to place your shelves level with one another, try staggering them or even installing them above one another to create a vertical stacked appearance. Both methods help to create a unique appearance while still being practical enough to store and display other pieces of decor.