16 Clever Ways To Reuse Plastic Nursery Pots To Attract Birds & Pollinators (& Repel Unwanted Pests)
We may receive a commission on purchases made from links.
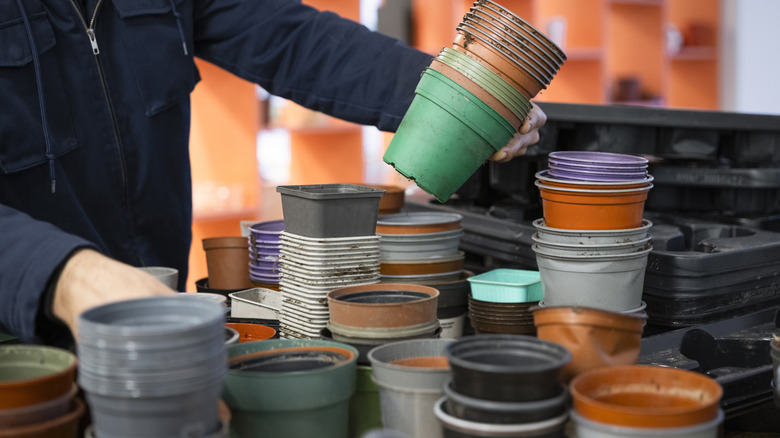
Is that ever-growing collection of plastic nursery pots rapidly overtaking the garden shed shelves or potting table? Clearing the clutter and catering to the beneficial critters that visit your backyard, be they feathered or exoskeletal, is easy if you have a few simple tools and even just a single crafty bone in your body. Creative ways to reuse plastic nursery pots in your garden include creating a bug hotel by filling them with paper rolls or adding a wooden front with cut-outs for a bird or butterfly house. Create a water station for bees, a hanging seed feeder or garden bath for birds, or a micro-pond for a variety of beneficial wildlife. These plastic pots also come in handy when repelling all manner of garden pests — think seedling collars, slug traps, bird feeder baffles, and mosquito container gardens.
If you're planning on making anything birds or bees will inhabit, even just temporarily, you'll need to clean and sterilize the pots before attempting a DIY. You don't want to risk spreading disease. Brush off any dried-up dirt with a clean brush, then scrub the pots with warm, soapy water. Rinse them in clean water, allow them to dry, and apply rubbing alcohol with a soft cloth to disinfect them. If you don't have any pots but still want to try, ask around family and friends for throwaway planters or buy some online. A 15-pack of RooTrimmer Green Thickened Plastic Plant Nursery Pots in various sizes costs about $23.
Bring beneficial bugs into your yards with a plastic nursery pot hotel
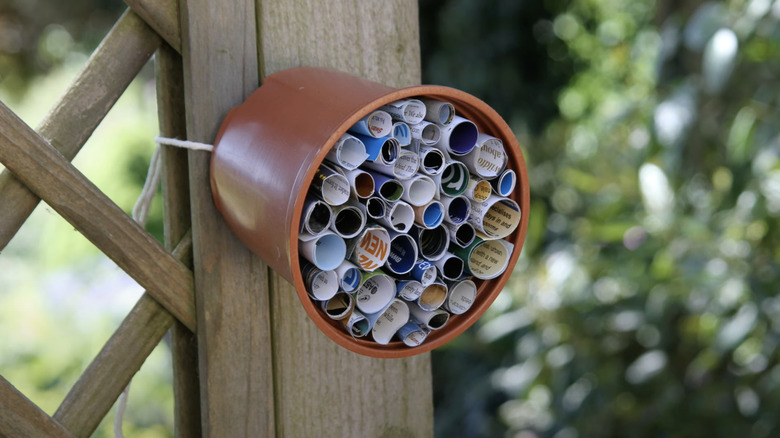
Save your plastic nursery pots for a DIY that'll make your garden a pollinator haven: yup, we're talking bug hotels! Tightly fill a clean plastic nursery pot of any size with hollow, dry, and biodegradable stems or tubes — think bamboo, thick plant stems, paper straws, straw, leaves, small pieces of wood, (dye-free) corrugated cardboard, or rolled-up paper. Sit it in your garden bed, propping it on a log, or mount it three feet up a south-facing tree or fence post. Occasionally, check for used and evacuated tubes and replace them.
Need a nesting spot for birds? DIY one from a plastic nursery pot
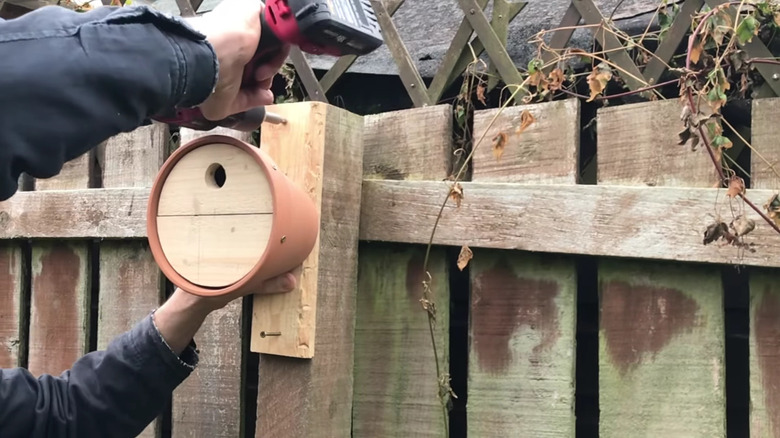
Reuse nursery pots for DIY birdhouses around your yard and boost your feathered friend group in the process. Measure the mouth of your planter and cut a wooden disc (or two half-discs) to fit snugly inside, adding a hole for the birds to enter and exit. Affix it to a shaded tree or fence post. Alternatively, drill two holes vertically in the side of the pot, turn the pot upside down, and affix it to a wooden platform on a stand. Top it with an upturned coir-lined hanging planter roof.
Fashion an underground home for bumble bees from a plastic nursery pot
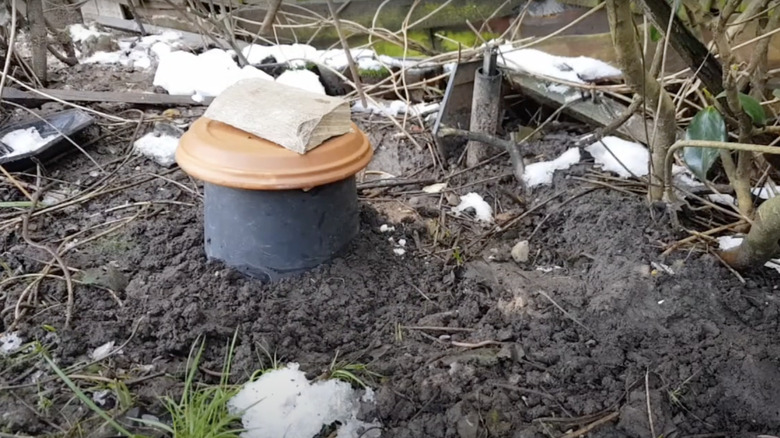
Bug hotels and honey bee watering stations are popular DIYs for backyard gardeners, but these don't cater to the unique nesting needs of the bumble bees. These also-important pollinators like to build their nests underground. Give them a home by creating a wire and straw nest on the ground, running a drainage pipe underneath it, and upturning a plastic nursery planter over the arrangement. Set something flat and heavy — a roof tile or terracotta planter saucer — on small rocks or wine corks atop the pot's drainage holes.
Plant up a pollinator pot in plastic nursery containers
DIY a pollinator pot, and you'll attract hummingbirds and butterflies to your outdoor space — and many more beneficial critters! You could use a huge plastic nursery pot or cluster various-sized pots together. Either way, it's the plants you choose that make this DIY work. You need flowering shrubs attractive to native pollinators. The selection may vary depending on which part of the U.S. you live in; non-profit native plant promoters Pollinator Partnership have made it easy by creating Native Pollinator Garden Recipe Cards for every region. Focus on plants that thrive in containers.
Want more butterflies? Craft them a home from a plastic nursery pot
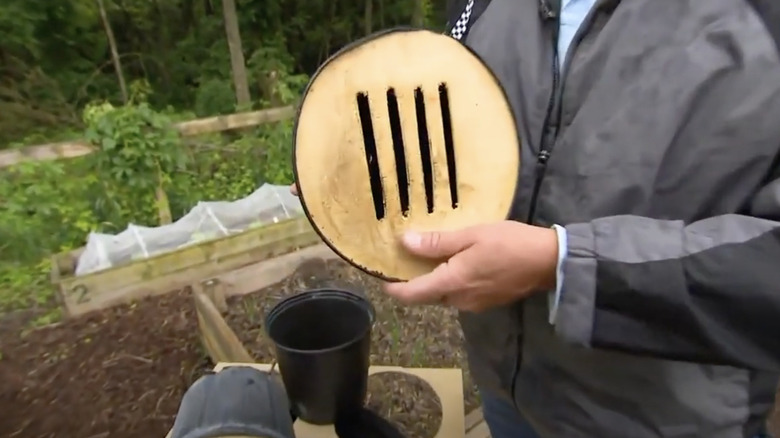
Choose a large, clean plastic nursery pot and measure the opening. For example, a 2-gallon pot has an opening of around 9 inches, so look for a similarly sized wood round, like this twin-pack of 1Plusselect Unfinished Round Wood Slices for almost $16. Cut a few vertical slots into the wood round and fit it into the pot, creating something similar to a birdhouse — minus the round entrance hole. Glue bark to the outside of the planter so it mimics their preferred nesting environment, or paint on bright flowers.
A plastic nursery pot feeder that birds will flock to
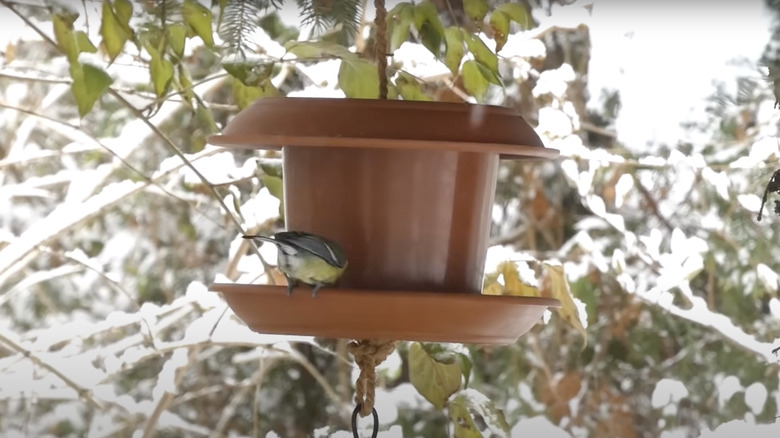
For this project, you'll need a plastic nursery pot and matching saucer and an additional large saucer, which doubles as seed catcher and perch. Drill a hole in the middle of each saucer and cut the bottom from the nursery pot. Thread rope or a metal rod through each of the parts, starting with the small saucer, then the pot, and finishing with the large saucer. Decorate the feeder with non-toxic, waterproof paint. Once the paint is dry, fill the pot with bird seed and hang it in a tree in view of a window.
Birds can wash dusty feathers in your plastic nursery pot bath

The fanciest version of this DIY is probably the pedestal bird bath — join two plastic nursery planters at their openings, repeat, stack them, and top with a large planter saucer filled with glass pebbles and water. Paint the planters if you wish. Make a planted bird bath by filling a large plastic nursery pot with soil and setting a smaller pot with a water-filled saucer atop that. Plant the large planter with nectar-filled flowering shrubs. Or wedge a large plastic pot saucer into a hanging basket and fill it with water.
Cater to buzzing pollinators with a plastic nursery pot bee cafe
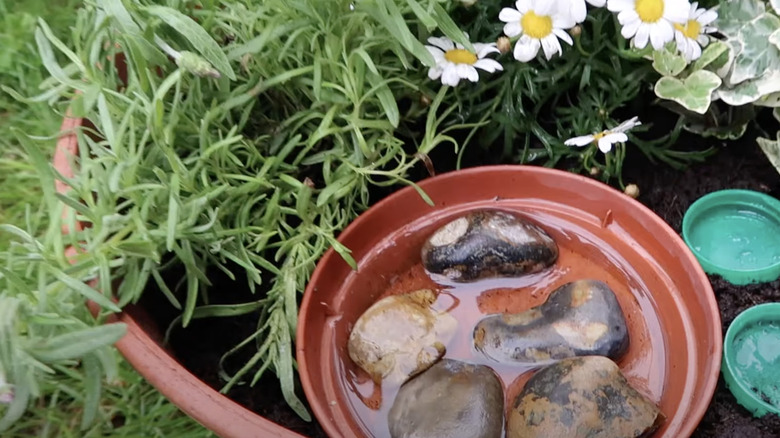
To create a watering station for bees, place the saucer from a plastic nursery pot on the ground and fill it with pebbles, marbles, or floating wine corks (they stop thirsty insects from drowning) and freshwater. Add a chain and hang it from a shepherd's hook in the garden. Or go all out and make a bee cafe by filling a large plastic nursery planter with soil and planting around a small pot saucer filled with rocks and water and some bottle caps of nectar with bee-friendly flowering shrubs.
Fill a plastic nursery planter with water for a micro-pond
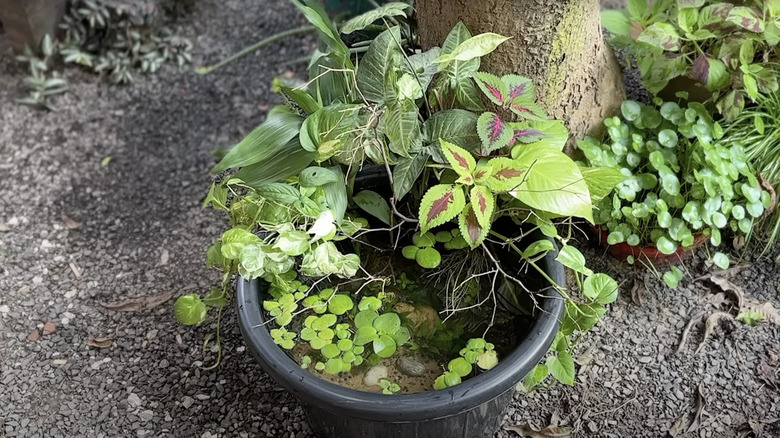
Backyard ponds are an important resource for birds and pollinators alike. If you're lucky, you might even get some permanent pest-eating residents like frogs! Use Leopong Black Waterproof Silicone Putty for about $15 to fill the drainage holes of a plastic nursery pot or add a pond liner. Fill the pot with a layer of soil, sand, and rocks, then add water and aquatic plants. You can also create the illusion of a large pond by grouping micro-ponds of different sizes together, adding a fountain to one of them if you wish.
A plastic nursery pot baffle preserves your bird seed
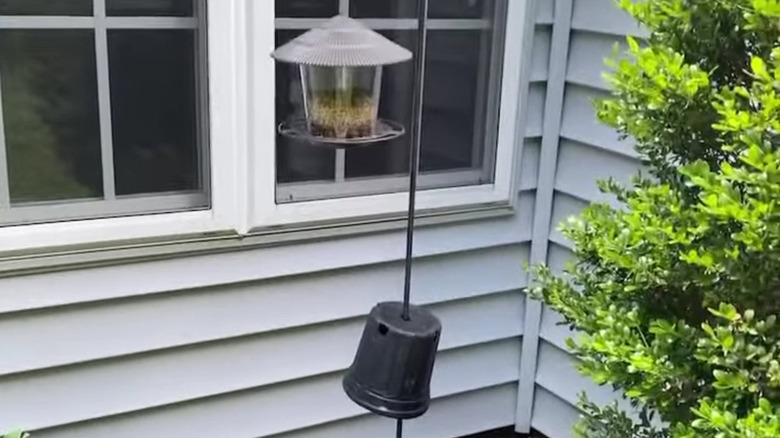
Hang an empty plastic nursery pot around your bird feeder, and you'll keep those pesky squirrels and chipmunks from scaling the pole or chain and stealing seed from your hungry feathered visitors. If you have a feeder mounted on a tall shepherd's hook, thread the pot's drainage holes over the pole (between the ground and the hook), ensuring the planter's opening faces down. Secure it in place using a reusable metal cable tie. Alternatively, thread the pot onto the chain above a hanging feeder, where it doubles as rain and bad weather protection.
Protect seedlings from hungry pests with a netted plastic planter
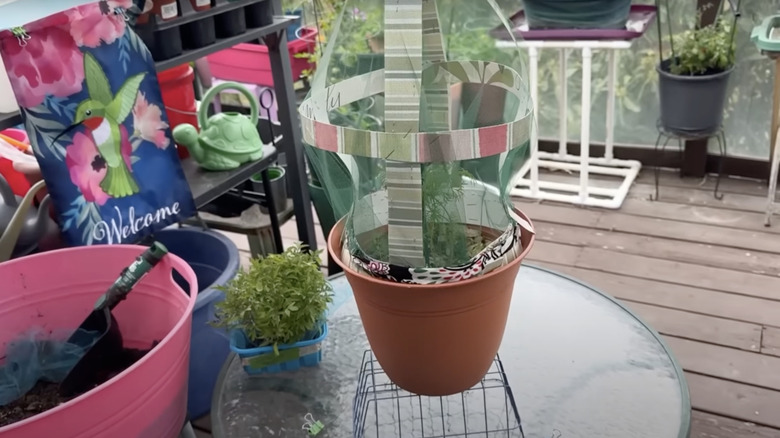
Need to keep hungry herbivores from munching on your plants, but don't have the budget or the space for netted raised beds? Craft micro versions for individual plants by cutting long strips from cheap plastic placemats — a 30-pack of 17 x 11-inch Tecmisse Heat Resistant Plastic Placemats costs about $16 — and attaching them to plastic nursery planters, forming a dome you can affix netting to. Alternatively, pop a plastic bag over the planter in place of the netting to create a mini temporary greenhouse and impenetrable pest barrier.
A plastic nursery pot plant collar protects your seedlings from nibbling pests

Cut the base from the pot using sharp scissors or a knife to create a collar. Pop that over the top of newly planted seedlings, carefully threading the plant through the top. The sturdy plastic walls protect the plant from pests and the plant still has room to grow. You could also cut a short-walled ring from the pot and wrap it around the stem of a new plant to thwart cutworms or simply upturn a plastic nursery pot over the plant for short-term (overnight, for example) protection.
A plastic nursery pot can trap pesky earwigs in the garden

Fill a plastic nursery pot with damp straw, mount it on a stake, and leave it in your garden overnight. The earwigs plaguing your plants will crawl inside; later, you can move them elsewhere. Alternatively, fill the nursery planter saucer with soy sauce, water, and vegetable oil and drop it into a hole dug into your garden bed. Place an upturned pot on it and push the soil back around, leaving the draining holes open. The earwigs will enter through the holes and fall into the mixture at the bottom.
Protect your tomatoes from rodents with plastic nursery planters
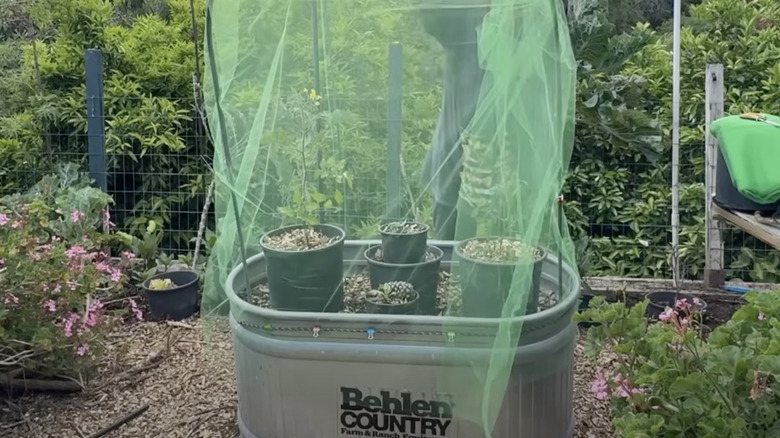
Rodents or birds snacking on your tomatoes? Cut the bottom of the biggest plastic nursery pots you have using a sharp pair of scissors — planters with thin, flexible walls are the easiest to work with. Set the modified pots on top of the soil in a raised garden bed with a hoop and fill them with soil and a single tomato plant, just as you usually would. Secure FARAER Ultra Fine Mesh Garden Netting for about $15 to the hoop and the sides of the raised bed.
Convert a plastic nursery pot into a snail and slug trap
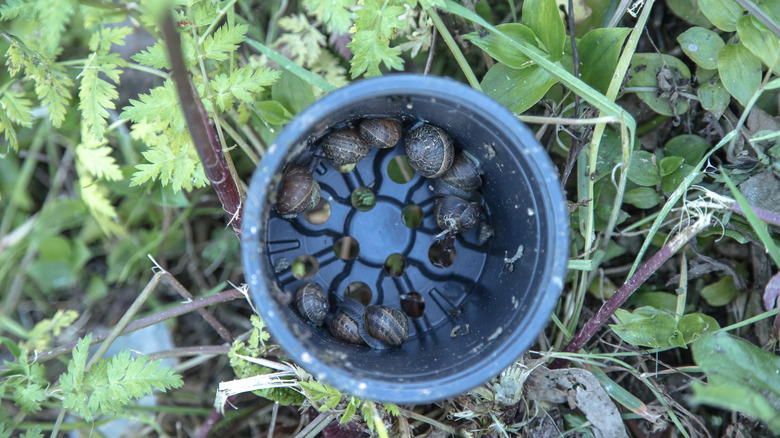
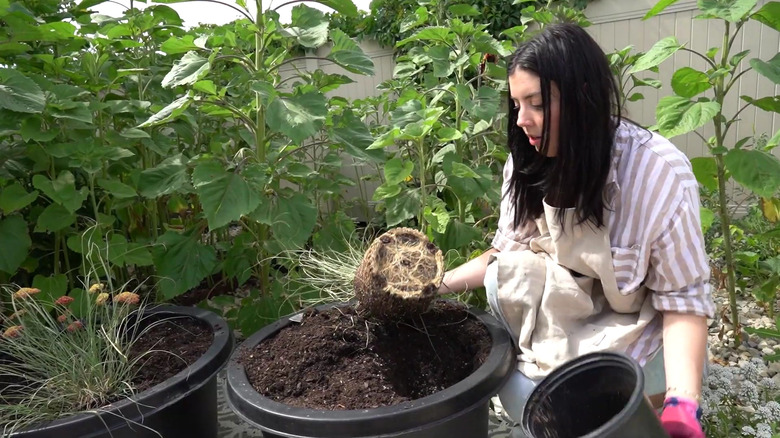
Admittedly, this idea attracts these garden pests rather than repels them, but only so that you can remove them before they destroy your vulnerable newly planted seedlings. Fill a plastic nursery pot halfway with soil (you don't even need to clean it first) and upturn it on your garden bed near the area where you see the most mollusks. Run water through the drainage holes to thoroughly soak the soil inside. Slugs and snails, attracted to the damp, dark environment inside the pot, enter the holes and get trapped inside.
Grow pest repelling plants in a plastic nursery pot
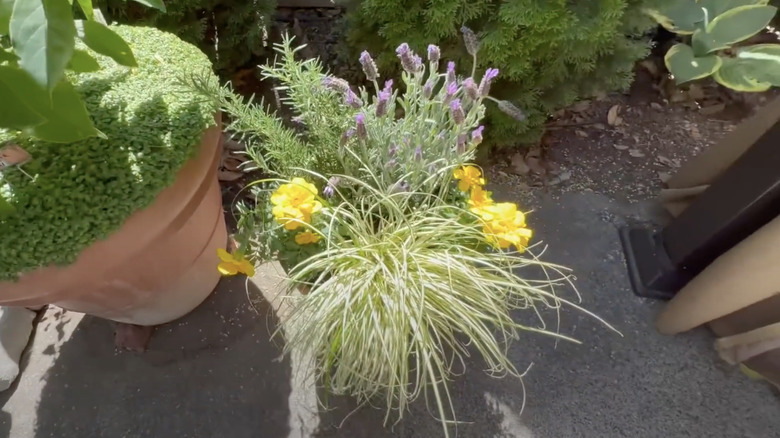
Use a large nursery pot (or multiple smaller ones) to create a natural mosquito or other pest repellent planter. Everything from aphids to mosquitoes to tomato hornworms hates basil. Chrysanthemum leaves contain a natural insecticidal oil. The smell of mint is off-putting to cabbage moths and mice, among other pests, and is best grown in pots to limit its spread. Lavender, lemongrass, and marigolds are other popular options. Plastic containers are lightweight, so you can move your natural pest control pot around your yard to wherever you're plagued by specific pests.