How To DIY A Bucket Pond For The Wildlife Living In Your Backyard
We may receive a commission on purchases made from links.
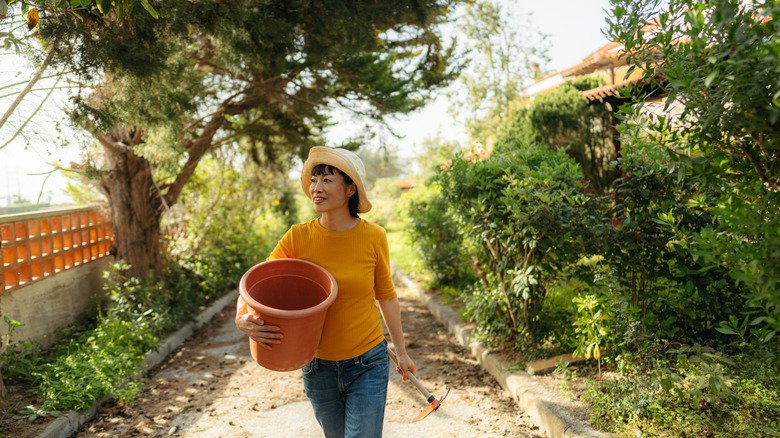
There are many environmental benefits to adding a pond to your garden space, and creating a small wildlife-friendly area does not always require digging or expensive materials. Anyone can make a thriving ecosystem with a simple bucket, a few materials, and a couple of hours. The goal is to mimic natural wetland conditions with easy access for creatures, native plants, shelter, and varying depths to support different species. You will need to start by finding a watertight bucket with a depth of 12 inches being ideal. This allows space for aquatic plants while helping prevent mosquitoes, which usually prefer shallow waters under 6 inches.
Location matters just as much as your container, so try to place your pond in a spot that will receive some sunlight during the day, but also has shaded times, as too much sun can encourage algae growth. A spot with nearby vegetation will also help boost the appeal to wildlife. Shrubs and tall grass provide cover for frogs and insects visiting the water. Even if you are tight on space, patios and balconies can still work. These miniature wetlands will attract pollinators, birds, and beneficial insects all while adding a nice water feature to your outdoor space.
Building your DIY bucket pond
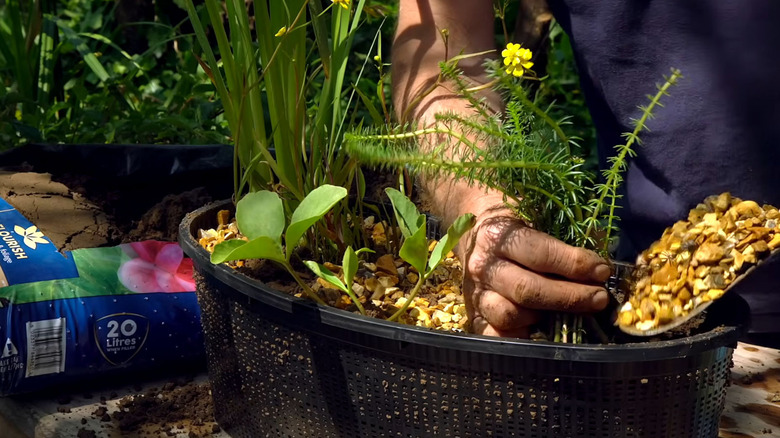
You will want to get pond plant baskets, like these Pondmaster aquatic plant baskets on Amazon. These are containers that have holes in them to allow water to penetrate and provide room for roots to expand. Layer the bottom of the baskets with 2 to 3 inches of aquatic soil. This heavy clay substrate mix is perfect for underwater plants and is heavy enough not to spread out and cloud the water. There are lots of different plants you will want to keep in your pond, and when picking them out, remember that native species are best, so you will need to do a little research into your region. Once planted, add some washed gravel to the tops of your baskets, being careful around the plants. This not only helps keep the substrate still when adding water, but will create little habitats to encourage animals to lay their eggs in.
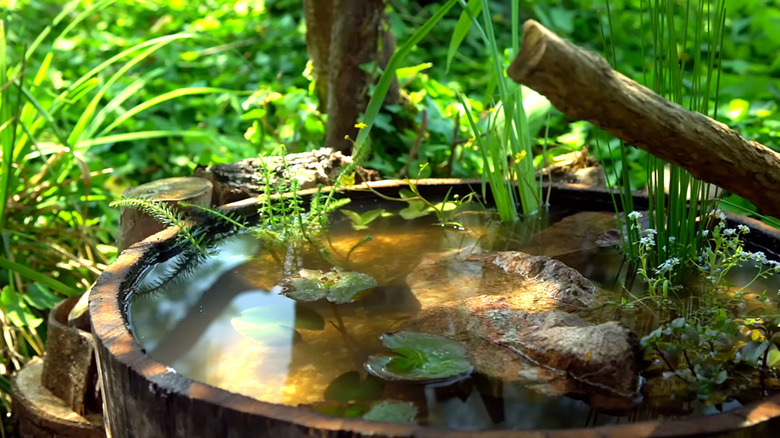
Once you have placed your baskets into the bucket, begin adding water slowly and carefully so as not to disturb the soil too much. Once finished, you can start to get creative with your pond. Arranging stones and large wood pieces to create varying heights in the water will encourage wildlife. You will also want to create a "ramp" for creatures to reach your new bucket pond from the ground. A large log would work well, placing it on an angle from the ground to the top of your bucket. You could even add a taller wood piece to act as a perch for birds to survey the area before popping down for a quick drink or bath.
Avoiding common bucket pond problems
Small ponds can face big problems if not properly maintained. Overcrowding plants can be an easy mistake, so make sure you do not overdo it to avoid oxygen depletion. If you are worried about algae, a small, weighted bag of barley straw just under the surface of the water can help naturally deter algae growth. Rainwater is best to use for your new bucket pond, but if that is not possible, tap water can be substituted, just make sure to use a water conditioner to help remove the chlorine.
While standing water may be good for frogs, mosquitoes can become a big problem. One way to deter mosquitoes is to add a small solar-powered water pump to keep the water moving. This makes it more difficult for them to lay their eggs but can also deter wildlife that prefer stagnant water. A few added fish could also help curb mosquitoes from laying eggs. Research your region for native mosquito-eaters. Eventually, your pond should start seeing more natural mosquito deterrents like birds and dragonflies. In the end, with just a few materials and some research, you could have a beautiful bucket pond that brings in new critters and creatures to your yard throughout the year.