What To Consider Before Choosing Swimming Pool Grout

We may receive a commission on purchases made from links.
The summer season is always pool season, and having one in your home is an absolute delight. Swimming pools are excellent additions that increase your home's value, provide a way to cool off in the summer heat, and help you make memories with your family. Building and installing a swimming pool also means selecting the right tiles to complete the pool design in your backyard. To ensure your pool tiles are secured in place, you must also choose the right grout. When investing in your swimming pool grout, consider aspects such as the grout's durability, flexibility, ease of installation, color, maintenance requirements, and finally, the adhesive used to lay the pool tiles.
What you prioritize for your pool's grout can vary and depends heavily on your personal preference. However, you must understand that pool chemicals can break down grout over time, and temperature fluctuations can cause grout to crack. Finding the right grout means you must also take the time to assess these fluctuations from season to season and figure out how they affect your pool.
Considerations when choosing pool grout
It's key to remember that your swimming pool grout will be frequently exposed to UV rays, water, chemicals, and temperature changes. All of these factors can easily make your grout less effective, so it's necessary to choose one that is durable and can withstand the harsh natural elements and chemicals. Aside from being durable, it should also be flexible to allow the pool tiles to expand and contract with changing temperatures without cracking.
Aesthetics are also important to consider, so choosing a grout color that complements your swimming pool's design, doesn't stain, and is waterproof is necessary to achieve your desired look. Lighter grout colors give your swimming pool a sleek, bright look, but they can also be more subject to staining. Darker colors tend to mask stains and require less cleaning, but they don't look as bright.
Clearly, how often you clean your pool waterline tiles and generally maintain your pool can be affected by the color of your pool grout. Additionally, the type of grout you choose may require resealing, depending on the maintenance needed for its upkeep. You may also need to re-grout your tiles after a certain amount of time due to wear and tear to extend the life of your pool. High-maintenance grouts force you to drain the pool frequently, which can be time-consuming. If you go for a low-maintenance option, all these may not be necessary. Finally, ease of installation is a key consideration, especially if you're planning on DIYing this project.
The importance of your pool adhesive to grout choice
Before choosing the grout, you must choose your pool adhesive. The adhesive is laid down first to ensure the tiles stick to the surface of your pool. The tile glue you choose must be waterproof and specific for pool use. Whether you're investing in a DIY pool kit or working with a professional installer, you want to ensure the grout and adhesive are compatible and effective.
There are three types of adhesives you can use for your pool tiles: Thinset, mastic, and epoxy, which can come ready mixed or powdered. Thinset, which is often referred to as mortar, is more popular due to its ease of use and affordability. You can just mix it with water and apply it to the surface before putting your tiles down, and it has some give, so you can move the tiles into place. Mastic is more like a fast-drying glue, so it's not as easy to maneuver once you've laid tiles down onto it. Thinset is much preferred over mastic for pools because mastic does not work well in very wet areas.
Epoxy tile adhesive is the most durable type to get, and usually goes with epoxy grout to provide a waterproof and secure bond for your pool tiles. The downside is that it can be difficult to mix and apply, takes a lot more time than traditional grout, and the quick-dry quality makes it hard to set many tiles at once without wasting it.
Types of swimming pool grout
There are two primary types of grout used for pool tiles: Epoxy and cement. Both can work for small mosaic pool tiles and larger format pool tiles, depending on your pool design. Epoxy grout is a resin-based, sealed waterproof material that lasts over time. While highly durable, it is also more expensive and difficult to install than cement grout. It sets fast, so you have to go slow and do smaller sections at a time. You cannot make many adjustments as you go if you happen to notice inconsistencies. One of the most recommended types of epoxy grout is the Ardex WA High Performance Epoxy Grout and Adhesive. It is ideal for pool tiles and uses a glass bead base instead of sand to make it easier to maintain.
Cement is much more affordable than epoxy grout, is easy to mix and lay over tiles, and you can dye it easily for more color options. It is much easier to work with when putting the tiles in your pool because it takes time to set, so you can make adjustments. This can be helpful when installing bulky, large-format tiles. However, it can also be a disadvantage as the setting time for this grout is a week or more, whereas epoxy sets within a few hours. Also, cement grout is more porous and allows water to seep through, which can cause discoloration, staining, and cracking. It is also not as flexible as epoxy grout. A good cement grout for pool tiles is the MAPIE Ultracolor Plus FA Powder Grout, which boasts stain-resistance, fewer cracks, and no need for sealing.
How to achieve the best grouting results

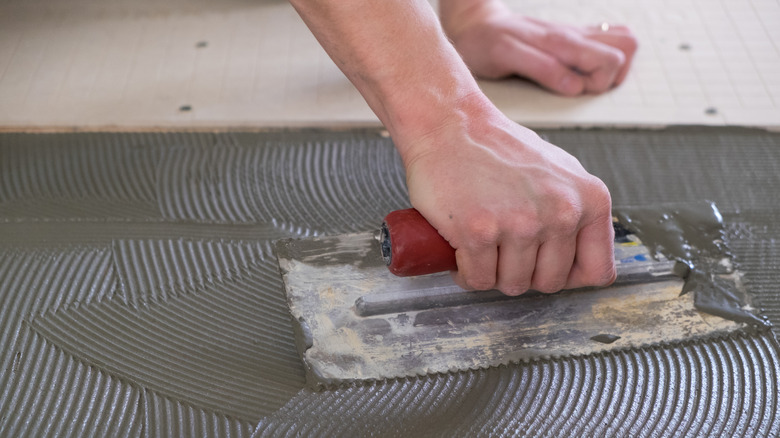
You must clean your pool's surface and remove any dirt and loose items before you begin. Pour and mix your pool tile adhesive according to instructions. Using a notched trowel, spread the adhesive evenly on the surface. Cover areas around 3 to 4 square feet at a time, working in smaller sections so the adhesive doesn't dry out as you go. Next, place the tiles directly on the glue, pressing down to remove any air and to keep your tiles in place. Use tile spacers to keep gaps for your grouting. Once the adhesive has completely dried (typically 24 to 48 hours, depending on instructions), you can grout.
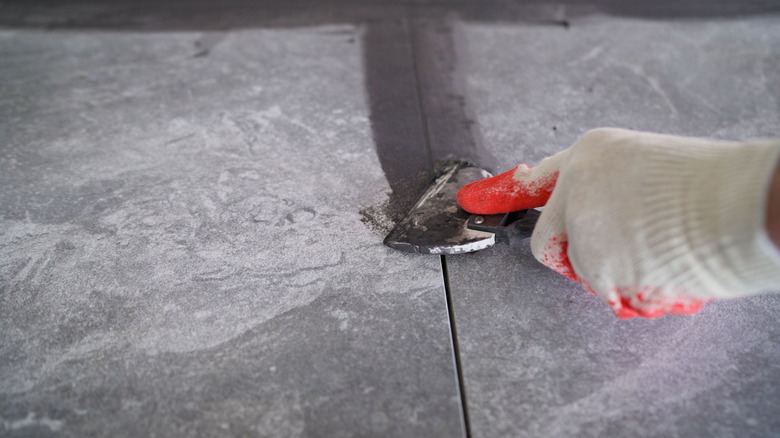
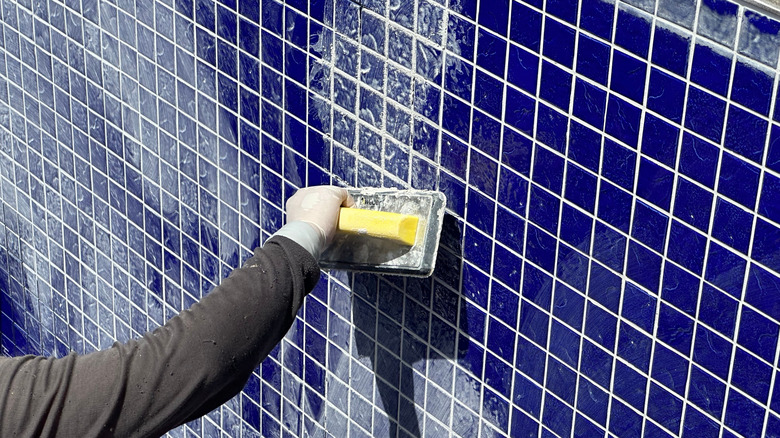
Remove all tile spacers and clean the tiles with a damp cloth or sponge to remove any debris. Prepping the tile for grouting is the most important step. Mix according to instructions to get the right consistency. Using a gauging trowel, press the grout into the joints between your tiles in a diagonal direction to keep it in place. Your goal should be to ensure the grout is applied into each space evenly and the spaces are sealed all the way to the surface of your tiles.
Once done filling in the grout, you want to remove any excess, then wait for it to set before wiping the tiles again with your damp cloth or sponge to remove any left on the surface. Do not fill the pool with any water until the grout is dry, and the time depends on the type of grout you used. Follow your manufacturer's instructions for accurate drying times.