Create Custom Trinket Dishes With This Coastal-Inspired DIY
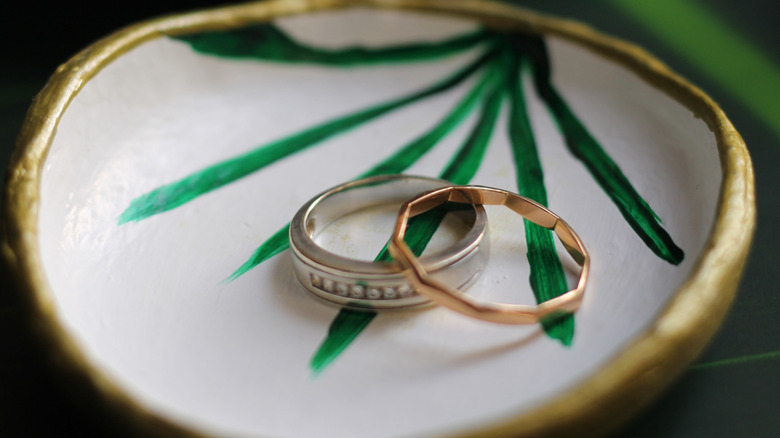
Coastal decor is one of those trends that will never truly disappear, though it does benefit from clever upgrades and refreshes that help keep it more modern and less overdone. Whether you have a full-on coastal theme or just want to try out this aesthetic, one of the simplest ways to make it work is with tiny details. Instead of every piece featuring a nautical-themed design, incorporate natural sea-inspired items throughout the house. One example is turning oyster shells into trinket dishes to create clever storage that also helps the coastal designs flow. Rather than spending a lot of money on valuable trinket trays, you can create your own that are customized to your bedrooms, bathrooms, and even living areas to bring more prints, patterns, and textures. A little Mod Podge, some decorative papers, and your shells are all you need.
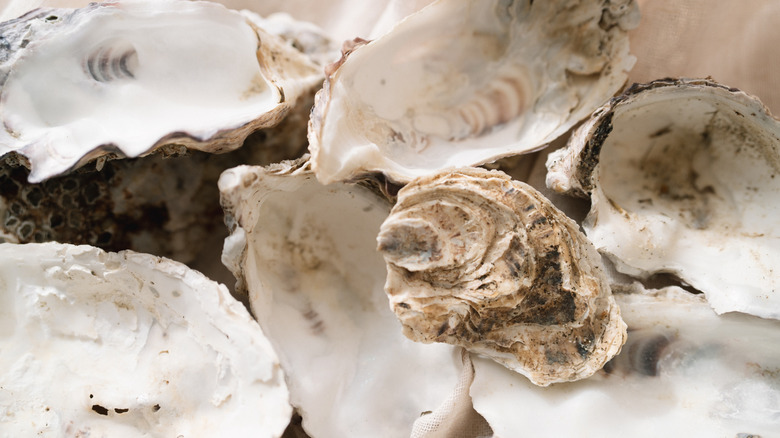
How you source your oysters or any other shells you choose to use is up to you. If you live near the ocean and can find them yourself, that's an option, but you may have to clean and prepare the shells. If you want more of a stylized base, purchasing shells may be the best option as they are cleaned and ready to craft with. However, some of the creativity lies in working with unusual oyster shapes, and the various textures make for more visual interest, so decide what works for you.
Clean and prep your oyster shells
If you find your shells on the beach, give them a good cleaning before you decorate them. You can use a stiff bristled brush to get a lot of the excess grit and the inner muscle off, otherwise, this will create a bump under your decoupage that you don't want there. While there are other methods to clean and save seashells to use as home decor, this option leaves you with the natural finish of the rough edge of the shell.
Once you've scrubbed your shells, give them one more rinse and allow them to fully dry. You have a few different options with your shells. If they are really dark in color or you want a more neutral base, you can paint the inside of the oyster in any color paint you want to create a clean background for the decoupaged designs. Otherwise, you can apply the images directly to the shell.
The designs for your trinket trays come from either printed napkins or decoupage paper. Choose patterns or colors that match your rooms. You also want to have Mod Podge to apply the designs to the shells. You want to separate the printed layer of your napkins from the other layers. This creates a thin image that is easier to adhere with the Mod Podge. Your trinket dishes will have the print on the inside portion of the shell to create a focal point.
Decoupage and seal your shells
Decide on your design by playing with the patterns on the napkin or paper. You can cut out individual designs and arrange them on the shell, or use a piece of paper or napkin that's large enough to cover interior of the shell. With this method, you can cut the paper neatly or tear off the excess going around the shell's natural edges once you glue it down. Using several individual images works well if you paint a solid-colored background that shows around your cutouts.
Once you have an arrangement you like, gently coat the inside of the shell with Mod Podge using a paint brush. Then, position the paper where you want it, and cover it in another layer of Mod Podge to seal it. Once it's dry, you can add everything from jewelry to snacks in your dish. Just like turning your summer shells into table dishes, this project gives you a new way to add storage to your surfaces.
Some people use gold or other paint colors to decorate the edges of the shell for a more finished effect. Using a paint pen is one of the easiest ways to accomplish this, but you can also paint it with a very slim brush to add the color. The metallic gold shade is nice with your printed patterns on the shell, and it gives the DIY trinket tray a professional look. You can also add other accents, like tiny faux pearls or beads, along the top edge of the oyster.