Reuse 5 Gallon Buckets To DIY A Grow Table That Will Help Your Garden Thrive
We may receive a commission on purchases made from links.
There's a simple gardening practice that makes growing vegetables a breeze on a balcony, paved patio, or small backyard: container gardening. Repurposed containers, like 5-gallon buckets, save you money, and elevating said buckets off the ground on a wooden table saves your back. First, you make a slatted wooden base supported by sturdy legs made from hefty 2 by 4s. Then, you add a railing that holds the buckets in place, making them easy to remove or replace as needed.
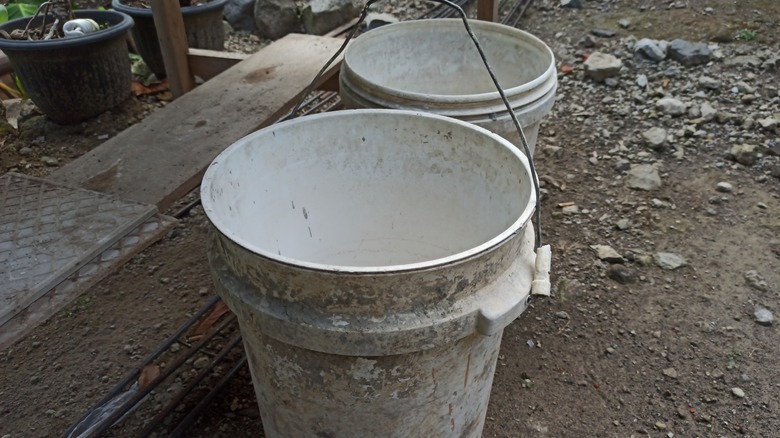
Buckets once used to hold toxic materials are a no-go for this project — you don't want those nasties leaching into the soil. Even safe used buckets need to be cleaned thoroughly before repurposing: first with soap and water and then wiped with diluted bleach, alcohol, or TSP. Alternatively, buy the containers new. A pack of 6 EconoHome Heavy-Duty BPA Free Food Grade White 5-Gallon Buckets costs about $40. (White is a good choice, since black attracts solar radiation, heating up the soil and damaging plant roots.)
You'll also need four 18-inch-long 4-by-4 planks (the table's legs). For the stretchers, you'll need four 13-inch-long 2-by-4 planks and four more 2-by-4 planks cut to the length you wish your table to be (count your buckets and measure your space before purchasing your wood). Use decking boards for the slats. You'll also need a couple of packs of self-tapping screws — 2.5 and 3 inches long. Ideally, use pressure-treated lumber; if that's not available, any old timber will work, including scrap finds, so long as you finish it to protect it from weather.
How to build a grow table using wood and 5 gallon buckets
Ready to elevate your DIY container garden with this handy project? Cut all your wood to size as directed above. Cut the decking boards into twelve 18-inch by 6-inch pieces and two 16-inch by 6-inch pieces. Screw the upper and lower short-end stretchers to the first pair of legs (the 4-by-4s), using two screws per attachment. A hammer and nails work just fine, too. Repeat for the second pair of legs. Next, screw the long stretchers to the end pieces you just created, starting with the lower stretchers — this forms the stable base for your table. Now, lay out the decking board slats, reserving the two shorter 16-inch-long slats for the end pieces. Screw the first slat in place, then slot a piece of scrap wood between each slat to ensure they're evenly spaced as you screw each successive slat to the stretchers.
If you used pressure-treated lumber, you can also leave the grow table unfinished; it's already insect-resistant. Just know that it will gradually take on a grey hue with exposure to the outdoors. If you used scrap or untreated wood, you'll need to finish the grow table. Tung oil is arguably the most durable and eco-friendly option — get a bottle of HOPE'S 100% Pure Tung Oil Wood Finish for about $18. You can also use an exterior paint or stain. Choose a hue that matches your existing outdoor furniture or garden style.
Make your new grow table work for your specific gardening style
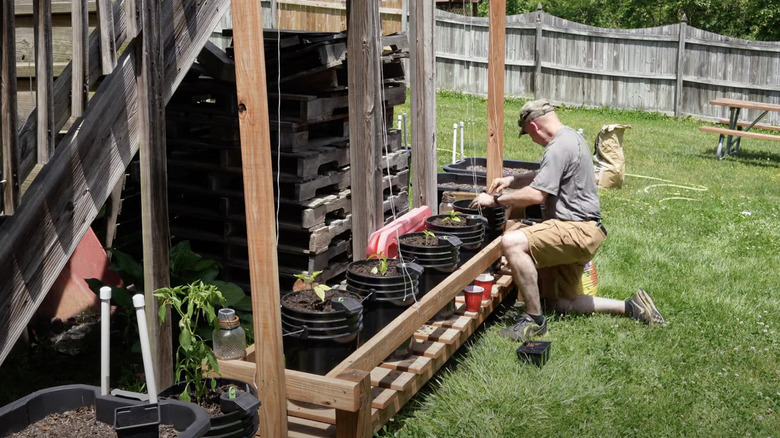
Once your grow table is set up in its final spot in your yard, you can fill it with the 5-gallon buckets, soil, and plants. Avoid using garden soil, which is prone to compaction in containers. Instead, get a few 25-quart bags of Miracle-Gro Organic Outdoor Potting Mix for about $10 or a similar commercial offering. Plant-wise, those with a small footprint are the best vegetables to grow in a bucket — think carrots, radishes, lettuces, spinach, green onions, and, of course, hardy culinary herbs. Even fruiting edibles like tomatoes, peppers, squash, beans, cucumbers, and eggplants do well in confined spaces if the container is deep enough (and 5-gallon buckets are certainly that). If you prefer flowers, tons of ornamental shrubs thrive in containers, too.
Save time on watering by turning your buckets into sub-irrigated planters with a three-pack GroBucket Garden Kit for almost $56. Need more growing space? Fit another row of buckets into your grow table by doubling the width of the end piece stretchers. Just as you would plant tall vegetables on the north side of a garden, plant your vines and shrubs in the back row to avoid shading out your short-statured edible plants. You could also make a waterfall-style grow table by doubling and tripling the height of the legs for each row, creating three tiers. Connect a wooden trellis frame to the table to support climbing vegetables, dropping garden twine down from the horizontal top rail, or stringing a net between the vertical end posts.