12 Must-Have Tools For A Flawless Home Paint Job
We may receive a commission on purchases made from links.
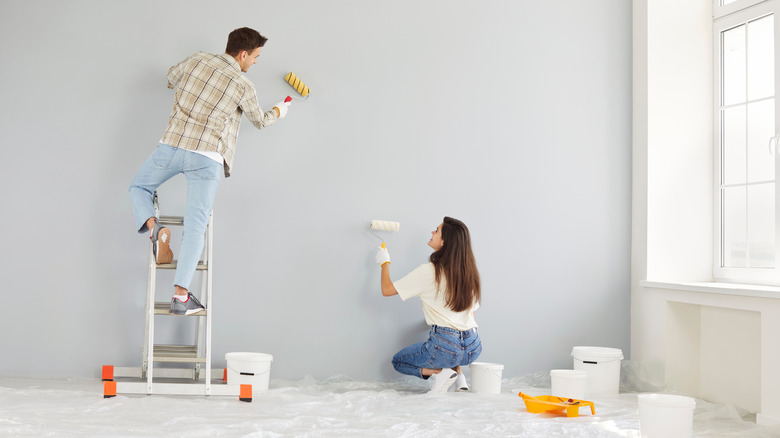
Painting your home for the first time can be incredibly exciting. You envision how each room will transform, how your personal style will flow seamlessly, and how beautifully cohesive your house will look once you're done. However, to bring that vision to life, you must have the right tools in your corner. Luckily, you don't have to break the bank to achieve stunning results. Focus on security and quality versions of the essential prep and painting tools. You'll want drop cloths, spackle, painter's tape, sandpaper, rollers and their accessories, paint brushes, stir sticks, and a ladder.
While it might be tempting to grab the cheapest options, know that those generally won't last long. This can be an issue if you need to tackle any future touch-ups or "we could use a bold accent wall" scenarios. If you've never touched a paintbrush before, get some practice in a small, less prominent area, like your linen closet. Once you've built your confidence, move on to the main living spaces. And if you're clumsier and messier than you'd care to admit, stock up on gloves and rags as well. That way, you can clean the stains as you work, rather than spending hours scrubbing later. Now that we've outlined the basics, let's dive into the primary tools you need as a first-time painter and how to choose them.
Drop cloths to catch paint drips

Whether you're experienced or yet to master a steady hand, you'll require drop cloths when daubing your interiors with paint. After all, when you move around with a loaded brush or roller, the paint may drip and splatter, marking your precious Persian rug or upholstered furniture with an unsightly stain. And before you go, "Well, I can always repurpose old bed sheets for this purpose," know that they're potentially the worst drop cloth material you could use while painting a room. Most sheets are too thin and even one accidental drip can bleed through.
Ideally, look for a canvas cloth rather than a plastic tarp. That's because canvas offers better stain absorption and will usually not track the paint all over the ground if you step on it. However, if you aren't too careful, especially when working on stairs, slippery tiles, or laminate floors, your cloth may not stay tacked to the ground. For that, seek cloths with rubberized bottoms like Trimaco 04321 slip resistant dropcloth stay put canvas or butyl drop cloths. Also, ensure it has a tight weave and weighs at least 10 ounces for greater durability. Invest in different sizes, so you aren't spending too much time folding larger pieces over in small areas or hallways. That being said, if your room holds furniture that can't be relocated elsewhere, cover it with plastic sheets for the most protection and to save money.
Spackle to even out holes and nicks in the walls
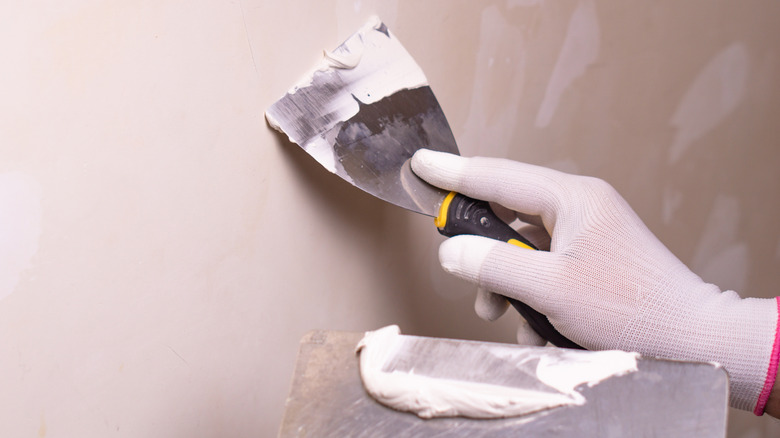
Before you get to the fun part, you must devote time to the preparation phase, a.k.a. spackling. This is because the walls are unlikely to be perfect. If your home has been lived in before and the previous owner went through a gallery phase, you may have to contend with nail marks. Add unexplained indentations, hairline cracks, and accidental dings to mix, and you'll spot so many dents, holes, or cracks. To ensure the paint doesn't highlight them as the light catches the walls, cover them up with a spackle compound.
Basically, spackle is a creamy paste that fills in the dips and indents on the walls and hardens to patch them. After it dries, sand it down to even out the surface. You can then paint over it for that perfect professional finish. For nail marks or small repairs, look for lightweight compounds that don't shrink, such as DAP Fast 'N Final spackling interior and exterior in white. Alternatively, look for DAP DryDex time indicator spackling to take the guesswork out of the equation. The pink spackle turns white when fully dry, so you won't accidentally paint on wet surfaces. For bigger repairs, opt for heavyweight spackling compounds. Be sure to over-apply, as they can shrink while drying. Remember to always sand down excess compound before painting over the spackled areas.
Painter's tape to cover edges, trim, and outlets

Painter's tape is another must-have tool. You'll need it to cover any baseboards, trims, windows, outlets, or surrounding surfaces where you don't want paint drips and spills. Not just that, there are plenty of other painter's tape hacks you'll wish you'd known sooner and may want it for. For example, you can wrap it around a paint brush or roller nap to prevent drips, for a better hold, or easier cleaning. Or line it flush with the ceiling or baseboards for razor-sharp, clean lines (you may be painting your home for the first time, but it shouldn't look like it). You can even use painter's tape to label spare cans for organization, so you aren't confused about the location of your tools.
However, be sure to choose the right kind of painter's tape. If you're working with delicate surfaces, like lightly textured drywall or veneers, where you don't want to risk the tape stripping off the material or coat, go for purple tape. But if you're working in spaces that don't get a lot of sunlight, go for less-expensive old-fashioned masking or green tape (direct sun will dry out and adhere traditional masking tape making it difficult to remove). For anything else, look for blue tape. ScotchBlue Sharp Lines multi-surface painter's tape is one option. But make sure it sticks well to the intended surface (think drywall, stone, and metal). Also, look for the duration it can be safely left on, so you don't have to worry about bleeding, damaging surfaces, or tape residues.
Multi-purpose painter's tool to speed up prep work
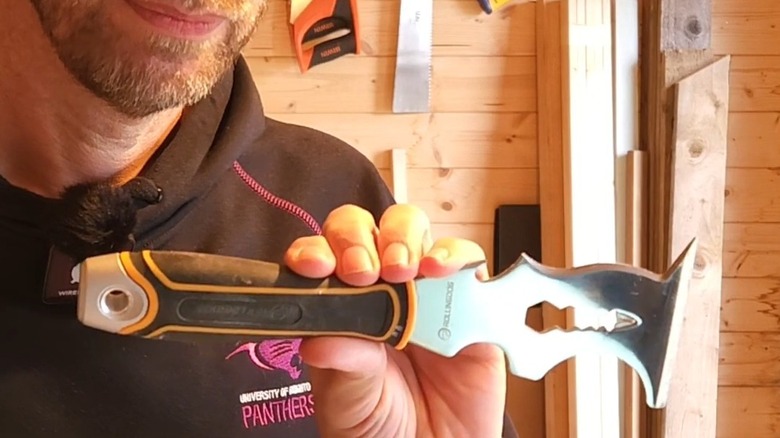
A gadget that packs a small toolbox's worth of functions and fits right into your pocket? Such a multi-purpose painter's tool is an indispensable addition to your arsenal once you understand its versatility. In its simplest form — which is a 5-in-1 tool — it features a flat scraping edge you can use as a putty knife when you're scraping off excessive spackle or removing peeling, cracked paint during prep. Want to remove nails before you get to work? The hole in the tool's center helps you achieve that.
It also has a sharp point that lets you clean out drywall fuzz or any debris in cracks, and remove peeling paint. The multi-purpose tool also features a curved edge that comes in handy to wring out more paint from the rollers. And if that's not enough, you can always use its hammer-ready back end to smack shut a paint can or open it without mangling the rim like a screwdriver would.
All-in-all, you can depend on a multi-purpose painter's tool to see you through the entire project, saving you precious time and avoiding the frantic energy spent finding the right tool. To further aid prep, manufacturers have gone on to add plenty more functions to this must-have painter's tool. From DEWALT 9-in-1 painter's tool to HYDE Tools 209651 17-in-1 painters multi-tool, there are many different variants to suit your style of work and budget.
Quality rollers to paint over large surfaces
A high-quality paint roller is another essential tool for any first-time painter. Since it holds a lot more paint than brushes, you can easily cover large — preferably flat — surfaces, such as ceilings, walls, or doors in a fraction of the time. Watching the roller glide smoothly over the walls feels almost meditative, which is a nice bonus.
But what is the best roller for your painting projects? A roller has two basic components: A frame and a cover that slips on the frame. Technically, an 18-inch roller will give the quickest coverage, limiting the passes to two or so. This is why it's the go-to for many professionals. However, for an easier-to-wield (read: standard) choice, get a 9-inch frame, like Wooster Brush R017-9 Sherlock roller frame. Ensure it has a threaded handle so you can later attach an extension pole if necessary. Select the cover fiber (or nap) according to your painting needs. The thicker a roller is, the longer the nap. This means for smooth surfaces — painted or otherwise (including drywall) — a ⅜-inch nap will get you far. Size up to ½-inch or ¾-inch for textured surfaces, such as concrete or stucco. Also, stick to woven fabrics or microfiber as they don't shed much, thus limiting the amount of lint you'll be picking off during painting. They also tend to render the silkiest finish.
An extension pole to reach greater heights
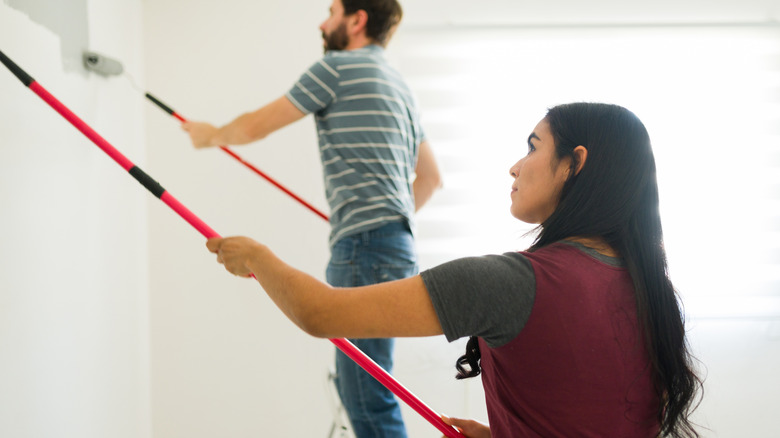
Imagine trying to reach the top of your stairway walls armed with a lone roller. Now, you could use a step ladder if you like, but lugging that around constantly in a narrow space might not be the best call. That's where an extension pole comes into the picture. Basically, it's a dedicated tool which the paint roller screws or clips on to, extending your access to taller heights with your feet firmly on the ground. You'll also find it useful while painting ceilings or your home's exterior walls. Since extension poles enable you to maintain even pressure and continuous strokes across your wall, they make painting less of a neck-breaking chore.
Although not strictly related to painting, there's another advantage to having extension poles. You can use them with squeegees and brushes for easier cleaning (or to remove hard-to-reach spiderwebs before painting). That's because poles usually have a universal thread (the point of attachment). Still, double-check the threaded tip's size before making any purchases — you don't want the roller to sit loosely. It's helpful if the pole has a sturdy, non-slip grip, is readily adjustable, and can reach the target height. For instance, the Bates extension pole has a sturdy foam grip, a convenient locking system, and an adjustable length from 5 feet to 12 feet.
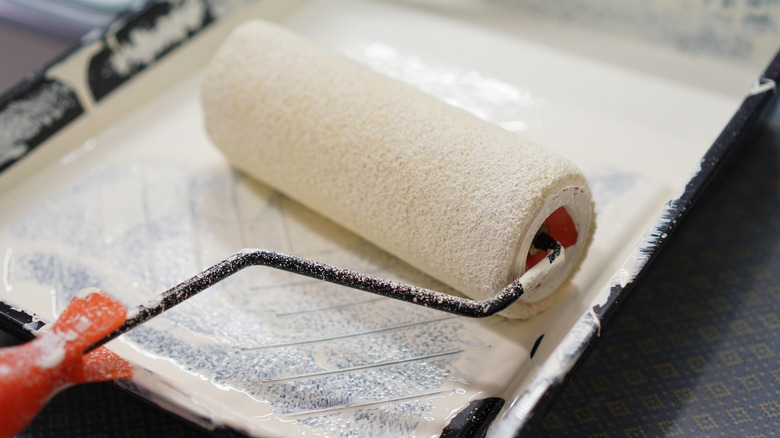
Paint trays or grids to load material on rollers
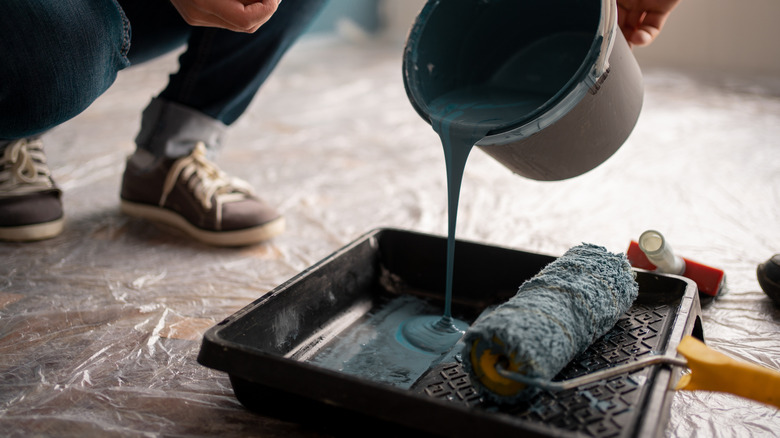
If you assumed you could dunk the roller into the gallon paint can and have a go at it, here's some news: It may not come out evenly coated. And the consequence of such an action would be a less-than-smooth finish and lots of drips. To avoid that, invest in a paint tray.
Get a sturdy metal tray as plastic ones are too flimsy, tip over easily, and are harder to balance on a ladder. Besides, metal trays are more likely to survive crashes if things go south. Look for trays with handles which make moving around more convenient. For easier cleanup, line the trays with plastic liners you can dispose of at the end of the project. Bates 9-inch paint tray with 10 plastic liners is a suitable option. Or, if you don't mind the upfront cost, you may give the reusable paint tray every DIYer needs before their next big project from Repaint Studio a shot.
If you aren't keen on paint trays, an alternate option is to buy a paint grid, like Wooster Brush F0001 Acme deluxe five gallon grid. These tuck into a 5-gallon bucket, and you can push the roller against them to load paint. However, be sure to decant about half the can's contents in a spare bucket to avoid getting paint on the roller handle and your hands.
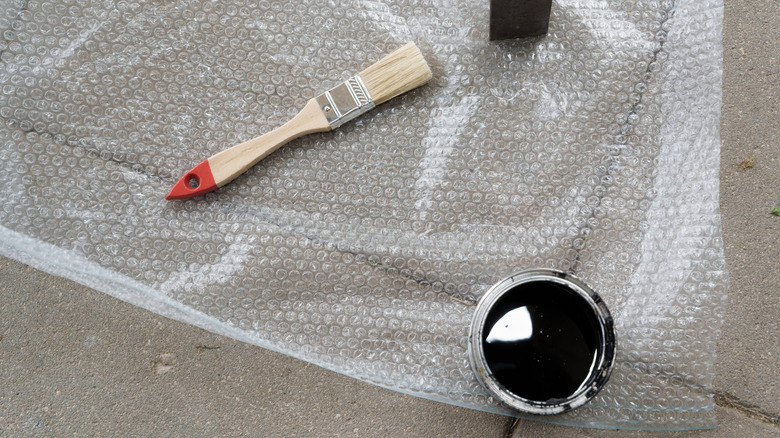
Large paint brushes to cover curved surfaces
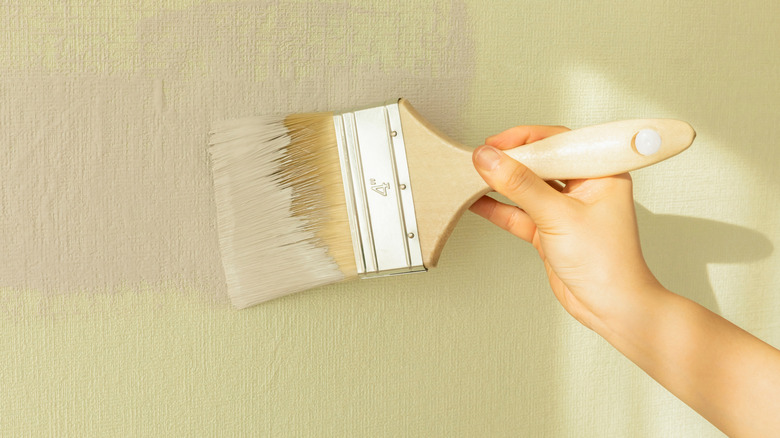
Although a paint roller will tide you through for the most part, you may hit a snag if the concerned surface is curved, like for furniture. Similarly, rollers may not work as well over grooved surfaces like fences, doors, cabinets, bookshelves, or panels. For them, you'll need a large brush to cover the area in a few strokes. Large brushes also work better on exterior surfaces, especially around siding, where straight edges are important.
Aim for a brush that's over 3 inches wide. Since you'll mostly be using it for quick coverage, a flat style will do. However, make sure you're buying the correct paint brush for the paint you're using. If you're using a water-based latex paint — which is usually the case for residential projects — stick to a synthetic paint brush, ideally made of nylon or a blend. But if you'll be using a heavy oil paint, brushes with natural hair bristles will work a little better. Don't compromise on the quality, or you'll spend more on constant replacements (and time removing stray bristles from your paint). Look for brushes with distressed tips on their bristles, as they provide a superior finish. Also, ensure the bristles spring back into position after being flexed. Pros prefer options with ergonomic, unfinished wood-based handles for a better grip.
Small brushes to work paint into corners or add detailing
The beauty (and success) of any project, including painting, lies in the details, and that's something beyond the forte of large brushes and rollers. To fill this gap, you must add in a few small brushes — also known as trim and sash brushes — to your toolkit. They'll aid your quest to add sharp, precise lines when you're working on trim, baseboards, and window frames, around tight corners and crevices, or adding details to molding and carvings.
However, rather than looking for flat brushes, seek out angled options because they're easier to work with when cutting in. Also, pay attention to size, and pick one that fits your hand to avoid cramps. Although small brushes are available in diverse sizes, ranging between ½ inch and 3 inches, the tiny options don't hold much paint. Plus, it's easy to add excess pressure, which may work contrarily, creating wavy lines where they're not wanted. Usually, 2½-inch angled brushes — such as the Purdy 144152125 Clearcut Series Glide angular trim paint brush — offer the best bang for the buck.
Sandpaper or sanding sponges to smooth out bumps between coats
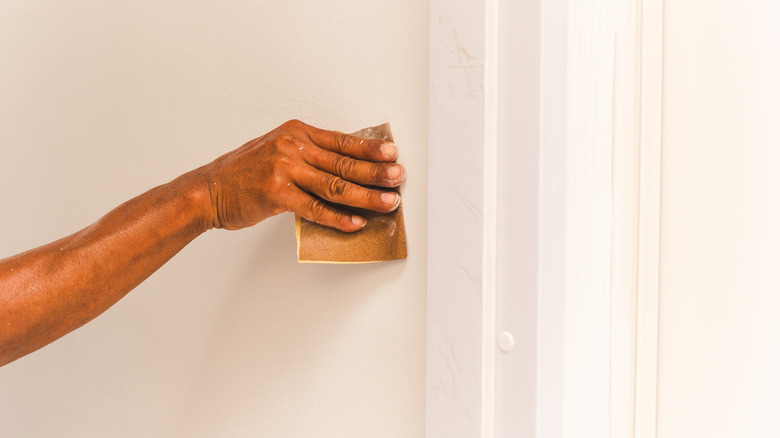
Throughout your painting project, you'll need to feather down various surfaces to ensure paint goes on smoothly. For instance, you may need to sand down any bumps and scuffs between coats for a professional touch. Or, if you've applied a spackling compound, you may need to smooth it out before you can layer on paint. You may similarly have a use for sandpaper if you're working on cracked, flaking paint, glossy finishes and stains, or rusted spots.
Since sandpaper is available in multiple grit sizes, it can be confusing to buy. Generally, you can make do with 180 and 220-grit sandpaper, especially around wooden surfaces. Remember, you'll need to follow up with greater grit for a smooth surface (the higher the grit, the finer the sandpaper). However, if you're working with a previously-stained or a high-gloss finish, you may need to go up to 320-grit. That being said, if you don't think that you'd be doing a whole lot of sanding and will only be ironing out imperfections or working around corners and butt joints, you can just go for sanding sponges, ideally with sloped edges. Try out 3M's angled sanding sponge for such work.
A sturdy, small ladder to safely reach high spots

If you're painting your home, you must have a sturdy ladder, or at the very least, a step stool. Having one makes it easier to reach the tops of the walls, especially if you have high ceilings or multiple stories. But keep a few considerations in mind. On most extension ladders, it's safe to only stand on the fifth rung from the top. Step ladders are an exception, where you can stand on the third-highest rung. So, choose your ladder's height after factoring in this safety criterion. Generally, a 4 to 6-foot-tall ladder can suffice indoors. But if you're hoping to cover your home's exterior, look into an extension or telescoping ladder. Consider options that extend 7 feet above the roof for safety.
If you plan to host full-size paint buckets atop the ladder, switch over to platform ladders where you have more space to balance yourself and your tools. Twin-step ladders will be more useful if you want to partner up during this DIY project. For ease of use, choose fiberglass ladders as they remain stable, are durable, and can be used around electrical points without risking shocks. Finally, take duty ratings into account, as they allude to the ladder's load capacity. Type III light-duty ladders can withstand 200 pounds and are usually safe around households. You can always size up according to your needs.
Paint mixer or stir sticks to ensure a consistent coat
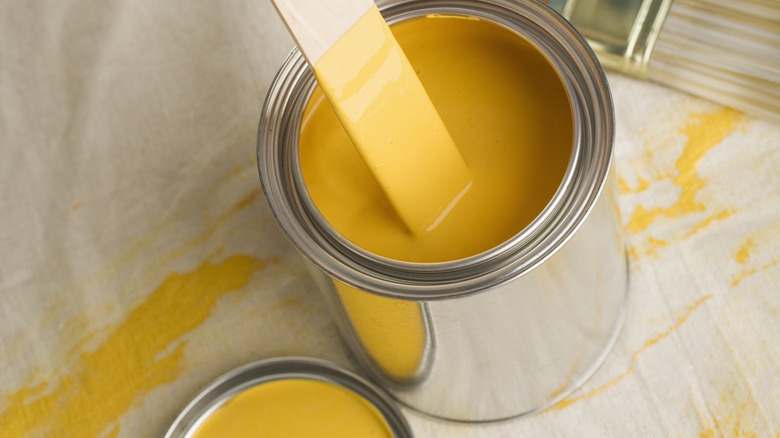
If your paint can has been sitting for a considerable while, chances are the solids may have separated and dropped to the bottom. This holds true for most paints, including solvent-based and acrylic. Although shaking the can before opening should help blend the mix, it may not be enough to get a consistent coat. Since you don't want the final look to come out ratty or uneven, buy a pack of wooden stir sticks like Hanwer's 25 pack paint stir sticks.
These sticks will help break apart any lumps in the paint, ensuring the pigment and texture are consistent throughout. But stir thoroughly for a few minutes for this to work, and repeat the action every time you let the paint sit for a couple of days. Alternatively, try out paint mixers. They come with fancy drill attachments to mix the paint. While they can reduce the time and effort required for mixing — particularly useful if you have carpal tunnel syndrome or other grip issues, or have a very large job with lots of cans — you don't need to splurge on them if you're on a tight budget.