Transform An Ordinary Old Mason Jar Into A Chic Tissue Holder With A Simple DIY
We may receive a commission on purchases made from links.
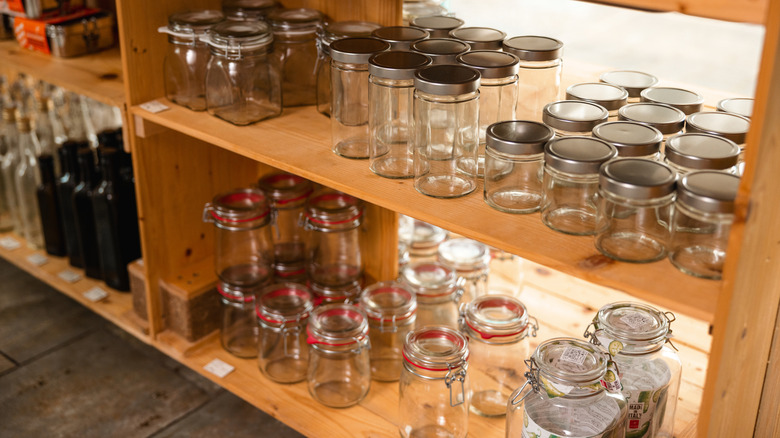
Tissues are a constant in life. "Finding Nemo" made you cry? They come to the rescue. You have a bad cough and cold? They become a nightstand staple. They are also needed to clean up the mess you make in your kitchen, or to blot your lipstick so it stays in place. Despite their importance, you might not be a big fan of their basic packaging. But instead of hiding them from sight, reuse an old mason jar to elevate boring tissue boxes to match your home's aesthetic. This upcycle is as easy as it sounds. Simply decant the bunched up napkins into an old jar and you've made a chic DIY tissue holder.
Just ensure the jar is clean and isn't sporting hidden cobwebs or dirt. Otherwise, your tissues will get dusty and won't be hygienic to use. To be 100% sure, dust its exterior and interior. Then, give it a warm soapy bath. Alternatively, dampen a microfiber cloth with some rubbing alcohol and use it to wipe the jar from the inside-out. In case it still has its spaghetti sauce label intact, use this brilliant hack to remove stickers from the glass surface. Set it aside to air dry prior to adding your napkins inside.
How to turn an old mason jar into a chic tissue holder
Once your jar is clean, free of sticky labels, and dry, open up your tissue packaging and carefully take them out. Without disturbing their configuration, place them as is in the jar. Congratulations! You just repurposed your old mason jar into a stylish tissue holder. To ensure you can easily pull out napkins when needed, slightly pull out the first one (like you see in the original packaging). Place it anywhere around the house and shut the lid when not in use to protect it against dirt.
However, if you don't find it convenient, hollow out the inside of your jar's lid. If it's removable, you can simply take it out. Otherwise, use your drill machine to create a hole. Now, get some thick craft paper, cardstock, or felt (basically, anything that's thick and won't tear apart from constant action), and measure the inside of the lid. Cut it out and create two diagonal slits to form an X. This opening will allow you to pop out tissues when needed and keep the rest covered in the meantime. Affix it to the jar's lip and screw back the lid. Or, you could add a little hot glue along its edges and stick it in place. However, only go this route if you're prepared to tear off the makeshift covering once you run out of tissues.
Tips to customize your mason jar tissue holder
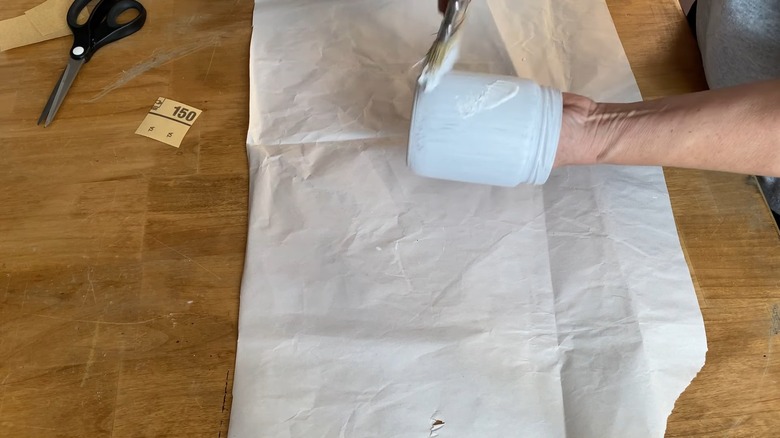
In case you don't like the plain look and want your mason jar tissue holder to match your home's aesthetics, paint it before you put the tissues inside. You could choose either glass or chalk paint when using a brush. Or, get a can of your favorite spray paint and use it to change your drab jar to fab. Keep in mind that you'll need multiple coats to get the desired look. Also, give the glass container ample time to dry between coats for a beautiful finish. After it's dry, apply a vinyl decal on top. You could paint the lid in the same hue or decorate it with colorful twine, thin jute rope, or an eclectic ribbon. Tuck in dried flowers, seashells, miniature coastal décor, or other embellishments for a bespoke tissue holder.
Another way to personalize your mason jar tissue holder is to wrap some leftover fabric around it. You could choose whatever you have on hand or find something cheap at your local thrift store. Pick fall or Christmas-themed pieces so they match your holiday décor. You could also go with a glittery piece if you love maximalist décor. Whichever way you go, iron it out so it looks sharp when glued. Use a generous amount of Mod Podge so the cloth adheres well to your glass jar. Keep the lid as is or apply a little Rub n Buff so it complements your tissue holder.