Transform Plastic Nursery Pots Into A Cool DIY Birdbath For Your Feathered Friends

We may receive a commission on purchases made from links.
Your cute little feathered friends will love you and your yard once you provide them with a nice birdbath in which to cool off. Birdbaths are pretty and allow birds to stop for a drink and clean themselves in some refreshing water. For wildlife lovers like us, this is an essential addition to garden decor. But choosing the right birdbath without making any mistakes can be difficult, and they're not usually cheap. The great news is that there's no need to spend any money to get a bird oasis, you could just DIY one using plastic nursery pots and saucers you already have at home.
This DIY is just one of the many creative ways you can reuse old plastic nursery pots in your garden instead of letting them gather dust. The idea is to attach two to four pots together to create a stand, and use two saucers to make a base and the actual birdbath. If you don't have any pots on hand, purchase a pack such as Myfeegoin 10-inch pots or Pottiffe 16-inch pots. You'll also need some glue that works well on plastic, like the Loctite plastics bonding system.
The simplest way is to use identical, same-sized pots. If you'd like to take creative risks, use different shapes or sizes of pots, but make sure that they stack nicely on top of each other and the saucers are larger than the pots. Any size can work, though we recommend using pots between 10 and 16 inches, as long as they're made of hard plastic rather than the flimsy type found in some nursery pots.
How to turn pots and saucers into a birdbath
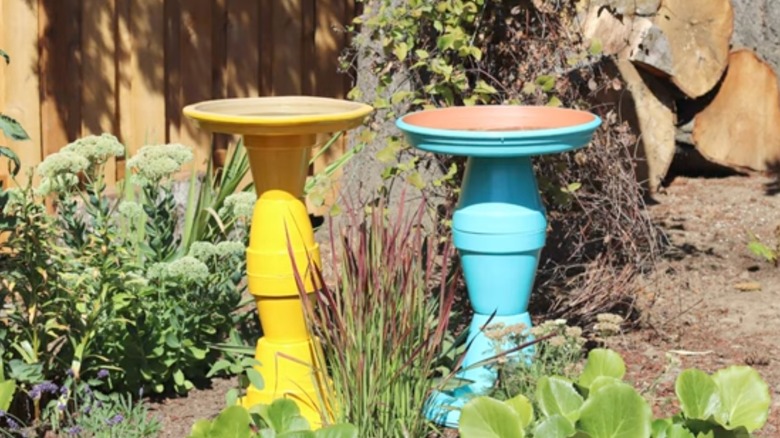
To create your birdbath, start by using the first saucer as the base of the structure. Center a pot upside down on the bottom of the saucer, and stack the remaining pots in a tower. With identical pots, alternate upside down and right-side up pots. With different sizes, create a largest-to-smallest stack. Top it up with the last saucer, which will serve as the birdbath. Once you have the arrangement to your liking, glue them in place. Following the product's instructions, allow the glue to fully cure before handling it.
You could leave the birdbath as-is or paint it for a cohesive finish. The paint job is your time to be creative, so don't hesitate to choose colors that match your aesthetic, mix paint hues, or paint small details all over the stand. To keep this safe for wildlife, either leave the inside of the top saucer (the actual birdbath) free of paint using painter's tape and a paper cover or use an animal-safe paint. Latex and acrylic paints are generally safe.
Depending on how heavy the plastic pots are, you may need to add some stones on the base saucer to weigh it down and keep it stable. To keep your birdbath from freezing in the winter, place it in a sunny location. Once placed in the garden and filled with some fresh water, your new birdbath is sure to become the go-to place for birds in the neighborhood.