The Budget-Friendly Way To Easily DIY Banquette Seating That Still Looks Luxe
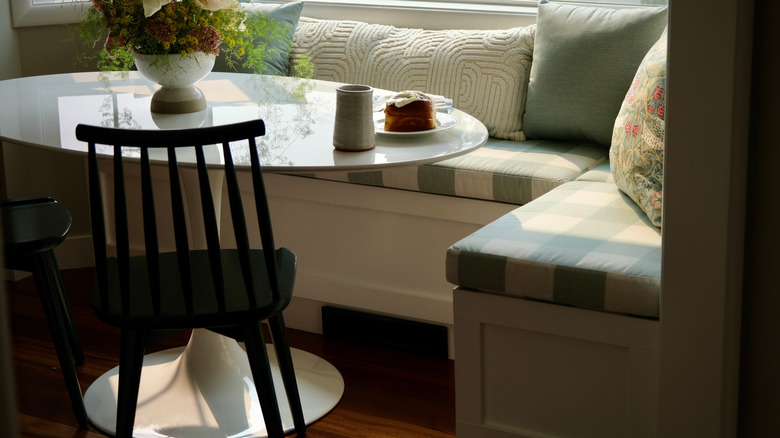
The perfect breakfast nook is one of the most sought-after home design features, instantly curating a cozy and inviting feeling from your dining spaces. If you've already decided that banquette seating is right for your space, there's one major downside — the cost. Custom seating can be expensive, especially if you need to work around existing features in your home. And if you aren't too comfortable with power tools, you might feel like building your own is impossible. But there's a simple trick using a bit of tongue and groove paneling and some plywood that allows you to construct custom banquette seating without breaking the bank. It allows you to create benches that look as if they are built directly into your space, blending them into your surrounding kitchen aesthetic. And the entire project is completely customizable, right down to the color scheme.
The key to this trick is mimicking a built-in aesthetic by using tongue and groove wall paneling. For around $5 to $30 per board, tongue and groove adds instant texture and depth to your breakfast nook without breaking the budget. The ottoman benches, either DIYed or purchased, introduce a fabric element that makes the space feel more dynamic. Paired with the right paint choice — whether it's a subtle pastel green or a vibrant accent color — and you have kitchen seating that feels entirely custom to your home. It's an excellent way to make use of awkward corners around your house that might be feeling a bit too empty. And with a few simple DIY tricks, you can make your breakfast nook even more functional by adding an under-seat storage. It's a simple yet effective trick to give your kitchen seating a cozy refresh.
Creating custom banquette seating for your kitchen
To kick your project off, you'll want to start by properly installing your tongue and groove paneling. Measure the length of your wall and cut each board to the desired height. You will also need to cut three pieces of plywood — ideally less than ½-inch thick — to the length of your wall. These boards will be mounted directly to your walls behind the paneling. Mount each board at the top and bottom of your paneling and add an additional board in the middle for extra security. Ensure that these boards are completely flush with the wall and level before installing your paneling. Starting at the corner of your wall, place the first piece of tongue and groove paneling and check that it is completely flush with the wooden boards and the adjacent wall. Using a nail gun, secure each piece of paneling to the full length of your desired seating area.
Once the wall is set, it's time to move onto seating options. There are a number of ways that you can DIY your own banquette seating that fits in just about any space. A few sheets of plywood and 2 by 4s can create the perfect custom ottoman benches that are sturdy and stylish. Using your existing measurements, create a framework out of 2 by 4s that sits directly into your desired corner. Secure it to the wall studs with a few screws and finish it with your plywood. The seats themselves should be hollow, allowing you to add storage cabinets to the top or side of your seats. Give the entire project a coat of paint before adding decorative elements like throw pillows or custom cushions.