The Free DIY Plant Marker Hack Every Gardener Should Know
We may receive a commission on purchases made from links.
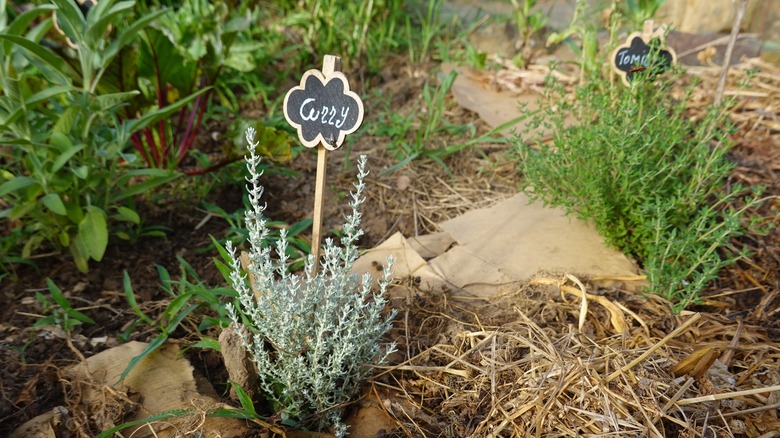
If you're always on the hunt for ways to reduce your gardening budget or practice zero-waste growing, making your own cultivation supplies can help. And DIYing creative garden labels using common items is a simple way you can achieve these goals. In fact, using twigs is both (basically) free and sustainable. You can compost the plant markers when you're done with them or once they start to deteriorate. Whittle the bark from one end of the twig and write the name of the plant on the flat area. Stick them in the ground next to said plant — they're best used in raised or mixed beds — or use them to identify seeds freshly planted in a propagation tray.
First, you'll need to cut some twigs from a shrub or tree using your sharpest pruners. Aim for branches about one quarter to half an inch in diameter (about the same as a pencil) and cut them into 6- to 8-inch lengths. Make sure they're not from a shrub that has the potential to sprout roots from cut branches, or you may start to grow a tree in your seedling trays. If you don't have large enough plants in your backyard already, you can buy twigs. A 120-piece bundle of LAZACA Crafting Sticks for about $9. You'll also need a box cutter, garden knife, or kitchen peeler (if the bark is soft). A water and UV-proof permanent marker works best — a 2-pack of 133 Supply Garden Marker Pens for about $9. But any old pen will do.
How to turn your cut twigs into handy plant markers
If the twigs are still green and fresh, let them dry out for a little bit longer before starting this project. Pick up your cutting implement of choice in one hand and the twig in the other. The safest way to attempt this project is to hold the stick with the end you wish to write on facing away from your body. Whittle off the bark on one side at one end, exposing the soft wood inside. Optionally, you can also flip the twig around and whittle the other end to a point, which will make it easier to push into the soil. Clean away the wood shavings (you can compost them if you wish) to prepare your workspace for lettering the labels.
Carefully write the letters of each plant name onto the flat, whittled portion of the twig using your pen of choice. If you make a mistake, don't worry; pick up your knife, whittle off a thin layer of wood, and start again. If you use any old pen, wait until the lettering is completely dry before you water your seedling trays or plants, or the ink may run. Make non-waterproof ink — and your twig plant labels in general — last longer by applying a clear coat sealer over the words. Try an outdoor sealer like WAN2TLK All-in-One Gloss Agent for about $20 a bottle, or even just clear nail polish or top coat. Use an old metal tin, a pretty ceramic plant pot, or disused clamp jars to affordably and aesthetically organize your unused markers.
Alternatives to markers and whittling for twig plant label lettering
For something more permanent, purchase a YIHUA Wood Burning Kit Station Pen for about $40, also called a pyrography tool, and burn the letters into your twig plant labels. Sand the whittled portion of your stick and write the plant name in pencil — you can draw cute pictures, too, if you want. Tape the twig to the table to keep it still while you work. Overwrite the pencil letters with a very hot wood-burning pen, then rub in a little beeswax or apply the sealers mentioned above to protect your handiwork. Alphabet stamps dipped into colored ink or acrylic paint also work well to impress the plant names onto the bare wood.
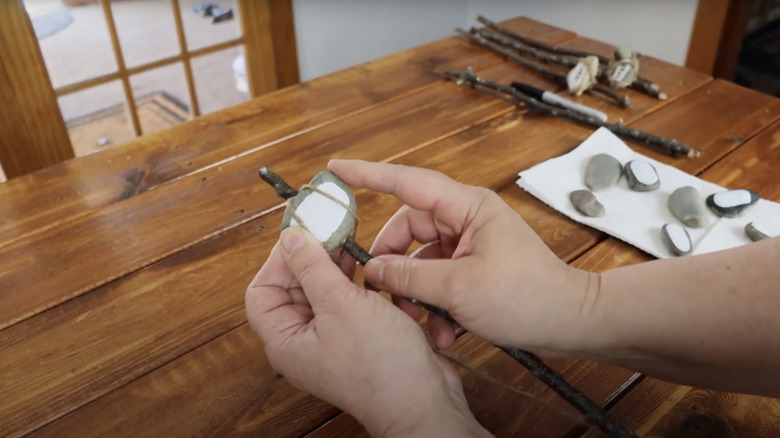
Don't want to whittle with these must-have gardening tools for beginners? Paint one end of the twig and write the name on the painted surface using a permanent marker. You could even match different plants to different colored paint for identification at a glance. Or instead of writing on the sticks themselves, write the plant names on wooden clothespins and clip them to the twigs, or on small rectangular labels and tie them to the stick using garden twine. Push the label to one or the other side of the branch before tying it on to make a flag-like plant marker. Alternatively, replace the wooden label with a small, flat river stone, paint it white on one side, write the plant name on it, and attach it to your twig by wrapping twine around either side of the label without covering the lettering.