Upcycle A Thrifted Vintage Wall Sconce With Some Simple Fabric
We may receive a commission on purchases made from links.
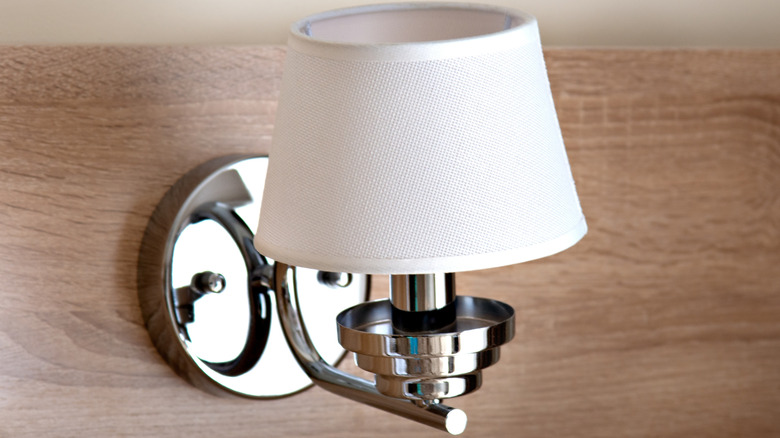
Thrifting a wall sconce is a great way to brighten up your home on a budget. But sometimes your discounted light fixtures might not go with your interiors or make them look dated. However, instead of making your peace with the eyesore or chucking the sconce out, upcycle it with a little fabric. The idea is as simple as it sounds. Simply cover your basic wall sconce with some spare fabric to turn it vintage. This way, you can ensure it complements your decor without shelling out money for new pieces.
Start by gathering the materials for your DIY project. The fabric is the protagonist, so choose it after careful deliberation. You want to pick something that looks antique — thrifted tablecloths are a good choice. Moreover, it should be easy to work with. Examples include linen, cotton, or dedicated upholstery fabric pieces. Brownie points if you find something that's printed or embroidered. Steer clear of anything that's sheer, or your sconce will be visible underneath once you light it. Similarly, avoid fabrics that are stretchy (challenging to drape properly) or thick (difficult to drape or hide the previous design). Once you have the base, you'll just need a sharp pair of scissors, an old newspaper, a pencil, and any fabric or spray glue you have on hand for your home's upkeep.
That being said, don't attempt the project if you have incandescent or halogen bulbs underneath your sconces. This is because they tend to overheat and might cause the fabric to catch fire if the heat builds up. Always use LED bulbs since they emit little heat and minimize the risk of accidents.
How to cover your sconce in fabric for a vintage look
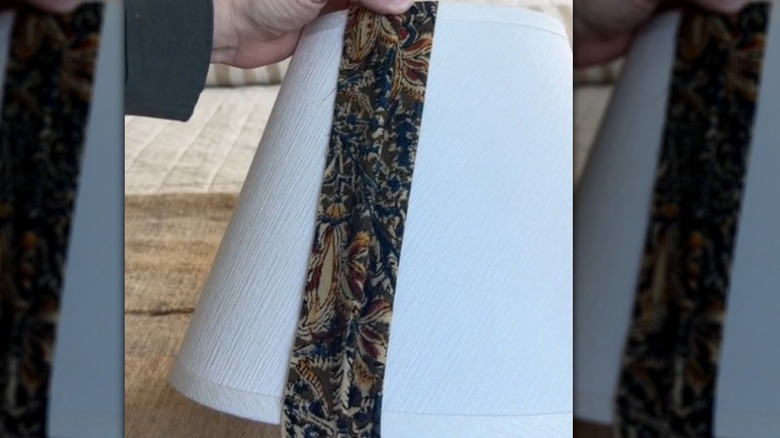
After you ensure the bulbs are LED and have the required supplies, remove the shade from your sconce. Now, place an old newspaper over it and mold it to the fixture's shape. In case your lampshade is smaller than the paper, cut off the excess and tuck in the remaining around its edges — both top and bottom — to get precise measurements. Carefully move it away from the shade, place it over your fabric's back, and trace the design with a pencil. If you're having trouble keeping the paper steady, use pins to keep it in place, or your cut fabric won't align well to the sconce.
Next, cut the traced pattern, leaving ½-inch margin on each side (forgo the top and bottom if you had to tuck in the newspaper). Carefully fold one vertical edge over itself to ensure there's no rough looking corner. Use fabric glue for the best results. However, if you don't have it, spray adhesive, glue dots, or Mod Podge will work, too. Now, for the fun part: sticking the fabric to your lampshade. Begin with adhering the rough vertical edge (the one you didn't fold over) and slowly wrap the entire piece over until the edges overlap. Straighten out creases as you go for a neat look. As for the leftover fabric around the top and bottom, cut them slightly (vertically) so they fold over well. Glue them in place and your simple DIY thrift flip will be ready for display.
Ways to personalize your vintage-looking lampshade
In case your fabric-covered lampshade looks a little incomplete, personalize it with slight decorations so it matches your decor seamlessly. But don't pick anything at random; let your current design theme inform your decision. For instance, if you're a fan of minimalist decor, a simple strip of ribbon around the top and bottom of the sconce will do fine. Just make sure the shade matches the base tones or design of the fabric. You could even choose contrasting hues to add visual interest. Want the shade to look more decorative? Replace the ribbon with a strip of lace or pearl. Tassels and decorative twine are other good options. The key is to choose something that will do justice to your wrapped fabric.
Another way to make your lampshade more interesting is to give it the look of a pleated sconce. For this, you need to cut out 3-inch strips of your chosen fabric and double them over so there are no rough edges. Then, wrap them over your shade, taking care to glue and overlap them to achieve the pleated look. Although simple, you'll require a decent amount of fabric for this style. So, ensure you have enough before you start. However, if your shade is pleated itself, wrap a little fabric around one section and bring out the design with the blunt edge of a pair of scissors or chopsticks.