HGTV's Mike Holmes Shares His Method For Removing Popcorn Ceilings
Popcorn ceilings are a common type of ceiling finish in homes built from the 1950s through the 1980s and later. They were quick to install, making them an affordable option for finishing a ceiling. They also muffled sounds, so they were practical as well. However, many people don't like the look, and in some older homes, the "popcorn" is made from asbestos, a significant health hazard. As a result of all of these factors, removing popcorn ceilings is a popular remodeling project that HGTV's Mike Holmes regularly undertakes.
The most important recommendation he shares is to test your ceiling for asbestos before you start. The EPA banned asbestos from popcorn ceilings in 1973. However, contractors were allowed to use existing products, so it may be in homes that were built or remodeled after that. The best way to know if you have this hidden danger of popcorn ceilings is to have it tested. "Should asbestos be found, you don't want to pull down the ceiling yourself," Holmes shared on HGTV Canada. "Bring in an asbestos abatement specialist." If the results are negative, it's safe to follow Holmes' DIY removal method.
How to prep your space to remove popcorn ceilings
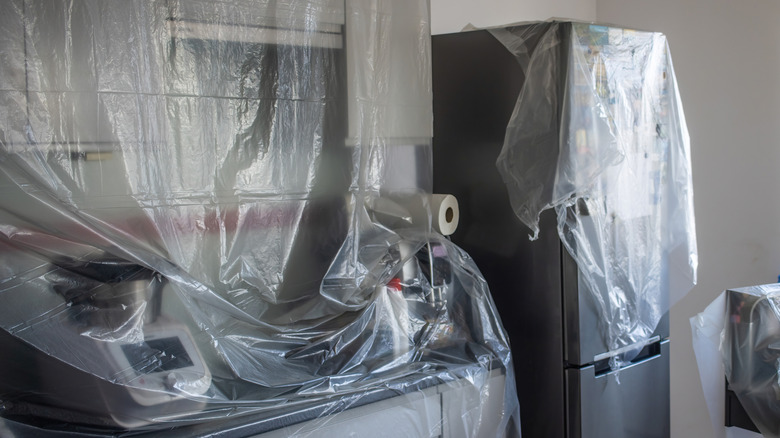
With decades of experience, Mike Holmes built much of his career on fixing mistakes caused by incompetent contractors or inexperienced DIYers. Prepping your space correctly is a major part of doing a good job. "Scraping a popcorn ceiling is a huge mess!" Holmes wrote on HGTV Canada. "Move furniture out of the room. Anything that can't be moved, cover with a plastic tarp." Tape sheeting to the walls and lay it over the floors to catch debris. Make sure all of your doorways are covered, too. Turn off your HVAC system during the job to prevent dust and debris from spreading to other parts of your home. Remove or cover and tape off any light fixtures in the ceiling, and cover the exposed wires and outlets with painter's tape to keep them dry. Turn off the circuit breaker to the room since you'll be working with water.
You also want to protect yourself. Even if your popcorn ceilings don't have asbestos, you don't want to get dust in your lungs or eyes. Holme said, "Don't neglect your safety gear. Wear a respirator and safety glasses at the minimum. To keep dust from spreading out into the rest of the home, I find it convenient to have a pair of disposable coveralls that I can toss when the project is complete." Finally, gather the supplies you'll need, including a ladder, a floor scraper, a putty knife, and a pump sprayer for scraping. After you scrape off the popcorn, you can fix any drywall issues with a drill, hammer, drywall screws, joint compound or spackling paste, and sandpaper blocks.
Mike Holmes' easy method for removing popcorn ceilings
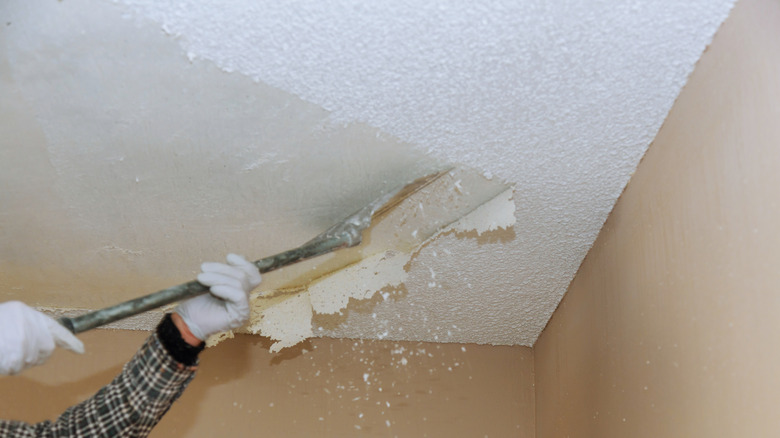
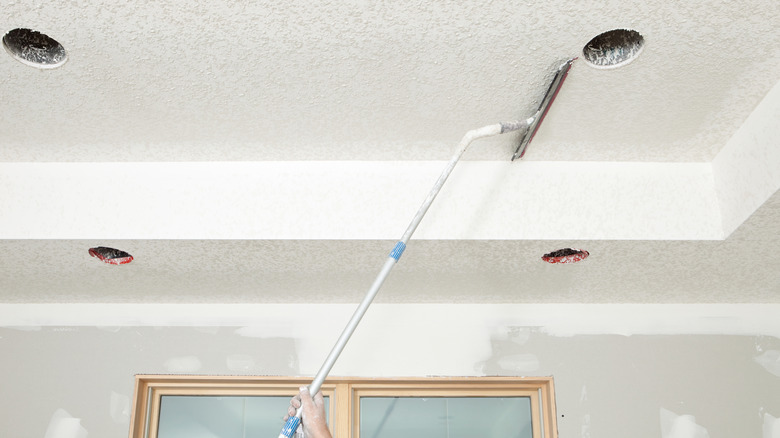
Following Mike Holmes' best practices for taking down popcorn ceilings, first fill your sprayer with water and add a few teaspoons of dishwashing liquid. Work in an area about 4 feet square to keep it manageable. Spray the ceiling with enough of the water/soap mixture to moisten the area, but don't saturate it, since that could damage the drywall underneath. Allow it to sit for 20 minutes, then scrape the ceiling with the floor scraper or putty knife. Holmes said, "To prevent gouging holes in your ceiling and save you some timely repair work later on, file down the edges of your scraper." If the popcorn doesn't come off easily, you can spray it again. Continue this process until the ceiling is clear.
One reason builders used popcorn ceilings is that they cover a lot of flaws. You'll expose these flaws by removing them, so be prepared to do some patchwork. If any drywall panels are loose, tighten them up with drywall screws. Hammer in any raised nails. If you see any holes or dents in your drywall, cover them with joint compound. Let it dry completely, then sand it smooth. Now you're ready to prime and easily paint your ceiling.