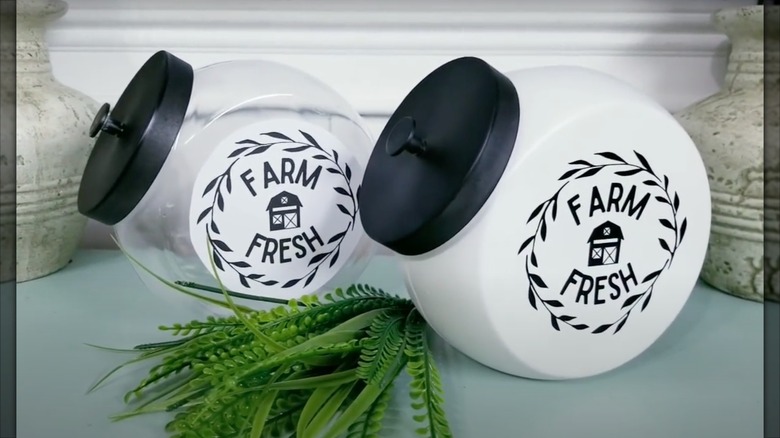
Use A Dollar Tree Jar To DIY Instant Kitchen Storage That Looks So Charming
If there's one thing homeowners can never have too much of, it's kitchen storage. Kitchen surfaces tend to be a collecting ground for various cooking utensils, ingredients, and cookware. If left unmanaged, the items could lead to messy and unorganized countertops. Enter DIY kitchen storage projects. From affordable essentials that keep kitchen cabinets tidy and clutter-free to hacks that add instant extra storage to your kitchen, Dollar Tree is the go-to spot to resolve storage and organization issues without spending too much of your hard-earned cash. The latest addition to the always-growing list of Dollar Tree DIYs? Converting a classic counter top glass cookie jar into instant kitchen storage that's charming, cute, and convenient — and it can store more than just cookies. Since the jars come with metal lids, they can be used to store herbs and spices, as well as anything else that needs a place in your kitchen, covered or uncovered.
All you'll need for this hack are the glass cookie jars, spray paint in colors of your choosing, labels or stickers, and Mod Podge. Hot glue or craft glue will work as well. You can also upcycle glass jars you already have lying around for this DIY. Optional items to consider include Crafter's Square wood beads to make little knob handles for the metal lids or ribbon to further customize your storage jars. Spools of Dollar Tree's Floral Garden gingham ribbon would make for a cute final touch to your jars.
Assemble your charming kitchen storage jars
To make your new kitchen accessories, separate the metal lids from the glass jars, and peel off any labels or stickers. If there is any sticker residue left on the glass, remove as much of it as possible. You'll want to work with a smooth surface so the spray paint will apply evenly and cleanly. Once the jars are wiped down, apply spray paint in your chosen color to your jar. You can apply the same color to the metal lid, or you can paint it another color for more differentiation. Or, leave some jars clear, and paint only the lids. Allow the painted lids and jars to dry for a sufficient amount of time, keeping in mind that drying and curing times vary for different paint types.
After your materials are fully dried and cured, it's time for customization and personalization. Place label stickers or custom-made labels on your jars — the Dollar Tree version has flat sides where you can easily smooth on vinyl designs or labels of any type. You could also stencil or hand-paint designs on the jars. For interchangeable labels, consider attaching Crafter's Square chalk board tags to the front of your jars to change and label whatever you store in them. For a little knob handle, paint your wood bead to match the lid color, letting it dry for an appropriate amount of time before gluing it to the lid. You can also use an old cabinet door knob as a handle. Add ribbon around the neck of the jars for an extra touch of charm.